.
Introduction
Tired of a cramped, cluttered kitchen? Dreaming of a fresh, airy space that beautifully showcases your favorite dishware and makes finding what you need a breeze? Then a DIY open shelving kitchen transformation might be just what you’re looking for! This project is surprisingly achievable, even for beginner DIYers, and can dramatically change the look and feel of your culinary hub. Say goodbye to bulky upper cabinets and hello to stylish, functional storage. We’ll guide you through creating your own stunning DIY open shelving kitchen in just seven easy steps, giving you a kitchen that’s both practical and Pinterest-worthy. Let’s unlock the potential of your space!
Table of Contents
What You’ll Need for Your DIY Open Shelving Kitchen
Before you roll up your sleeves and dive into this exciting project, let’s gather all the necessary supplies. Having everything on hand will make the process smoother and more enjoyable. Proper preparation is key to any successful DIY venture, especially when it comes to building your dream DIY open shelving kitchen.

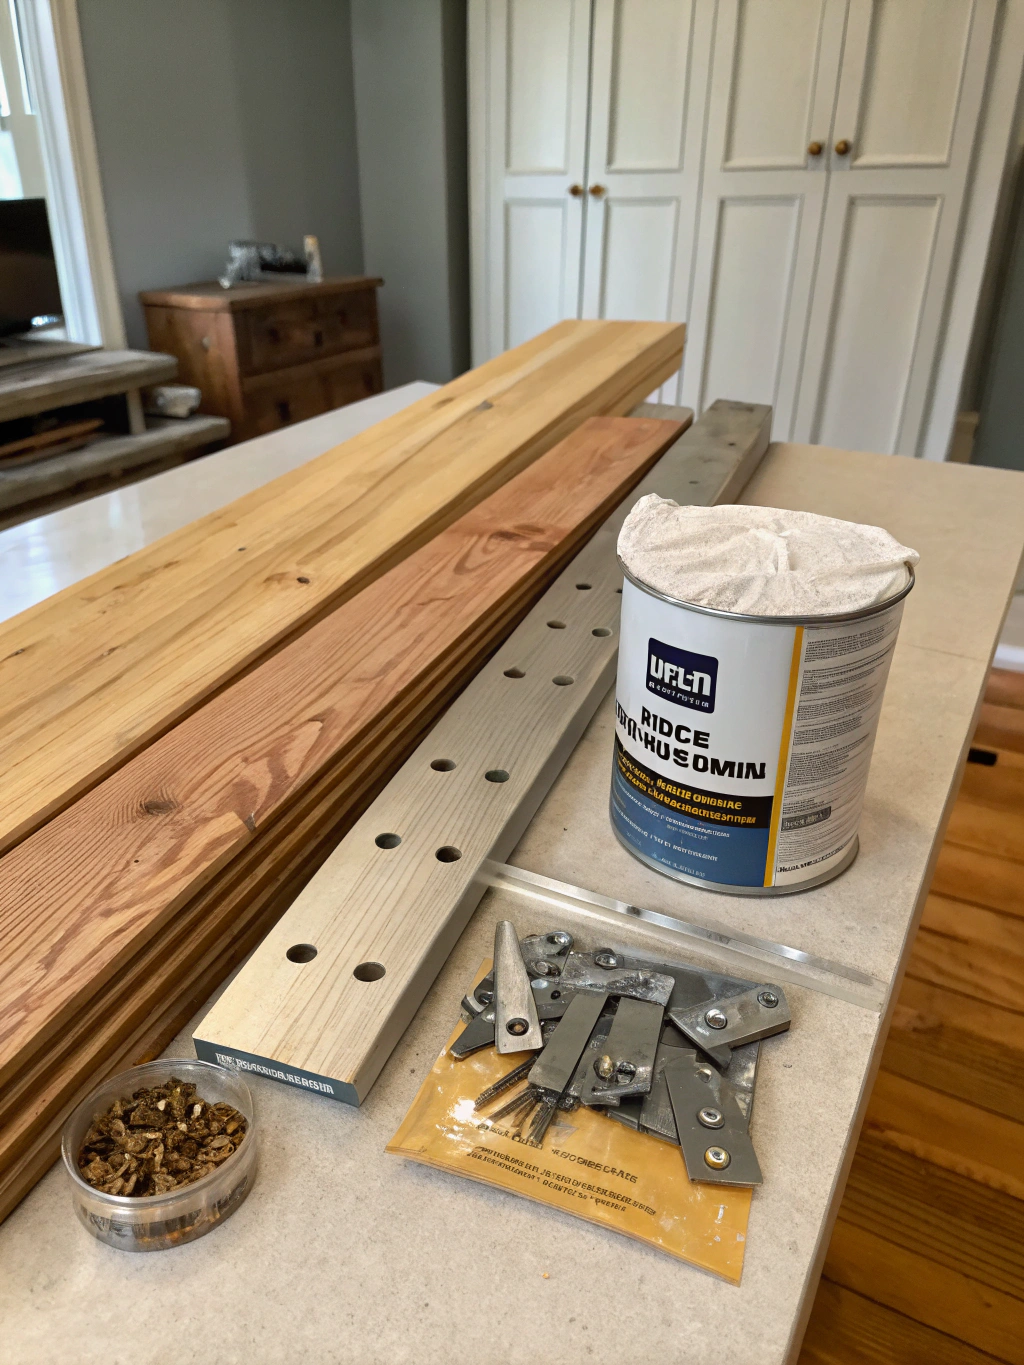
Caption: Gather these essential tools and materials before starting your DIY open shelving kitchen transformation.
Materials:
- Shelving Boards: (e.g., Pine, Oak, Poplar, or even reclaimed wood). Choose a thickness of at least ¾ inch for good support. The length and width will depend on your available space and design.
- Shelf Brackets: (e.g., Metal L-brackets, industrial pipe brackets, floating shelf hardware). Ensure they are rated to hold the weight of your shelves and their contents.
- Wood Stain or Paint: (Optional, for finishing your shelves). Choose a color that complements your kitchen décor.
- Wood Finish/Sealer: (e.g., Polyurethane, lacquer). This will protect your shelves from moisture and wear.
- Sandpaper: (Various grits – e.g., 120, 220). For smoothing the shelves.
- Wood Screws: (Appropriate length for your shelf thickness and brackets).
- Wall Anchors: (If not screwing directly into studs – e.g., toggle bolts, heavy-duty drywall anchors).
- Painter’s Tape: For marking and ensuring straight lines.
- Cleaning Supplies: (Rags, tack cloth).
Tools:
- Tape Measure
- Pencil
- Level (A 24-inch or longer level is ideal)
- Stud Finder
- Drill/Driver (With various drill bits and screwdriver bits)
- Circular Saw or Miter Saw (If cutting your own shelves. Alternatively, have your hardware store cut them to size.)
- Orbital Sander or Sanding Block
- Paint Brushes or Rollers (If painting/staining)
- Safety Glasses
- Gloves
- Dust Mask
Having these items ready will set you up for success as you embark on creating your beautiful and functional DIY open shelving kitchen.
Step-by-Step Guide to Your DIY Open Shelving Kitchen
Now for the exciting part – building your open shelves! Follow these seven steps carefully, and you’ll be admiring your transformed kitchen in no time. Remember, patience and precision are your best friends in any DIY project.
Step 1: Plan and Measure Your Space
Before you even think about picking up a tool, meticulous planning is crucial. Decide where you want your open shelves. Consider the height – they should be easily accessible but not so low that they interfere with countertop activities. Think about what you plan to store on them; this will influence the depth and spacing between shelves.
Use your tape measure and painter’s Lape to mark out the intended positions of your shelves on the wall. Check for symmetry and visual balance with other kitchen elements. It’s also wise to consider “DIY open shelving kitchen tips, How to build a DIY open shelving kitchen, Creative ideas for DIY open shelving kitchen” from reliable sources at this stage for inspiration. This planning phase is where your vision for a DIY open shelving kitchen really starts to take shape.
A common pitfall here is underestimating the space needed or misjudging the visual impact. Take your time, step back frequently to assess, and even use cardboard cutouts to simulate the shelves before committing. Remember to account for the thickness of the shelves themselves in your measurements.

Caption: Step 1 for your DIY open shelving kitchen: Carefully plan and measure your wall space.
Step 2: Prepare and Finish Your Shelves
Once your dimensions are finalized, it’s time to prepare your shelving boards. If you haven’t already, cut your boards to the desired lengths using a circular saw or miter saw. If you’re not comfortable with this, most home improvement stores offer cutting services.
Next, sand the shelves thoroughly. Start with a coarser grit sandpaper (like 120) to smooth out any rough spots or imperfections, then move to a finer grit (like 220) for a silky smooth finish. Wipe away all sanding dust with a tack cloth. This step is vital for a professional-looking DIY open shelving kitchen.
If you’re staining or painting your shelves, now is the time. Apply thin, even coats, allowing each coat to dry completely according to the manufacturer’s instructions. Lightly sand between coats if recommended. Finally, apply a protective wood finish or sealer. This will protect your shelves from spills, stains, and the general wear and tear of a busy kitchen. Don’t skip the sealer, especially in a kitchen environment where moisture is common.
Step 3: Locate and Mark Wall Studs
This is arguably one of the most critical steps for a secure and long-lasting DIY open shelving kitchen. Your shelves, especially when loaded with dishes and glassware, will be heavy. Attaching the brackets directly to wall studs provides the strongest possible support.
Use a stud finder to locate the studs in the areas where you plan to install your shelves. Most studs are typically spaced 16 or 24 inches apart on center. Once you find a stud, mark its edges lightly with a pencil. Double-check your findings with the stud finder to ensure accuracy.
If stud placement doesn’t perfectly align with your desired bracket locations, or if you’re installing shelves on a wall with few or inconveniently placed studs, you’ll need to use appropriate heavy-duty wall anchors. However, always aim for at least one screw per bracket into a stud if possible. Forgetting this step can lead to sagging shelves or, worse, a disastrous collapse!
Step 4: Install the First Set of Brackets
With your stud locations marked (or your anchor points determined), it’s time to install the first set of brackets for your lowest shelf. Hold your first bracket against the wall at your marked height. Use your level to ensure it’s perfectly vertical (plumb). Mark the screw hole locations with a pencil.
If you’re drilling into studs, pre-drill pilot holes slightly smaller than your screw diameter. This prevents the wood from splitting and makes driving the screws easier. If using wall anchors, follow the manufacturer’s instructions for installing them. Secure the bracket to the wall with the appropriate screws, ensuring it’s tight and flush.
Repeat this process for the second bracket for that shelf, using your level across the top of the two brackets (or by measuring precisely from a level line) to ensure they are perfectly aligned horizontally. This precision is key for a level DIY open shelving kitchen. Misaligned brackets will result in slanted shelves – a DIYer’s nightmare!
Step 5: Install Remaining Brackets and Shelves
Once your first set of brackets is securely in place and perfectly level, place your first shelf board on top to double-check the fit and alignment. Make any minor adjustments to the brackets if needed.
Now, proceed to install the brackets for the subsequent shelves. Measure up from your first shelf (or your initial marking line) to determine the position for the next set of brackets, ensuring consistent spacing. Again, use your level diligently for both vertical and horizontal alignment for each bracket. Replicating the care you took with the first set of brackets is essential for a uniform and professional DIY open shelving kitchen.
After all brackets are installed, place your prepared shelf boards onto them. Depending on your bracket type, you may need to secure the shelves to the brackets from underneath with small screws. This prevents the shelves from shifting or tipping. Some “DIY open shelving kitchen tips, How to build a DIY open shelving kitchen, Creative ideas for DIY open shelving kitchen” also suggest using adhesive for extra security, but ensure it’s appropriate for your materials.
Step 6: Check for Level and Make Adjustments
With all your shelves in place, take a step back and admire your handiwork! But before you start styling, do one final check. Place your level on each shelf, both front-to-back and side-to-side, to ensure everything is perfectly level.
If you find any shelves are slightly off, now is the time to make minor adjustments. This might involve slightly loosening screws, shimming a bracket (using thin pieces of wood or plastic shims), or re-tightening screws. It’s much easier to fix minor issues now than after you’ve fully loaded your DIY open shelving kitchen shelves.
This attention to detail will make a big difference in the final appearance and functionality of your open shelving. A perfectly level shelf not only looks better but also ensures items won’t slide or roll off.
Step 7: Style Your New Open Shelves!
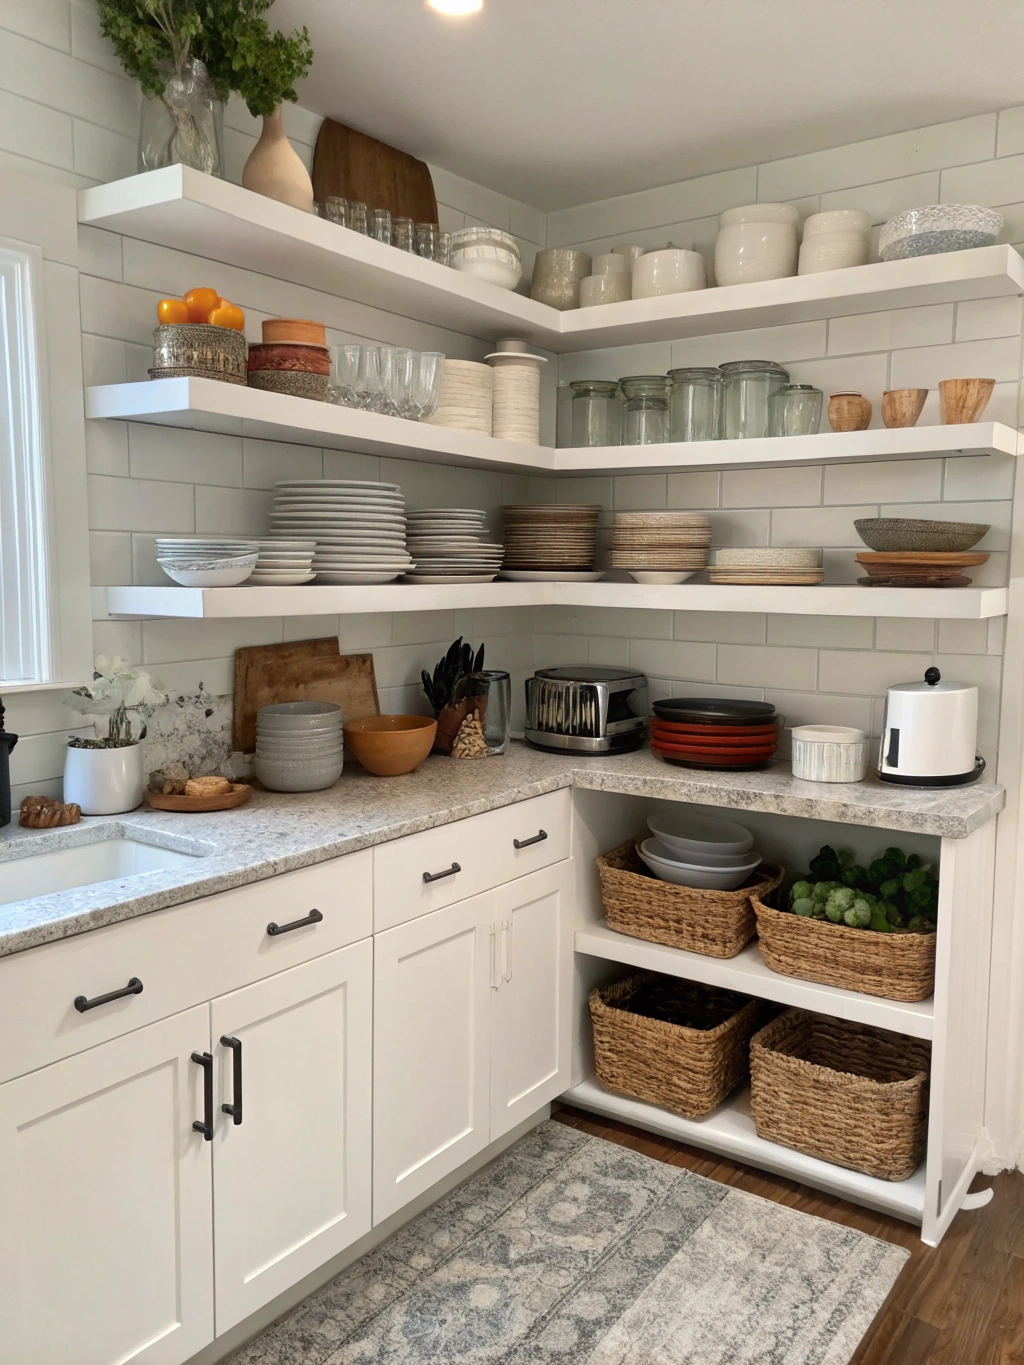
This is the most rewarding part: styling your new DIY open shelving kitchen! Now you can arrange your favorite dishes, glassware, cookbooks, small appliances, and decorative items.
Think about balance and visual appeal. Group similar items together, vary heights and textures, and don’t overcrowd the shelves. Leave some “breathing room” to maintain that airy, open feel. Consider a color scheme or theme for your displayed items to create a cohesive look. This is where your personal style truly shines.
Remember, open shelving is not just for storage; it’s a display. Keep it tidy and curated. Regularly dust and re-arrange items to keep things fresh and interesting. Enjoy the newfound beauty and functionality of your kitchen!
Your Stunning DIY Open Shelving Kitchen: The Final Result!
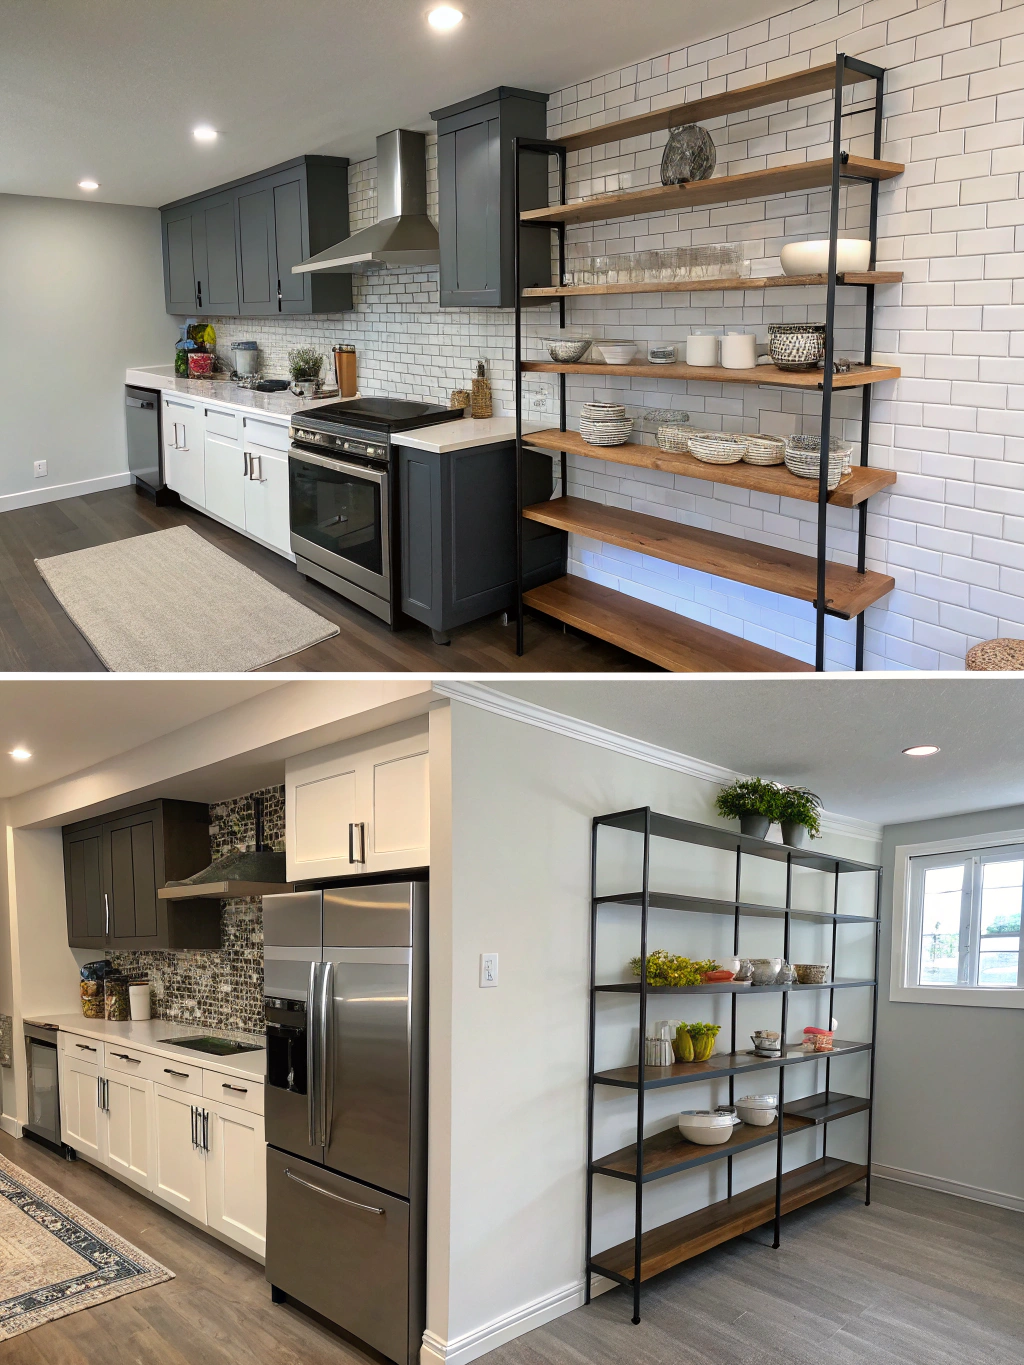
Congratulations! You’ve successfully transformed your kitchen with beautiful, functional DIY open shelving kitchen! Take a moment to step back and admire your incredible work. Not only have you added a stylish design element, but you’ve also likely made your kitchen feel more spacious and organized. This project proves that with a bit of planning and effort, you can achieve high-end results on a DIY budget.

Caption: The stunning final result: your very own beautifully executed DIY open shelving kitchen, ready to impress!
Your new open shelves are now ready to be filled with your favorite items, adding personality and charm to your culinary space. The accessibility and visual appeal will make your daily kitchen routines more enjoyable. We’d love to see how your DIY open shelving kitchen turned out! Share your photos and any tips you discovered along the way in the comments below.
Pro Tips & FAQs for Your DIY Open Shelving Kitchen
To help you get the most out of your new DIY open shelving kitchen and address some common questions, here are a few pro tips and frequently asked questions:
What are some creative ideas for styling a DIY open shelving kitchen?
Styling is where your personality shines! Here are a few ideas:
- Color Coordination: Stick to a palette of 2-3 colors for your dishware and accessories for a cohesive look.
- Mix Materials: Combine ceramics, glass, wood, and metal items for textural interest.
- Height Variation: Use cake stands or small risers to vary the height of items and create visual layers.
- Practical & Pretty: Store everyday items like mugs and bowls alongside decorative pieces like plants or artwork.
- Stack Smartly: Stack plates and bowls neatly. Consider using plate racks for vertical storage.
- Incorporate Greenery: Small potted plants or herbs can add life and color to your shelves.
- Minimalist Approach: Don’t overcrowd. Sometimes less is more, allowing key pieces to stand out. Many “DIY open shelving kitchen tips, How to build a DIY open shelving kitchen, Creative ideas for DIY open shelving kitchen” guides emphasize this.
How do I keep my DIY open shelving kitchen clean and organized?
Open shelves do require a bit more diligence in cleaning than closed cabinets, but it’s manageable:
- Regular Dusting: Dust shelves and items weekly or bi-weekly with a microfiber cloth.
- Wipe Down Spills Immediately: Especially important for wooden shelves to prevent staining.
- Curate Regularly: Periodically review what’s on your shelves. Remove items you don’t use or love to prevent clutter.
- Use Baskets or Bins: For smaller, less attractive items, use stylish baskets or containers to keep them corralled and out of sight.
- Wash Displayed Items: Items that aren’t used frequently might need an occasional wash to keep them sparkling.
What’s the best wood to use for a DIY open shelving kitchen?
The best wood depends on your budget, desired look, and durability needs:
- Pine: Affordable, lightweight, and takes stain/paint well. It’s a softer wood, so it may dent more easily.
- Poplar: Another affordable option, slightly harder than pine, and paints very smoothly. Good for a painted finish.
- Oak: Very durable and strong, with a prominent grain pattern. More expensive but offers a classic, high-end look.
- Maple: Hard, durable, and has a fine, subtle grain. Great for a modern, clean look. Can be pricier.
- Reclaimed Wood: Offers a unique, rustic charm and is an eco-friendly option. Ensure it’s properly cleaned and sealed.
Regardless of the wood type, ensure it’s at least ¾-inch thick for adequate support for your [DIY open shelving kitchen](https://www.fixdiy.site/diy-picture-ledge-shelf/).
How much weight can DIY open shelves hold?
The weight capacity of your [DIY open shelving kitchen](https://www.fixdiy.site/diy-picture-ledge-shelf/) depends on several factors:
- Bracket Strength: Choose brackets rated for the load you anticipate. Heavy-duty steel brackets are best for storing lots of dishware.
- Wall Anchoring: Screwing directly into studs provides the most support. If using drywall anchors, select ones rated for substantial weight.
- Shelf Material and Thickness: Thicker, stronger wood will support more weight without bowing.
- Span Between Brackets: The closer your brackets are, the more weight the shelf can hold. Avoid excessively long spans without intermediate support.
As a general rule, well-installed shelves with good quality brackets secured to studs can typically hold 25-50 pounds per linear foot, but always check the specifications of your chosen brackets and anchors.
Are there alternatives to traditional wood shelves for a DIY open shelving kitchen?
Absolutely! While wood is popular, you can get creative:
- Glass Shelves: Offer a sleek, modern look and can make a space feel even more_open. Tempered glass is essential for safety and strength.
- Metal Shelves: Stainless steel or powder-coated metal shelves provide an industrial or contemporary vibe. Very durable and easy to clean.
- Reclaimed Materials: Beyond wood, consider things like old bowling alley lanes or thick slate tiles for unique, sturdy shelves.
- Floating Shelves: These have hidden brackets for a minimalist look. Kits are widely available, or you can build your own. Our guide on a DIY open shelving kitchen approach often works well for floating designs too.
Consider the overall style of your kitchen when choosing alternative materials.
Conclusion & Your Next DIY Adventure
You’ve done it! Your DIY open shelving kitchen is complete, and your space is undoubtedly transformed. This project not only adds immense style and functionality but also boosts your DIY confidence. The beauty of open shelving lies in its versatility and the personal touch it brings to the heart of your home.
What are your favorite items to display on your new shelves? Did you encounter any unexpected challenges or discover any clever tricks during your build? Share your experiences, photos, and any additional “DIY open shelving kitchen tips, How to build a DIY open shelving kitchen, Creative ideas for DIY open shelving kitchen” in the comments below – we love hearing from fellow DIY enthusiasts!
If you enjoyed this project, be sure to subscribe to our newsletter for more home improvement guides, tips, and inspiration delivered straight to your inbox. And don’t forget to share this post with friends who might be looking to tackle their own DIY open shelving kitchen project! Happy DIYing!


