Introduction: Turning Trash into Treasure with Plastic Lids
Hey there, fellow DIY enthusiasts! Ever look at that overflowing recycling bin, especially the pile of plastic lids, and think, “There has to be a better use for these?” You’re not alone! Today, we’re diving headfirst into the wonderfully creative world of repurpose plastic lids crafts. It’s amazing how these simple, often-discarded items can be transformed into something beautiful, functional, or just plain fun.
Table of Contents Repurpose Plastic Lids Crafts
Table of Contents
Repurpose Plastic Lids Crafts
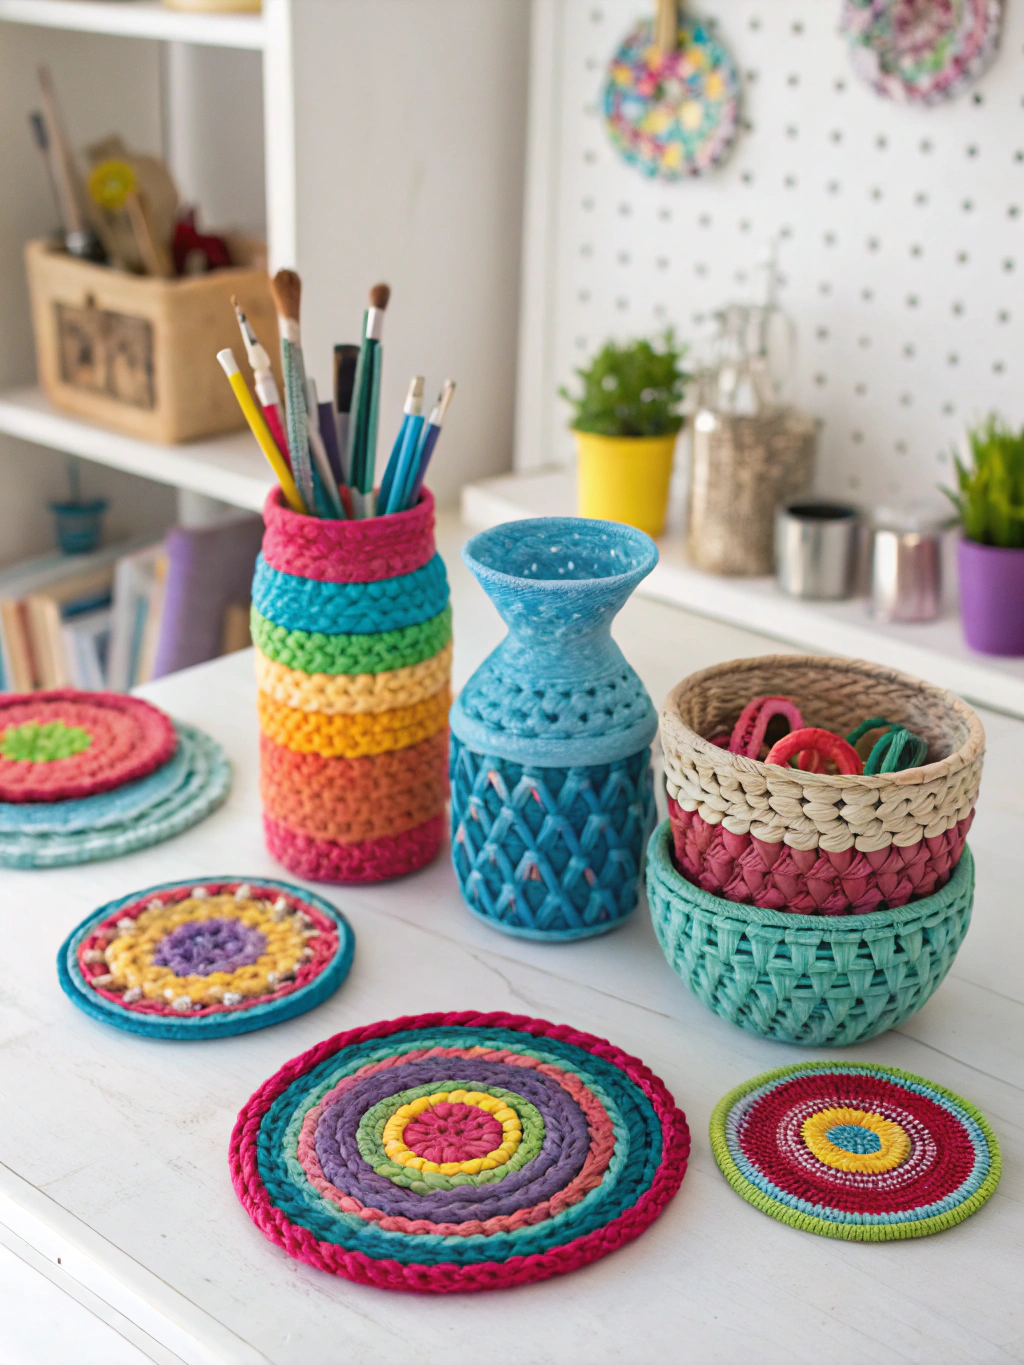
Transform everyday plastic lids into stunning DIY projects. Let your imagination run wild!
This post is your ultimate guide to unlocking that hidden potential. We’ll explore seven fantastic DIY ideas that will not only help you reduce waste but also add a personal touch to your home and life. So, grab a cup of your favorite beverage (maybe it even came with a plastic lid you can save!), and let’s get those creative juices flowing. It’s time to see how you can make art from what many consider waste!
The Magic of Transforming Simple Lids
Why bother with repurpose plastic lids crafts, you ask? Well, the benefits are manifold! First off, it’s an incredibly eco-friendly endeavor. Every lid you upcycle is one less piece of plastic heading to a landfill or potentially polluting our environment. It’s a small step, but collectively, these actions make a big difference. Plus, let’s be honest, there’s a deep satisfaction in creating something amazing from practically nothing.
Beyond the environmental thumbs-up, crafting with plastic lids is wonderfully budget-friendly. Your primary material is free! This means you can experiment, make mistakes, and let your creativity soar without worrying about expensive supplies. It’s also a fantastic way to get kids involved in crafting and teach them about sustainability in a hands-on, engaging way.
Plastic lids come in a surprising variety of colors, sizes, and even textures. Think about the lids from milk jugs (often sturdy HDPE), soda bottles (PET, though the bottle itself is more common for crafts), peanut butter jars, coffee cans, yogurt tubs (usually PP or PS), and condiment bottles. Each one offers unique possibilities. Before you start any project, make sure to clean your lids thoroughly with soap and water.
For safety, it’s best to avoid lids from containers that held harsh chemicals, unless you are absolutely certain they can be cleaned to a safe, inert state. The sheer versatility of these humble discs is what makes repurpose plastic lids crafts so exciting – from decorative items to functional organizers, the sky’s the limit.
Getting Started: Your Essential Toolkit for Lid Creations
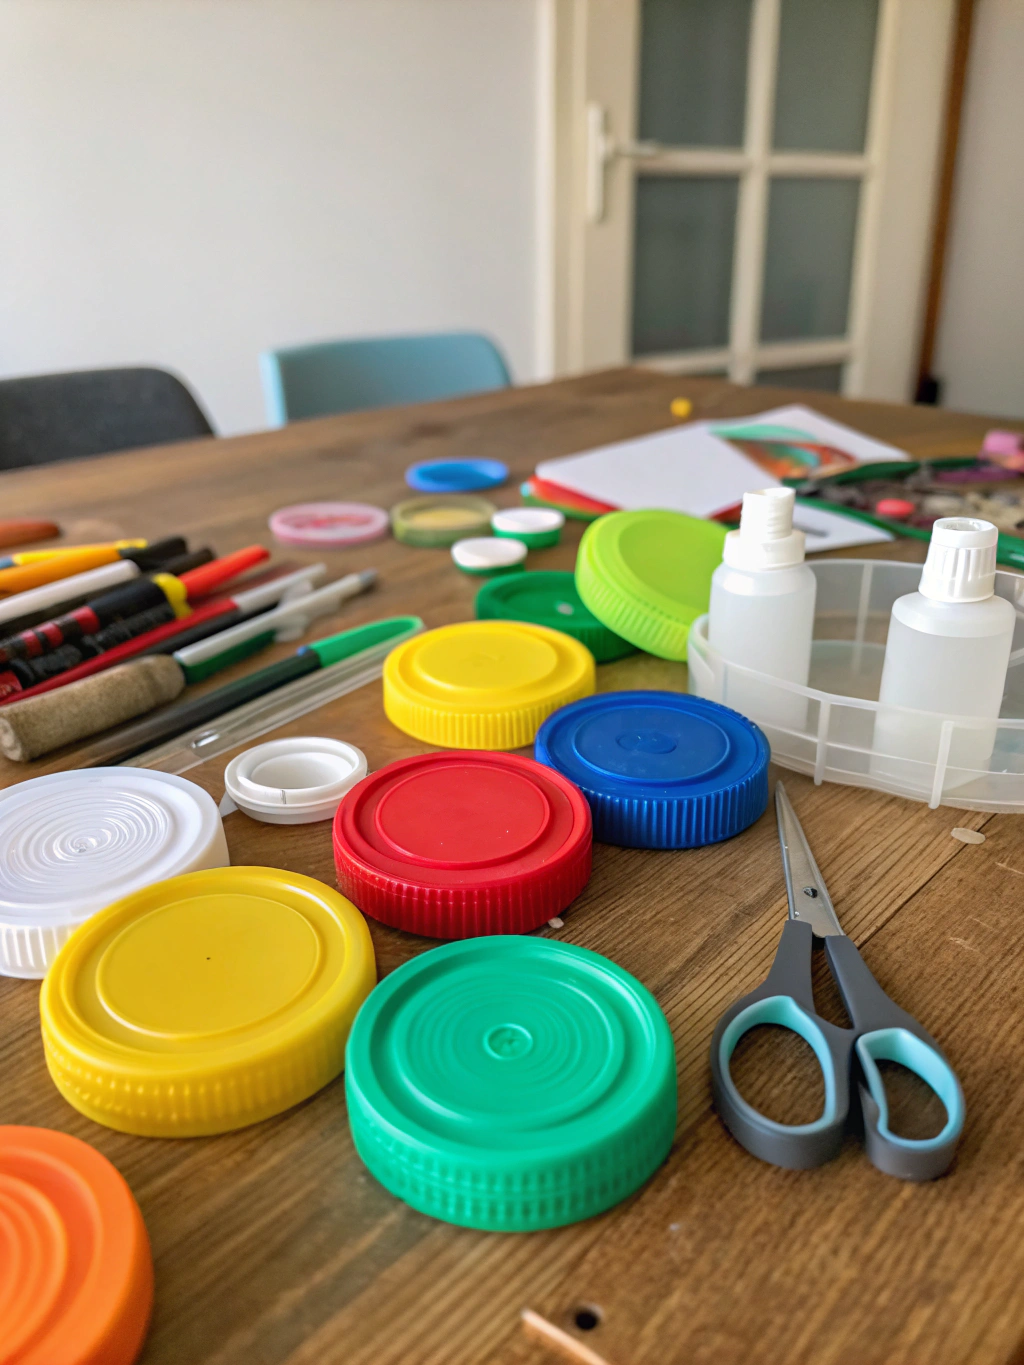
Before you dive into the exciting world of repurpose plastic lids crafts, it’s a good idea to gather some basic tools and materials. Having these on hand will make your crafting process smoother and more enjoyable. Don’t worry, you probably have many of these items already!
Repurpose Plastic Lids Crafts
Your basic toolkit for embarking on exciting repurpose plastic lids crafts projects.
Here’s a list of what you’ll generally need:
- A growing collection of plastic lids: Start saving them now! Aim for a variety of sizes, colors, and types (e.g., milk, soda, yogurt, peanut butter).
- Strong craft glue: Options like E6000, a hot glue gun with glue sticks, or a good quality clear PVA glue (for lighter applications) are excellent. The choice depends on the project’s demands.
- Sharp scissors or a craft knife (like an X-Acto knife): For cutting and shaping lids. Always use with caution.
- Cutting mat: To protect your work surface when using a craft knife.
- Permanent markers (like Sharpies): For drawing designs, labeling, or adding color. A variety of colors is always fun.
- Acrylic paints and brushes: If you want to change the color of your lids or add painted details.
- Drill with small bits or an awl: Essential for making holes if you’re creating wind chimes, ornaments, or anything that needs to be strung.
- Ruler or measuring tape: For precise cuts and measurements.
- Optional Embellishments: Get creative! Think buttons, beads, glitter, yarn, fabric scraps, googly eyes, ribbons – whatever sparks your fancy.
- Safety Gear: It’s always wise to have safety glasses, especially when cutting plastic that might splinter, and gloves if you’re working with particularly strong adhesives or paints.
Having these tools ready will empower you to tackle a wide range of repurpose plastic lids crafts ideas and bring your visions to life!
Our Top 7 Creative DIY Repurpose Plastic Lids Crafts Ideas
Ready to transform that pile of plastic lids into something awesome? We’ve curated seven creative DIY projects that are perfect for beginners and seasoned crafters alike. Let’s explore some fantastic ways to get started with repurpose plastic lids crafts!
I. DIY Mosaic Coasters from Plastic Lids (Detailed Project)
One of the most satisfying repurpose plastic lids crafts you can try is creating your own mosaic coasters. They’re not only practical for protecting your furniture but also serve as tiny, vibrant pieces of art. Plus, they make fantastic, personalized gifts! This project is a great way to use up smaller colorful lids or pieces of larger ones.
A. What You’ll Need Specifically for Coasters: Repurpose Plastic Lids Crafts
- Assorted colorful plastic lids: The more variety in color, the better your mosaic can be.
- Strong craft glue: E6000 or a similar industrial-strength adhesive works well for a durable bond. Hot glue can also be used for quicker assembly but might be less permanent.
- Cork sheet, thick cardboard, or ceramic tiles: For the coaster backing. Pre-cut cork coaster bases are readily available at craft stores, or you can cut your own squares (e.g., 4×4 inches) or circles.
- Sharp scissors or a heavy-duty craft knife: For cutting lids into smaller mosaic “tiles.”
- Cutting mat: Essential if using a craft knife.
- Ruler: For measuring and ensuring straight cuts if needed.
- Optional:
- Clear waterproof sealant or resin: For a glossy, professional, and water-resistant finish.
- Sandpaper (fine grit): To smooth any rough edges on cut plastic pieces.
- Grout (unsanded): If you want a more traditional mosaic look with filled gaps (this is more advanced).
B. Step-by-Step Guide to Crafting Your Coasters: Repurpose Plastic Lids Crafts
Let’s get down to the nitty-gritty of how to make crafts with plastic lids into beautiful coasters.
Step 1: Prepare Your Lids to Repurpose Plastic Lids Crafts
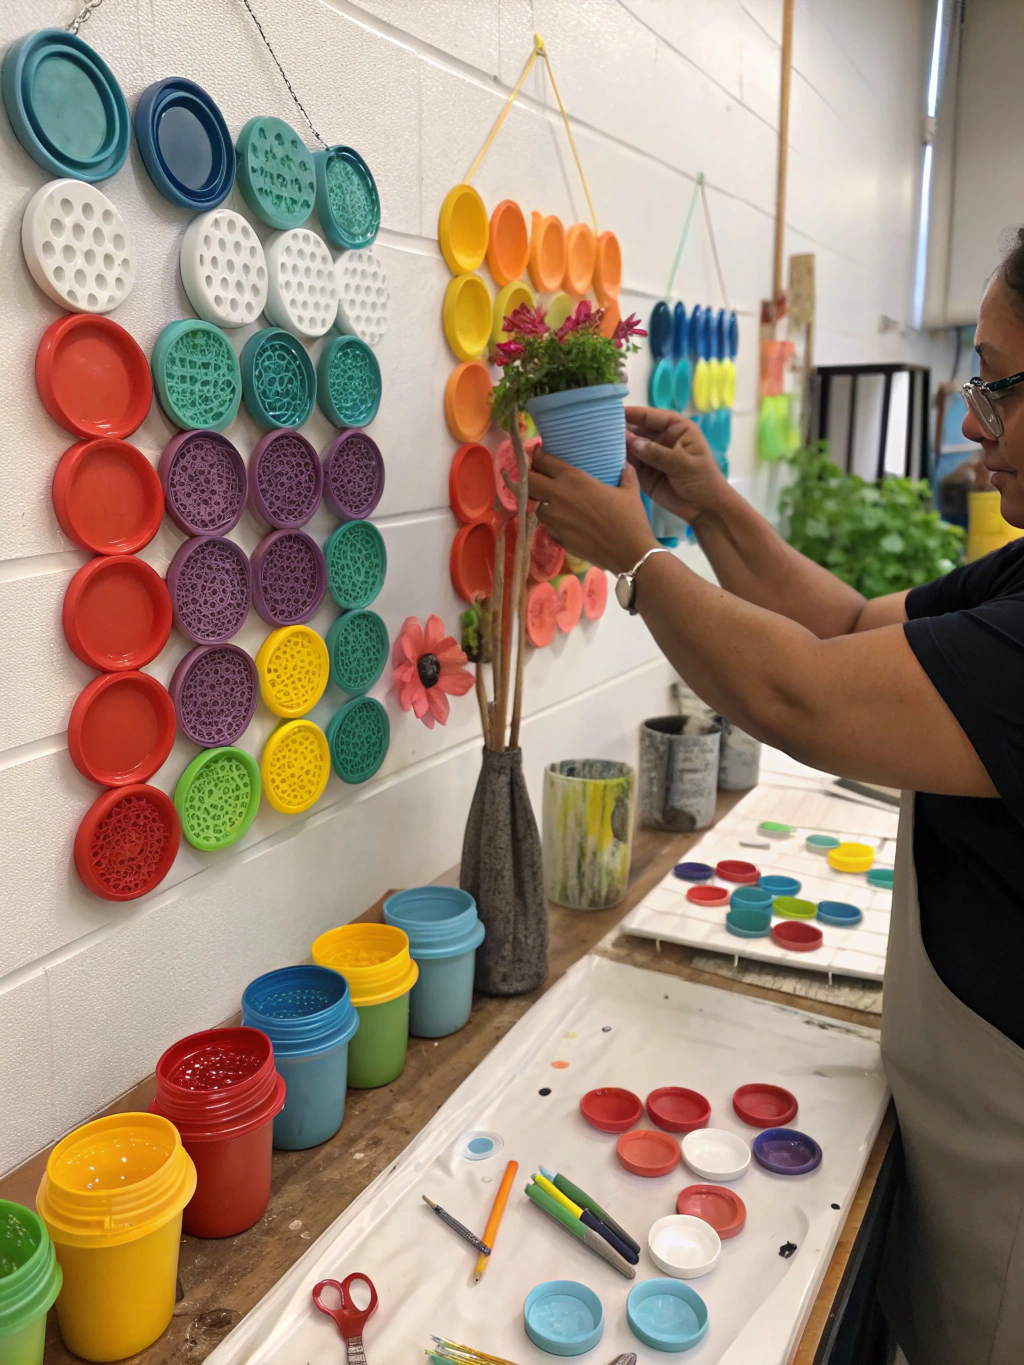
Step 1: Gather, clean, and sort your plastic lids by color – the building blocks for your mosaic art.
First things first, ensure all your plastic lids are sparkling clean and completely dry. Any grease or dirt will prevent the glue from adhering properly. Wash them with warm soapy water, rinse well, and allow them to air dry or pat them dry with a cloth. This initial preparation is crucial for the longevity of your repurpose plastic lids crafts.
Once clean, sort your lids by color. This will make it easier to plan your mosaic design. If some lids have a raised rim that you don’t want, you might be able to carefully trim it off with strong scissors or a craft knife, depending on the lid’s thickness and material. Always prioritize safety when cutting.
Step 2: Design Your Mosaic Pattern
Now for the fun part – planning your design! Take your coaster base (cork, cardboard, or tile) and lightly sketch your intended pattern if you wish. You can go for a symmetrical geometric design, a random abstract arrangement, a simple gradient, or even try to create a small picture like a flower or a star.
Lay out your whole lids or cut plastic pieces on the coaster base without glue first. This allows you to play with the arrangement, colors, and shapes until you’re happy with the look. Consider how the colors interact and whether you want contrasting or complementary hues. This is where your “creative ways to use plastic lids” really come into play. Don’t be afraid to experiment!
Step 3: Cutting and Shaping (If Needed)
If you’re using larger lids or want more intricate shapes than whole small lids can provide, it’s time to cut them into smaller mosaic “tiles.” Thinner plastic lids (like those from some yogurt containers) can often be cut with sturdy scissors. For thicker, more rigid lids (like milk jug caps), a sharp craft knife used on a cutting mat is more effective.
Safety Note: When using a craft knife, always cut away from yourself, use a sharp blade (dull blades require more pressure and are more dangerous), and make several shallow passes rather than trying to cut through in one go. Adult supervision is a must if children are nearby or involved. You can cut squares, triangles, slivers, or organic shapes. A variety of shapes can add more interest to your mosaic. If any cut edges are rough, a quick pass with fine-grit sandpaper can smooth them out.
Step 4: Gluing Your Masterpiece
Once your design is finalized and your pieces are ready, it’s time to start gluing. Work in small sections. You can either apply a small dab of glue to the back of each plastic piece or apply a thin, even layer of glue to a small area of the coaster base.
Press each plastic piece firmly onto the base, holding it for a few seconds to ensure good adhesion. If you’re using strong liquid glue like E6000, work in a well-ventilated area. Try to place the pieces close together, but small gaps are perfectly fine and can even add to the mosaic effect. If glue oozes out from under the pieces, wipe it away carefully with a damp cloth or a cotton swab before it dries. Ensure full glue coverage for a lasting bond, a key factor in successful repurpose plastic lids crafts.
Step 5: Finishing Touches (Optional but Recommended)
After all your plastic pieces are glued down and the glue has fully cured (check the manufacturer’s instructions, typically 24-72 hours for strong adhesives), you can add some finishing touches.
For a durable, water-resistant, and glossy finish, consider applying a coat of clear waterproof sealant or a thin layer of clear epoxy resin over the entire coaster surface. This will also help to lock all the pieces in place and make the coasters easier to clean. If you opt for resin, follow the mixing and application instructions carefully and allow it to cure completely in a dust-free environment.
If you chose to use grout for a more traditional mosaic look (this is a bit more advanced), you would mix the unsanded grout according to package directions, apply it over the mosaic, pressing it into the gaps, and then wipe the excess off the surface of the plastic pieces before it hardens. This technique really makes the colors pop.
C. The Stunning Final Result! Your Upcycled Coasters Repurpose Plastic Lids Crafts
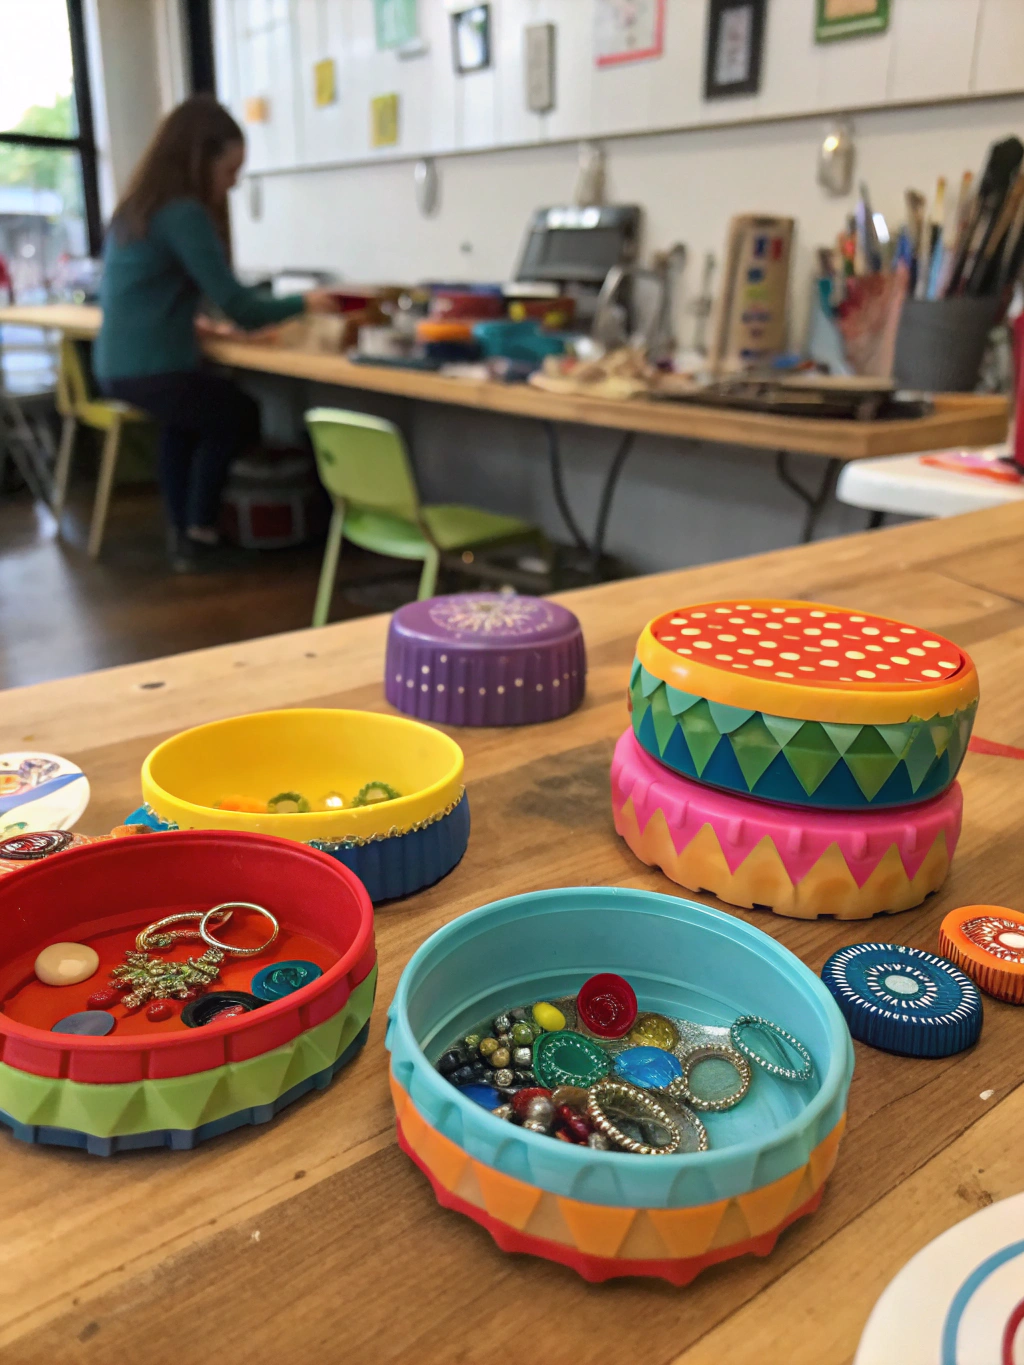
Repurpose Plastic Lids Crafts
Voila! Your very own set of vibrant coasters, a testament to creative repurpose plastic lids crafts.
And there you have it! Your very own set of unique, handmade mosaic coasters, crafted from something that might have otherwise ended up in the trash. Aren’t they gorgeous? These coasters are not only a conversation starter but also a daily reminder of your creativity and commitment to upcycling. Use them for your coffee mugs, tea cups, or cold drinks. They also make thoughtful, eco-friendly gifts for friends and family. We’d love to see your coaster creations – feel free to share photos in the comments below!
Now, let’s check out six more fantastic repurpose plastic lids crafts ideas!
II. Whimsical Wind Chimes Repurpose Plastic Lids Crafts
Imagine the gentle, tinkling sound of a homemade wind chime dancing in the breeze, crafted entirely from repurposed plastic lids! This project is not only a delight for the ears but also a feast for the eyes, adding a splash of color and movement to your porch, garden, or balcony.
- What You’ll Need: A collection of plastic lids in various sizes and colors (milk jug lids, soda bottle caps, and larger flat lids work well), one larger, sturdier lid (like from a coffee can or a large tub) or a metal/wooden ring to serve as the top hanger, strong string or fishing line, a drill or awl to make holes, beads (optional, for extra jingle and decoration), and permanent markers or acrylic paints if you wish to decorate the lids further.
- How to Make It:
- Start by decorating your chosen plastic lids. You can paint them with vibrant acrylics, draw intricate patterns with permanent markers, or even glue on small, lightweight embellishments. Let your creativity shine!
- Next, carefully drill a small hole (or two, for better balance on some shapes) near the edge of each lid that will hang down. Also, drill several holes around the perimeter of your larger top lid/ring, plus one or two in its center for hanging the entire chime.
- Cut varying lengths of string or fishing line. Tie one end of a string securely to a decorated lid. Thread the other end up through one of the perimeter holes on the top lid/ring and tie it off.
- Repeat this process, attaching lids at different lengths to create a cascading effect. You can intersperse colorful beads on the strings above or between lids for added visual appeal and a soft, tinkling sound.
- Finally, attach one or two longer pieces of string to the center hole(s) of the top lid/ring to create a hanger.
- Why It’s Great: This is one of the most charming repurpose plastic lids crafts ideas. It’s a fantastic way to use a mix of lid types and allows for endless personalization. The movement and sound can be truly captivating.
III. Colorful Garden Markers Repurpose Plastic Lids Crafts
Tired of forgetting which herb is which, or where you planted those carrots? Repurposed plastic lids can come to the rescue as durable, waterproof, and highly visible garden markers. This is a practical craft that adds a pop of personality to your green space.
- What You’ll Need: Flat or relatively flat plastic lids (lids from cottage cheese, yogurt tubs, or coffee cans are ideal), permanent markers (UV-resistant ones are best for longevity outdoors), acrylic paints (optional, for background color), wooden stakes, sturdy twigs, or even old plastic cutlery handles, and strong waterproof glue (like E6000 or exterior-grade hot glue).
- How to Make It:
- Clean your plastic lids thoroughly. If desired, paint a base coat of color on the lids with acrylic paint and let it dry completely. Light colors make the text more readable.
- Using a UV-resistant permanent marker, clearly write the name of the plant on each lid. You can also add a small drawing of the plant or a fun border.
- Apply a generous amount of waterproof glue to the top portion of your stake or twig.
- Firmly press the back of the labeled plastic lid onto the glued section of the stake. Allow the glue to cure fully according to the manufacturer’s instructions before placing them in your garden.
- Why It’s Great: This project showcases truly creative ways to use plastic lids in a functional manner. They withstand the elements better than paper or wooden markers and can be easily cleaned and reused season after season. It’s an excellent way to keep your garden organized and looking cheerful.
IV. Mini Storage Containers Repurpose Plastic Lids Crafts
We all have those tiny items that get lost easily – beads, buttons, safety pins, screws, spices, or even small craft supplies. Plastic lids can be cleverly transformed into nifty mini storage containers to keep these little treasures organized.
- What You’ll Need: Matching plastic lids that can snap together (some condiment jar lids might work, or if you have containers where the lid itself can form a base for another lid), or two lids of the same diameter. Strong craft glue is needed if you’re joining two separate lids. Optional: paint or markers for decoration.
- How to Make It:
- Snap-Together Method: If you have lids designed to snap onto a container, sometimes two such lids can snap together tightly, creating a small, enclosed pod. Test this with lids you have.
- Gluing Method: Take two lids of the same size (e.g., two milk jug lids or two identical takeout container lids). Clean them thoroughly. Apply a bead of strong glue (like E6000) around the rim of one lid. Carefully align the second lid rim-to-rim on top of the first, pressing them together to form a small, enclosed container. Let the glue cure completely. One lid acts as the base, the other as the top which can be pried off and on if the glue is applied carefully to only one half, or if you glue one lid to a small jar bottom and use another lid as a top.
- Alternative: Glue the bottom of a small, shallow plastic container (like a single-serve applesauce cup, trimmed down) to the inside of a larger flat lid. Then, use another matching flat lid as the top cover.
- Decorate the outside with paint, permanent markers, or labels as desired.
- Why It’s Great: This is a simple yet effective example of how to make crafts with plastic lids for practical home organization. These mini containers are perfect for junk drawers, craft rooms, or workshops.
V. Kid-Friendly Game Pieces or Tokens Repurpose Plastic Lids Crafts
Engage the little ones in a fun crafting session that results in custom game pieces or tokens! Plastic lids are perfect for this, as they are lightweight, easy to handle, and can be decorated in countless ways.
- What You’ll Need: A collection of uniformly sized plastic lids (milk jug lids are ideal as they come in various colors and are a good size), permanent markers, acrylic paints, or stickers for decoration.
- How to Make It:
- Clean all the lids thoroughly.
- Decide what kind of game pieces you want to create. You could make:
- Checkers: You’ll need 12 lids of one color and 12 of another (or paint them accordingly).
- Counting Tokens: Decorate lids with numbers for educational games.
- Custom Board Game Movers: Let kids draw characters or symbols on the lids.
- Play Money: Write denominations on them.
- Use permanent markers to draw directly onto the lids. Alternatively, kids can paint them with acrylics (a primer might help on slicker plastics) or apply fun stickers.
- If desired, you can glue two lids back-to-back for a thicker, more substantial game piece.
- Why It’s Great: This is a wonderful way to involve children in repurpose plastic lids crafts, fostering creativity and recycling awareness simultaneously. Custom game pieces can make family game night even more special.
VI. Decorative Wall Art or Mural Repurpose Plastic Lids Crafts
Feeling ambitious? Gather a large collection of plastic lids and embark on creating a stunning piece of wall art or even an outdoor mural. This project can transform a blank space into a vibrant focal point.
- What You’ll Need: A lot of plastic lids in various colors and sizes (the more, the merrier!), a large backing board (like plywood, sturdy cardboard, or a canvas panel) if creating an indoor piece, or a prepared outdoor wall/fence section. You’ll also need very strong adhesive suitable for the surface and conditions (e.g., construction adhesive for outdoor murals, E6000 or similar for indoor boards).
- How to Make It:
- Plan your design. This is key for a large-scale project. You could create an abstract pattern, a geometric design, a landscape, a favorite animal, or even a mandala. Sketch it out on paper first, or even arrange the lids on the floor to visualize.
- Prepare your surface. Ensure the board or wall is clean and dry. If painting the background, do this first.
- Start by arranging your plastic lids according to your design without glue. This allows you to make adjustments. Consider color flow, size variation, and overall composition.
- Once you’re happy with the layout, begin gluing the lids in place, working in sections. Apply adhesive to the back of each lid or directly to the surface and press firmly. For outdoor murals, ensure every edge is sealed if possible to prevent water ingress.
- Let the adhesive cure completely.
- Why It’s Great: This project truly showcases creative ways to use plastic lids on a grand scale. It’s a statement piece that reflects your artistic flair and eco-consciousness. For large outdoor pieces, consider the plastic’s UV resistance or apply a UV-protective sealant over the finished mural.
VII. Cute Fridge Magnets Repurpose Plastic Lids Crafts
Brighten up your refrigerator door or any magnetic surface with personalized, adorable magnets made from plastic lids. This is one of the quicker and simpler repurpose plastic lids crafts ideas, perfect for an afternoon crafting session.
- What You’ll Need: Small to medium-sized interesting plastic lids (bottle caps, small jar lids), small strong magnets (neodymium magnets work well), strong craft glue (like E6000 or super glue), acrylic paints, permanent markers, and optional tiny embellishments like googly eyes, glitter, small buttons, or fabric scraps.
- How to Make It:
- Clean the lids thoroughly.
- Decorate the front (top) of the plastic lid. You can:
- Paint a miniature scene or an abstract design.
- Draw funny faces or characters with permanent markers.
- Glue on googly eyes and other small embellishments to create “lid creatures.”
- Cover it with a small circle of decorative paper or fabric.
- Once your decoration is dry and complete, turn the lid over. Apply a dab of strong glue to the center of the back of the lid.
- Press a magnet firmly into the glue and let it cure completely as per the glue instructions. Ensure the magnet is strong enough to hold the lid’s weight plus a piece of paper.
- Why It’s Great: These magnets are fun, functional, and allow for a lot of individual expression. They make sweet little gifts and are a great way to use up those individual, unique lids you’ve been saving.
Pro Tips for Perfect Plastic Lid Crafting Repurpose Plastic Lids Crafts
Embarking on repurpose plastic lids crafts is exciting! To help you achieve the best results and enjoy the process safely, here are some pro tips:
- Safety First, Always: When cutting plastic lids, especially with craft knives, always wear safety glasses to protect your eyes from flying shards. Ensure adult supervision if children are involved with sharp tools or hot glue guns. Work in a well-ventilated area when using strong adhesives like E6000 or spray paints.
- Lid Selection Savvy: Not all plastic lids are created equal. HDPE (High-Density Polyethylene, often found in milk jug lids) and PP (Polypropylene, common for food container lids) are generally good for crafting as they are somewhat flexible yet sturdy. PET lids (from soda bottles) can also be used. Always test paints and glues on a spare lid first to check for compatibility and adhesion, as some plastics can be very slick.
- Adhesion is Absolutely Key: For glue to stick properly, your plastic lids must be scrupulously clean and completely dry. Remove any greasy residue or food particles. For particularly smooth or glossy plastics, lightly sanding the area to be glued with fine-grit sandpaper can create a rougher texture (a “key”) that helps the adhesive grip much better.
- Get Creative with Colors: Don’t feel limited by the original colors of your lids! Acrylic paints work well on most plastics. For optimal adhesion on very slick surfaces, consider applying a plastic primer spray paint before your color coat. Spray paints specifically designed for plastic are also an excellent option for even coverage. Permanent markers (like Sharpies) are great for details but may fade over time if exposed to direct sunlight.
- Think Beyond Just the Lid: Don’t be afraid to combine plastic lids with other upcycled materials to enhance your projects. Think bottle caps (metal or plastic), fabric scraps for texture, yarn for wrapping or stringing, cardboard tubes, old CDs – the possibilities are endless! For more inspiration on blending materials and discovering diverse “Repurpose plastic lids crafts ideas, Creative ways to use plastic lids, How to make crafts with plastic lids”, you can find a wealth of creative stimulus from resources like Good Housekeeping’s upcycling guides, which often feature mixed-media approaches.
Frequently Asked Questions (FAQs) about Repurpose Plastic Lids Crafts
Got questions about diving into repurpose plastic lids crafts? We’ve got answers! Here are some common queries:
Q1: What are the best types of plastic lids for crafts?
A: Generally, lids made from HDPE (High-Density Polyethylene – commonly found on milk jugs, detergent bottles) and PP (Polypropylene – often used for yogurt cups, butter tubs, and some bottle caps) are excellent for crafting. They are relatively easy to cut, glue, and paint. PET (Polyethylene Terephthalate – used for soda bottle lids) can also be used, though they can sometimes be a bit more brittle. The key is to look for lids that are clean, sturdy enough for your project, and have interesting colors or shapes. Always ensure they are thoroughly cleaned before use!
Q2: How do I clean plastic lids properly before crafting?
A: Proper cleaning is vital for successful repurpose plastic lids crafts, especially for good paint and glue adhesion. Wash the lids with warm water and dish soap to remove any food residue, oils, or stickiness. Use a brush if needed for crevices. Rinse them thoroughly under clean water. Finally, let them air dry completely, or wipe them dry with a clean, lint-free cloth. For stubborn sticky labels, try soaking the lid in warm, soapy water, then gently scraping. A bit of rubbing alcohol or a citrus-based cleaner (like Goo Gone) can help dissolve adhesive residue, but always test on an inconspicuous area first as some plastics can be sensitive to solvents.
Q3: What kind of paint works best on plastic lids?
A: Acrylic paints are a popular and versatile choice for painting plastic lids. For best results, especially on very smooth or slick plastic surfaces, it’s highly recommended to first apply a plastic primer. This creates a surface that the acrylic paint can grip onto much better, preventing chipping or peeling. Spray paints formulated specifically for plastic also offer excellent adhesion and a smooth finish. Always allow paint to dry and cure completely according to the manufacturer’s instructions.
Q4: Can I melt plastic lids to reshape them for crafts?
A: While it’s technically possible to melt certain types of plastic lids (like HDPE #2 plastic) in a dedicated toaster oven (never one used for food!) to create new shapes or flat sheets, this process requires extreme caution and proper safety measures. Melting plastics can release harmful fumes (Volatile Organic Compounds – VOCs), so it *must* be done in a very well-ventilated area, preferably outdoors, while wearing a respirator rated for organic vapors. It’s generally not recommended for casual DIYers or children due to the health risks and the need for precise temperature control. For most repurpose plastic lids crafts, cutting, gluing, and decorating without melting are safer, easier, and more accessible methods.
Q5: Where can I find more “Repurpose plastic lids crafts ideas, Creative ways to use plastic lids, How to make crafts with plastic lids”?
A: Inspiration for repurpose plastic lids crafts is everywhere! Besides the ideas shared in this post, visual platforms like Pinterest and Instagram are treasure troves – just search for terms like “plastic lid crafts,” “upcycled lids,” or “bottle cap art.” Many DIY and craft blogs, as well as environmental and sustainability websites, feature creative upcycling projects. For a broad range of ingenious upcycling ideas, including more “Repurpose plastic lids crafts ideas, Creative ways to use plastic lids, How to make crafts with plastic lids”, established sources such as Good Housekeeping often showcase innovative ways to transform everyday items into something new and exciting.
Unleash Your Inner Artist: It’s Your Turn! Repurpose Plastic Lids Crafts
Wow, what a journey through the colorful and creative possibilities of repurpose plastic lids crafts! From practical coasters to whimsical wind chimes and artistic murals, it’s clear that these humble plastic discs hold a universe of potential. Not only do these projects offer a fantastic outlet for your creativity, but they also champion a more sustainable way of living by giving a second life to items often destined for the landfill. Repurpose Plastic Lids Crafts
Now, the vibrant world of upcycled lid art awaits your touch. We hope these seven ideas have sparked your imagination and shown you just how easy and rewarding it can be to transform trash into treasure. Remember, the best craft projects are those you infuse with your own personal style and flair. Repurpose Plastic Lids Crafts
Which of these repurpose plastic lids crafts will you try first? Perhaps you have other ingenious ideas for repurposing plastic lids that you’d like to share? We wholeheartedly encourage you to dive in, experiment, and most importantly, have fun with it! Drop a comment below to share your thoughts, your planned projects, or even photos of your finished masterpieces! We absolutely love seeing the creativity of our community blossom.
Don’t keep all this crafty goodness to yourself! If you found this post inspiring, please share it with your fellow DIY enthusiasts, crafty friends, and eco-conscious pals on social media. And for a regular dose of DIY tutorials, upcycling tips, and home improvement hacks delivered straight to your inbox, be sure to sign up for our newsletter!
For even more inspiration on upcycling various household items and further exploring the realm of repurpose plastic lids crafts, don’t forget to browse other articles and guides right here on FixDIY.site! Happy crafting!

