Introduction
Tired of your summer decor feeling a bit bland, or perhaps you’re staring at an ever-growing pile of fabric scraps wondering what to do with them? You’re in the right place! Today, we’re diving into a wonderfully whimsical and eco-friendly project: a diy fabric scrap summer garland. This project is not only incredibly easy and budget-friendly, but it’s also a fantastic way to inject a pop of color and personality into your home, patio, or even a summer party.
Forget complicated crafts that require a ton of specialized tools; this garland is all about simple techniques and charming results. We’ll show you exactly how to make your own vibrant decoration that screams summer fun, using those beloved fabric remnants you couldn’t bear to toss. So, let’s gather those scraps and get ready to create something beautiful!
Table of Contents
Table of Contents
What You’ll Need for Your DIY Fabric Scrap Summer Garland
Before we jump into the creative process, let’s gather our supplies. The beauty of this project lies in its simplicity and reliance on materials you likely already have, especially if you’re a fellow DIY enthusiast or crafter.
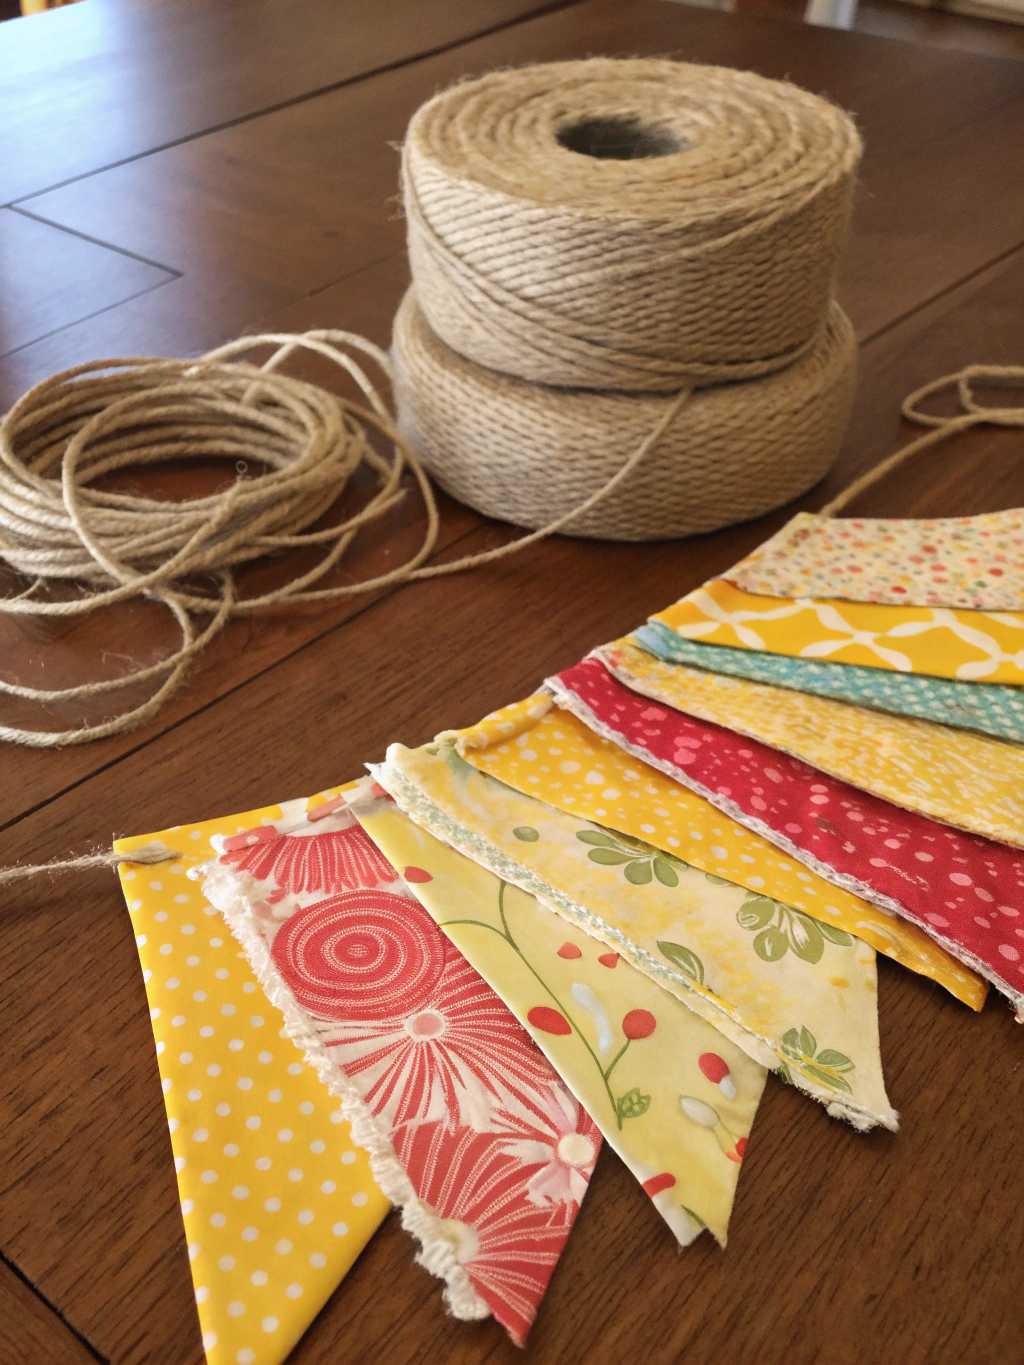
Caption: All the bits and bobs you’ll need for your delightful diy fabric scrap summer garland adventure!
Here’s a list of what you’ll need: DIY Fabric Scrap Summer Garland
- Fabric Scraps: This is the star of the show! DIY Fabric Scrap Summer Garland
- Variety is Key: Mix and match colors, patterns, and textures. Cottons, linens, lightweight denim, and even bits of lace or ribbon work wonderfully. Think bright summer hues, pastels, or even a nautical theme.
- Quantity: The amount depends on how long and full you want your garland. A good starting point is a medium-sized grocery bag full of scraps. You can always add more!
- Pre-washing: If you’re using new fabrics or scraps from various sources, it’s a good idea to pre-wash them, especially if your garland might get damp (e.g., on a porch). This prevents colors from bleeding and ensures any shrinkage happens before you cut.
- Twine, Cord, or Ribbon: This will be the backbone of your garland. DIY Fabric Scrap Summer Garland
- Jute Twine: Gives a lovely rustic, farmhouse feel.
- Cotton Cord: Offers a softer, slightly more polished look.
- Baker’s Twine: Adds a subtle pattern and comes in various colors.
- Satin or Grosgrain Ribbon: Can provide a more elegant or playful base, depending on the color and width. Choose something sturdy enough to hold the weight of the fabric.
- Length: Decide on the desired length of your finished garland, then add about 12-24 inches extra for creating loops or ties at each end for hanging.
- Sharp Fabric Scissors or a Rotary Cutter and Mat: DIY Fabric Scrap Summer Garland
- Fabric Scissors: A good pair of sharp fabric scissors will make cutting a breeze. Make sure they are dedicated to fabric to keep them sharp.
- Rotary Cutter and Mat: If you have a lot of fabric to cut, a rotary cutter, self-healing mat, and a clear quilting ruler will speed up the process significantly and give you very straight edges. This is my preferred method for batch-cutting strips!
- Measuring Tool: A ruler or measuring tape. DIY Fabric Scrap Summer Garland
- (Optional) Pinking Shears: To help reduce fraying on certain types of fabric, although some fraying adds to the rustic charm of this project.
- (Optional) Iron and Ironing Board: For pressing wrinkled fabric scraps before cutting. While not strictly necessary for this rustic-style garland, crisper fabric can be easier to cut accurately.
Having these items ready will make your DIY summer fabric garland creation smooth and enjoyable. The great thing about this project is its flexibility – don’t have the exact type of twine? Improvise with what you have! That’s the spirit of DIY.
Step-by-Step Guide: How to Make Your DIY Fabric Scrap Summer Garland
Alright, let’s get down to the fun part – making your very own diy fabric scrap summer garland! We’ve broken it down into five simple steps.
Step 1: Gather & Prepare Your Fabrics to DIY Fabric Scrap Summer Garland
The heart of your garland lies in the fabric choices. This initial step is all about selecting, sorting, and preparing your scraps for their transformation.
DIY Fabric Scrap Summer Garland
First, raid your stash! Pull out all those leftover pieces from past sewing projects, old clothes that are beyond repair but have lovely patterns, or even remnants from the fabric store bargain bin. Aim for a good mix of colors, patterns (florals, stripes, polka dots, solids), and even textures. For a DIY summer fabric garland, think about light and airy fabrics. Cottons and poly-cottons are perfect, but lightweight linen, chambray, or even thin corduroy can add interesting texture. Avoid very heavy or stiff fabrics like upholstery material or canvas, as they won’t drape as nicely and will be harder to tie.
Once you have a good pile, take a moment to sort them. You might group them by color families (e.g., blues and greens, pinks and yellows) or by pattern. This helps you visualize how they’ll look together on the garland and ensures a balanced distribution. If any of your fabrics are heavily wrinkled, giving them a quick press with an iron will make them easier to cut accurately in the next step. While some natural crinkle is fine and adds to the rustic charm, deep creases can make it tricky to get uniform strips.
A common pitfall here is not having enough variety, leading to a less dynamic garland. Don’t be afraid to mix bold patterns with solids, or light colors with pops of darker shades. Another thing to watch out for is fabric that frays excessively. While a little fraying is desirable for that shabby-chic look, some fabrics (like loose-weave linens or certain synthetics) can unravel to the point of disappearing. If you’re concerned, you can opt to cut those with pinking shears in the next step, or simply choose more stable fabrics. Remember, this is a great project for “imperfect” fabrics, so don’t strive for absolute perfection.
Step 2: Cut Your Fabric Strips
With your fabrics selected and prepped, it’s time to transform them into the strips that will form the body of your garland. Precision isn’t paramount here, but a general consistency will make for a more cohesive final product.
Now, decide on the dimensions of your fabric strips. A good general size is about 1 inch (2.5 cm) wide and 6-9 inches (15-23 cm) long. However, this is entirely up to your preference!
- Wider strips (1.5-2 inches) will create a fuller, more substantial garland and will require fewer strips overall.
- Narrower strips (0.5-0.75 inches) will give a more delicate, whimsical look but will require more strips and more tying.
- Longer strips (10-12 inches) will create a garland with more “hang” and movement.
- Shorter strips (4-5 inches) will result in a tighter, fluffier look, almost like a pom-pom border if tied closely.
I personally like a mix, perhaps mostly 1-inch wide by 7-8 inches long, with a few slightly wider or narrower ones thrown in for texture.
Cutting Methods:
- Scissors: If you’re using scissors, you can simply eyeball the width or make a small snip at your desired width and then tear the fabric if it’s a type that tears straight (many cottons do). Tearing gives a lovely, slightly frayed edge naturally. Alternatively, you can lightly mark lines with a fabric pen or chalk and cut along them.
- Rotary Cutter: For faster and more uniform strips, a rotary cutter, cutting mat, and quilting ruler are your best friends. Lay out your fabric (you can stack a few layers if your cutter is sharp enough), align your ruler, and VZZZT! Perfect strips. This is especially helpful if you’re making a very long garland or multiple garlands. This is a key technique for an easy fabric scrap garland tutorial as it speeds things up considerably.
As you cut, create a big, beautiful pile of fabric strips. Don’t worry if they’re not all perfectly identical in length or width; minor variations add to the handmade charm. The quantity of strips you’ll need depends entirely on how long and full you want your garland. For a 6-foot garland with medium fullness, you might need anywhere from 100 to 200 strips. It’s always better to cut more than you think you’ll need; you can always use leftovers for another small project.
Common pitfalls during this step include making strips too short, which can make them difficult to tie securely, or too long and thin, which might make them look sparse. Also, be mindful of your cutting tools. Dull scissors or a dull rotary blade will make the process frustrating and can snag your fabric. Take breaks if your hand gets tired; this part can be a bit repetitive but seeing that pile of colorful strips grow is incredibly satisfying!
Step 3: Prepare Your Twine or Cord
With your fabric strips all cut and ready, the next step is to prepare the backbone of your diy fabric scrap summer garland: the twine, cord, or ribbon onto which you’ll tie everything.
First, determine the desired finished length of your garland. Think about where you plan to hang it. Will it drape across a mantelpiece? String along a fence? Decorate a doorway? Measure that space, or estimate if needed. Once you have your desired length, add at least 12 inches (30 cm) to 24 inches (60 cm) extra. This additional length is crucial for creating loops or leaving tails at each end for easy hanging. It’s always better to have a little too much than not enough twine. You can always trim excess later, but you can’t easily add more!
Once you’ve cut your twine or cord to the appropriate length, create a small loop at each end. A simple overhand knot or a figure-eight knot will work perfectly to form a secure loop. These loops will make it much easier to hang your finished garland on hooks, nails, or even tree branches. If you prefer, you can skip the loops and just leave long tails for tying the garland in place.
This step is straightforward, but a common pitfall is underestimating the length needed. Consider how much “drape” or “swag” you want in your garland. A garland hung taught will need less length than one that swoops gracefully. Another potential issue is choosing a twine or cord that is too thin or weak for the weight of the fabric strips, especially if you’re making a very long or dense garland. Jute twine (around 2-3mm thick) or a sturdy cotton cord are generally good choices. If you’re using ribbon, ensure it’s a robust type that won’t easily tear under tension.
Take a moment to ensure your knots for the loops are tight and secure. You don’t want one end coming undone after all your hard work tying on the fabric strips! This simple preparation sets the stage for the most transformative part of the project.
Step 4: Tie Your Fabric Strips to the Twine
This is where the magic truly happens, and your pile of fabric strips starts to become a beautiful diy fabric scrap summer garland. It’s a repetitive process, but also very meditative and satisfying as you see your creation come to life.

DIY Fabric Scrap Summer Garland
Caption: Step 4: The rhythmic process of tying individual fabric strips onto the main twine.
There are a couple of common ways to tie your fabric strips onto the twine:
Simple Knot:
DIY Fabric Scrap Summer Garland- Take one fabric strip.
- Fold it in half to find the center.
- Place the center of the strip under your twine.
- Bring the two ends up and over the twine, then tie a simple single knot (like the first step of tying shoelaces). Pull it snug, but not so tight that it distorts the twine too much.
- You can do a single knot, or a double knot for extra security, especially if using slippery fabrics. A single knot usually suffices and allows for easier adjustment later.
Lark’s Head Knot (also known as a Cow Hitch): This is my preferred method as it’s quick, secure, and looks neat.
- Take one fabric strip.
- Fold it in half lengthwise, creating a loop at one end and two tails at the other.
- Place the looped end under your twine.
- Bring the loop up and over the twine.
- Pull the two tails of the fabric strip through the loop.
- Gently pull the tails to tighten the knot around the twine.
Choose whichever knot you find easier or prefer the look of. The Lark’s Head knot tends to make the strips hang down neatly side-by-side, while a simple knot can sometimes make them splay out a bit more, which can also be a nice effect.
The Process:
Start tying your strips near one of the end loops (or a few inches from the end if you’re leaving tails). Continue adding strips one by one. You can follow a specific color pattern, or go completely random for a more bohemian, eclectic look. I enjoy a more random approach, but I do try to ensure I’m not clustering too many similar colors or patterns together. Step back occasionally to check the overall balance.
Spacing and Fullness:
- For a very full, dense garland: Push the knotted strips close together on the twine. You’ll use a lot more fabric this way, but the result is lush and substantial.
- For a lighter, more airy garland: Leave small gaps (e.g., 1/4 to 1/2 inch) between each knot or group of knots.
- You can also vary the density, perhaps making it fuller in the middle and sparser towards the ends.
A common pitfall here is tying the knots too loosely, which can cause the strips to slide around too much or even come undone. Ensure each knot is snug. Another is not varying the fabric placement enough, leading to unintentional color blocking if you’re aiming for random. Keep your whole pile of fabric strips handy and pick from different parts of the pile as you go. If you’re following a pattern, lay out your strips in order beforehand to make it easier to pick up the next one.
This “tying” part is something you can easily do while watching TV or listening to a podcast. It’s a wonderfully relaxing, almost meditative task. For those looking into how to make DIY fabric scrap summer garland, this method is straightforward and highly effective.
Step 5: Fluff and Finish Your Garland
You’ve made it to the final step! All those beautiful fabric strips are now proudly adorning your twine, and your diy fabric scrap summer garland masterpiece is almost complete. This last step is all about giving it those finishing touches that elevate it from a collection of tied fabric to a truly charming decoration.
Take your garland and give it a gentle shake. This helps all the fabric strips fall into place and reveals the natural drape and fullness. Now, go along the length of the garland and “fluff” the strips with your fingers. Separate any that are clumped together, twist some slightly if you like, and generally encourage them to spread out and fill any gaps. If you used simple knots, you might want to ensure the knots are all facing the same way (or intentionally varied). If you used Lark’s Head knots, they generally align themselves quite well.
Inspect your garland for any strips that look significantly longer or shorter than desired, or any that are perhaps too wide or too thin and look out of place. You can now trim any errant ends with your fabric scissors. Don’t aim for perfect uniformity unless that’s the specific look you’re going for; a little variation in length can add to the handmade character. However, if a few strips are dramatically longer and distracting, a little snip can neaten things up.
At this point, you can also slide the fabric strips along the twine to adjust their spacing. If you find a section looks a bit sparse, you can gently push the knots closer together. If an area seems too crowded, you can spread them out a bit. This is easier if you used single knots or didn’t pull your Lark’s Head knots excessively tight.
Optional Embellishments:
If you want to add a little extra flair, now’s the time!
- Small Bells: Tie tiny jingle bells intermittently along the twine between fabric clusters for a subtle festive sound.
- Wooden Beads: String a few wooden beads onto the twine between sections of fabric for a rustic or boho touch.
- Mini Pom-Poms or Tassels: You can tie on small, pre-made pom-poms or mini yarn tassels for extra texture and fun.
- Fairy Lights: For an evening glow, you can gently entwine a strand of battery-operated LED fairy lights through the garland.
A common pitfall in this stage is over-trimming. It’s easy to get carried away trying to make everything “perfect,” but remember the charm of this project is often in its slight imperfections. Trim only what’s necessary. Another thing to avoid is pulling too hard when adjusting strips, as this could distort the twine or loosen knots. Be gentle. Once you’re happy with the fullness, the drape, and any final adjustments, your DIY summer fabric garland is ready to hang!
The Final Result: Your Stunning DIY Fabric Scrap Summer Garland!
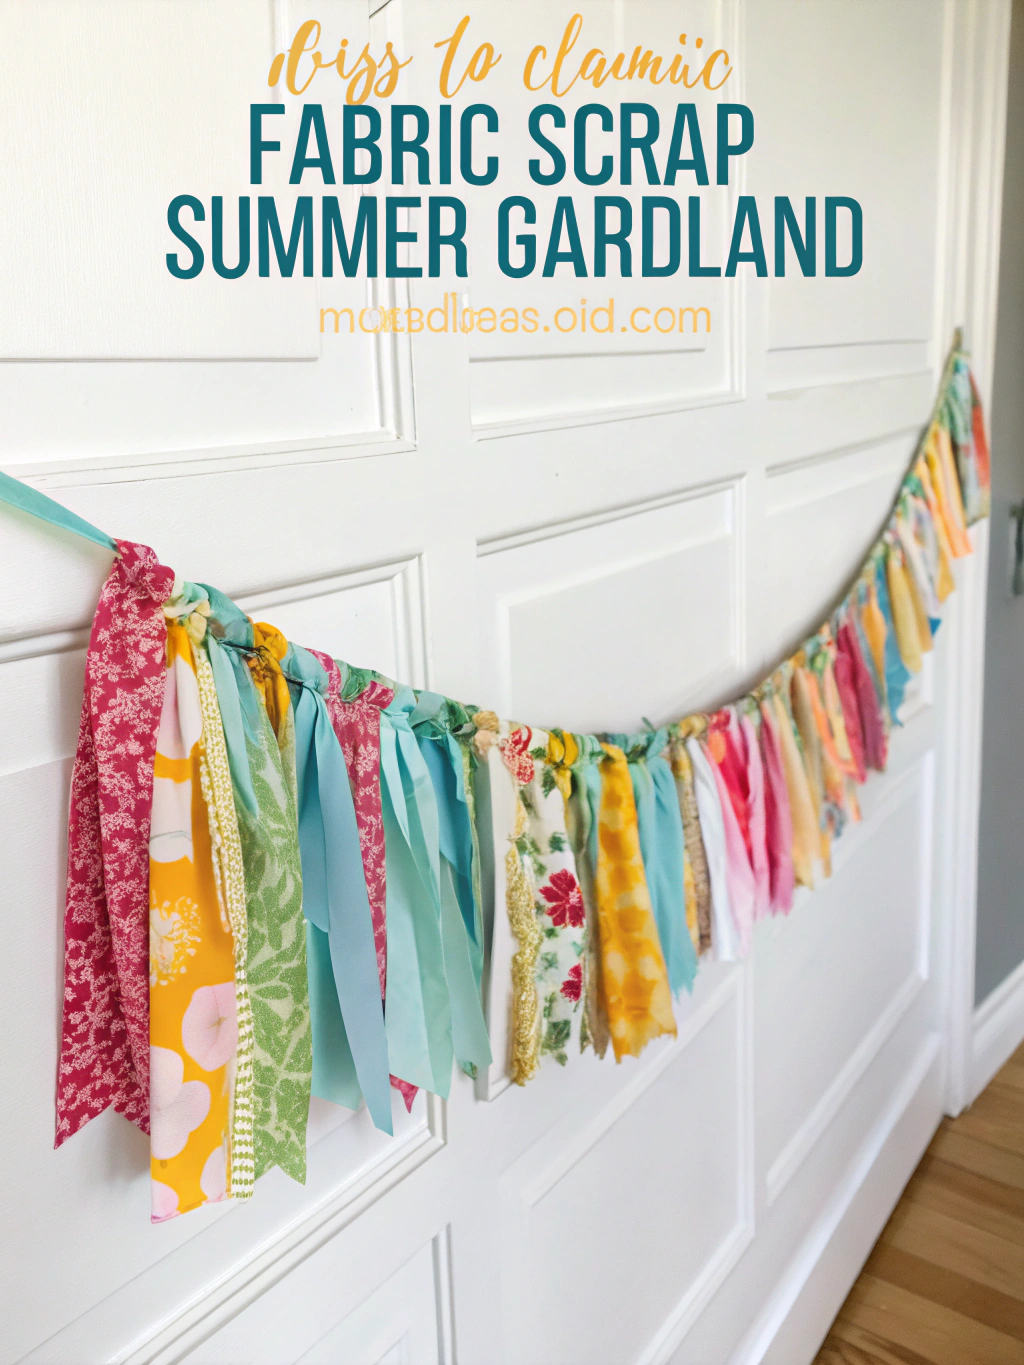
And there you have it! After a bit of snipping, tying, and fluffing, your very own diy fabric scrap summer garland is complete and ready to bring a splash of summer cheer to your space.
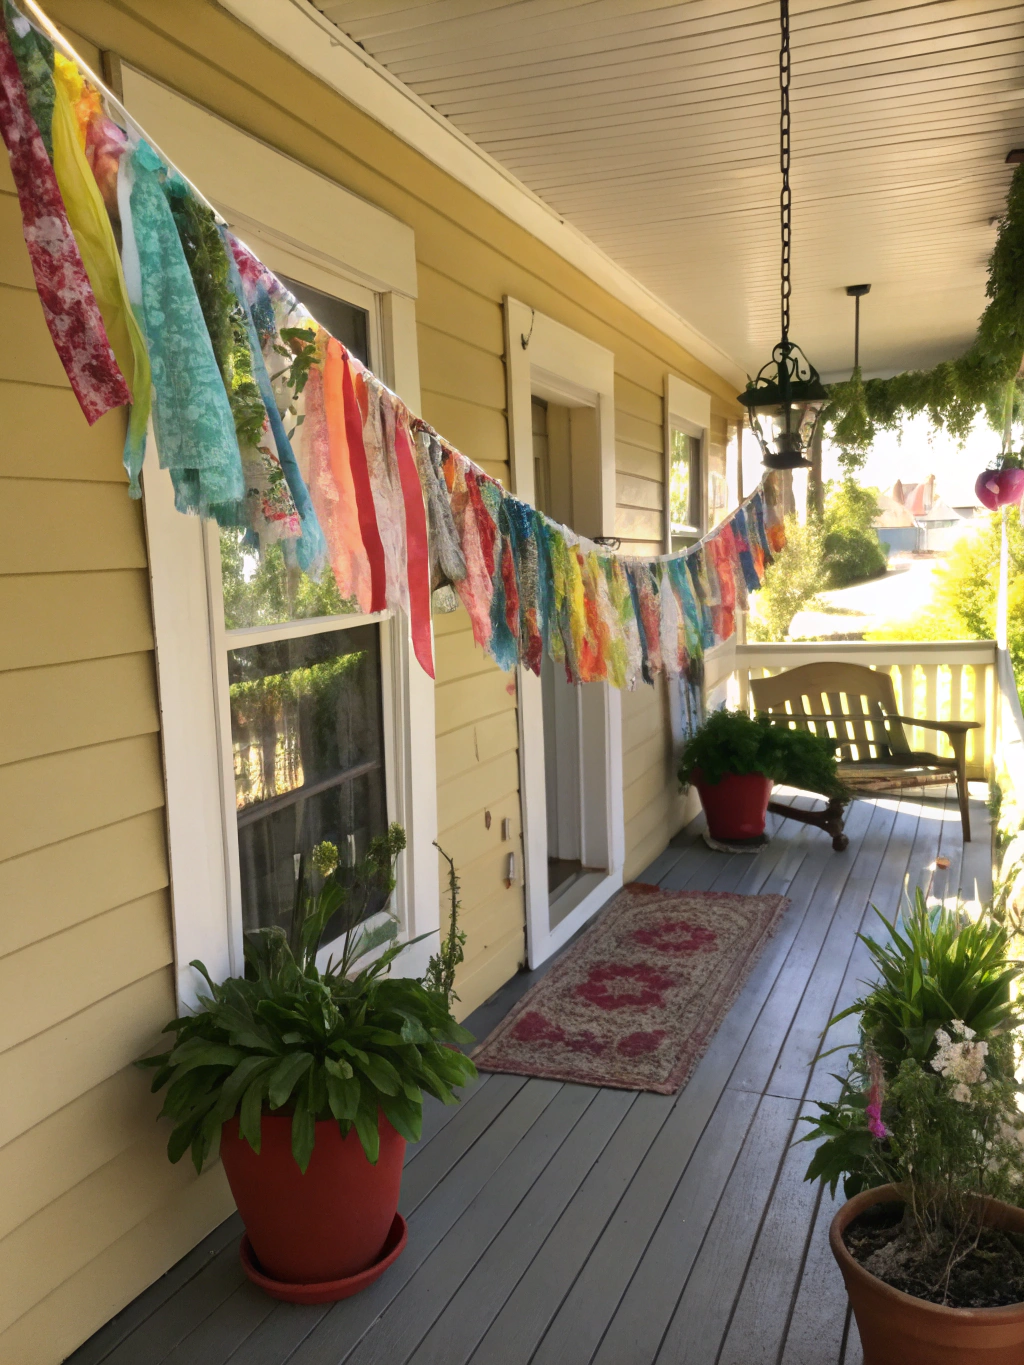
DIY Fabric Scrap Summer Garland
Caption: Ta-da! Your vibrant and cheerful DIY fabric scrap summer garland, ready to brighten any room or outdoor space.
Isn’t it amazing how a collection of simple fabric scraps can transform into such a delightful and festive decoration? This project is a true testament to the beauty of handmade and the joy of upcycling. Whether it’s draped over a mantel, strung across a patio, hung in a child’s room, or used as a party decoration, this garland is sure to be a conversation starter.
The wonderful thing about this project is its versatility. Each garland will be unique, reflecting your personal style and the fabrics you had on hand. Perhaps you opted for a riot of bright colors, a serene coastal palette, or a charming vintage floral theme. No matter your choice, you’ve created something with character and a personal touch that store-bought decorations simply can’t replicate. It’s a great way to add a bit of whimsy and color, especially when you’re looking for quick holiday DIYS. For more ideas on incorporating handmade touches into your seasonal decor, you might want to check out other diy fabric scrap summer garland projects and festive crafts.
We’d absolutely LOVE to see your finished DIY fabric scrap summer garlands! Share a photo in the comments below, or tag us on social media. Let us know if you have any tips or tricks you discovered along the way, or what color combinations you chose for your summer theme!
Pro Tips & FAQs for Your DIY Fabric Scrap Summer Garland
You’ve got the basics down, but here are a few extra tips and answers to frequently asked questions to help you make your diy fabric scrap summer garland project even more successful and enjoyable.
How can I make my DIY fabric scrap summer garland look fuller?
To achieve a fuller look, you have a few options: DIY Fabric Scrap Summer Garland
- Closer Knots: Tie your fabric strips very close together on the twine, minimizing any gaps between them. This will require more fabric strips.
- Wider Strips: Use slightly wider fabric strips (e.g., 1.5 to 2 inches).
- Longer Strips: Longer strips (e.g., 8-10 inches) that are then fluffed out can also contribute to a sense of fullness.
- Double Layering: Tie two strips together in each knot, or alternate between single and double strips.
- Vary Textures: Incorporating fabrics with more body, like a lightweight corduroy or even tulle scrunched up, amongst your cottons can add volume.
What are the best fabrics for a DIY summer fabric garland?
Light to medium-weight fabrics work best. DIY Fabric Scrap Summer Garland
- Cottons & Poly-Cottons: These are ideal due to their wide availability in various colors and patterns, ease of cutting, and how well they hold a knot. Quilting cottons are perfect.
- Linen & Linen Blends: Offer a lovely texture and a slightly more rustic or sophisticated feel. They can fray a bit more, which can be a desirable look.
- Lightweight Denim or Chambray: Add a nice casual, sturdy touch.
- Gingham & Seersucker: Classic summer fabrics that look fantastic in a garland.
- Sheer Fabrics (Organza, Chiffon, Tulle): Can be interspersed for a touch of whimsy and light, but use them along with more opaque fabrics for balance.
- Ribbon Scraps: Don’t forget bits of satin, grosgrain, or lace ribbon!
Avoid very heavy fabrics (like upholstery fabric or heavy canvas) as they won’t drape well and will be bulky to tie. Also, steer clear of fabrics that fray excessively unless you like that super-distressed look or are willing to use pinking shears. Many crafters look for an easy fabric scrap garland tutorial specifically because it can use such a wide variety of common materials.
How do I prevent the fabric edges from fraying too much?
A little fraying adds to the charm of a rustic diy fabric scrap summer garland, but if you want to minimize it: DIY Fabric Scrap Summer Garland
- Pinking Shears: Cut your fabric strips with pinking shears. The zigzag edge helps prevent excessive unraveling.
- Choose Tightly Woven Fabrics: Fabrics like quilting cottons, poplins, or broadcloth tend to fray less than loosely woven ones like some linens or gauzes.
- Fabric Glue/Fray Check: For very specific strips you’re worried about, you could apply a very thin line of Fray Check or clear-drying fabric glue along the edges. This is time-consuming, so reserve it for special fabrics.
- Tearing (for some fabrics): Paradoxically, for fabrics that tear straight (like many 100% cottons), tearing along the grain can sometimes lead to less continuous fraying than cutting with dull scissors. Test on a scrap first.
Can I make this garland no-sew if I don’t want to tie knots?
Absolutely! While tying is the traditional method for this style, if you’re looking for an alternative no-sew method:
- Fabric Glue: You could fold each strip over the twine and secure it with a strong fabric glue. Use clips to hold it in place while it dries. This might be less durable for outdoor use.
- Stapler: For a very quick, rustic look, you could fold the fabric strip over the twine and put a staple through it. This is best for temporary garlands or if the back won’t be visible.
- Fusible Webbing/Hem Tape: Place a strip of fusible webbing inside the fold of the fabric strip (with the twine encased) and iron to fuse it shut. This creates a neat, flat loop.
However, the knotted method is generally the quickest, most secure, and most characteristic for this type of garland. For more no-sew and easy craft inspiration, resources like HGTV often feature"DIY summer fabric garland, Easy fabric scrap garland tutorial, How to make DIY fabric scrap summer garland"and similar projects.
How should I store my DIY fabric scrap summer garland after the season?
To keep your garland looking great for next summer: DIY Fabric Scrap Summer Garland
- Shake it Out: Gently shake off any dust or debris.
- Spot Clean (if needed): If there are any small spots, try to spot clean them carefully with a damp cloth and mild detergent. Avoid soaking the whole garland unless your fabrics are all colorfast and pre-washed.
- Roll, Don’t Fold: The best way to store it is to loosely roll it around a piece of cardboard (like the tube from paper towels or wrapping paper) or your hand. This helps prevent deep creases in the fabric strips.
- Store in a Dry Place: Place the rolled garland in a breathable bag (like a cotton tote or a pillowcase) or a box in a dry, cool place. Avoid plastic bags for long-term storage as they can trap moisture.
Proper storage ensures your beautiful handmade creation will be ready to delight you again next year!
We hope this comprehensive guide has inspired you to create your own diy fabric scrap summer garland! It’s a wonderfully rewarding project that’s kind to your wallet and the planet. This vibrant decoration is perfect for brightening up any space, from a summer party to everyday home décor. You can find even more inspiration for handmade decorations from sources like HGTV’s list of "DIY summer fabric garland, Easy fabric scrap garland tutorial, How to make DIY fabric scrap summer garland" among their favorite holiday ideas.
What are your favorite ways to use up fabric scraps? Do you have any go-to color combinations for summer decorating? We’d love to hear your thoughts and see your creations! Share your comments below, and if you loved this tutorial, please consider sharing it with your fellow DIY enthusiasts or signing up for our newsletter for more creative projects! Happy crafting!

