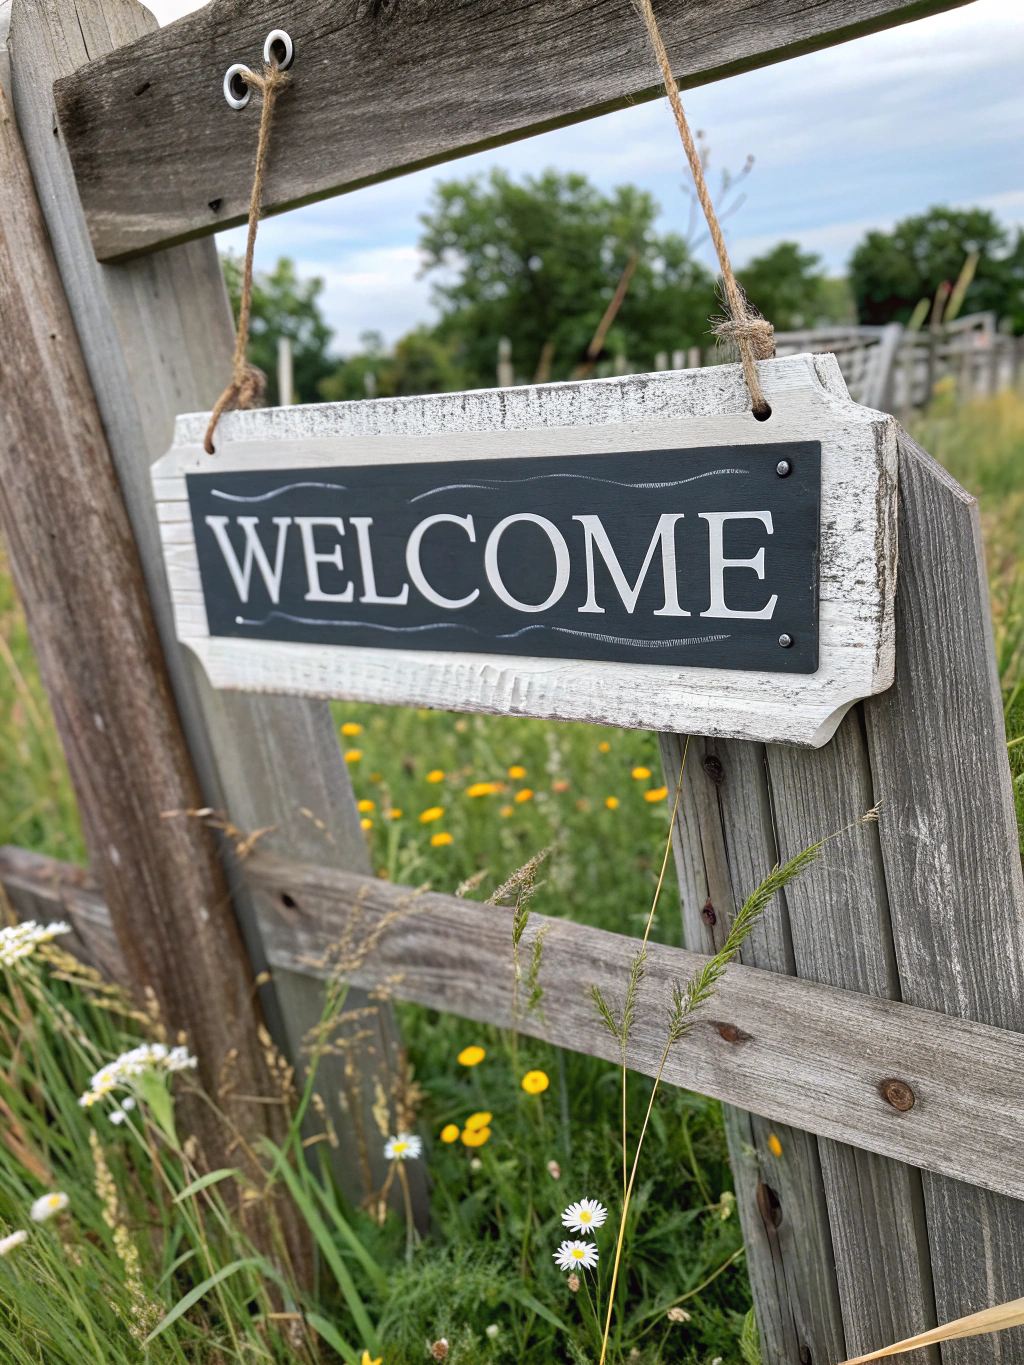
Introduction
Ever scrolled through Pinterest or walked through a home decor store and fallen in love with those charming, rustic farmhouse signs, only to be put off by the hefty price tag or the feeling that they just weren’t quite personal enough? You’re not alone! Creating a DIY farmhouse sign is not only a budget-friendly alternative but also an incredibly rewarding project that allows you to infuse your own personality and style into your home decor.
This guide will walk you through how to create a stunning DIY farmhouse sign in just five easy steps. Forget complicated techniques or expensive tools; we’re focusing on a straightforward approach that even beginners can master. By the end, you’ll have a beautiful, custom piece that will have guests asking, “Where did you get that?!” Imagine the pride in saying, “I made it!” Let’s get those creative juices flowing and craft something truly special for your home.
Table of Contents
Table of Contents
What You’ll Need for Your DIY Farmhouse Sign
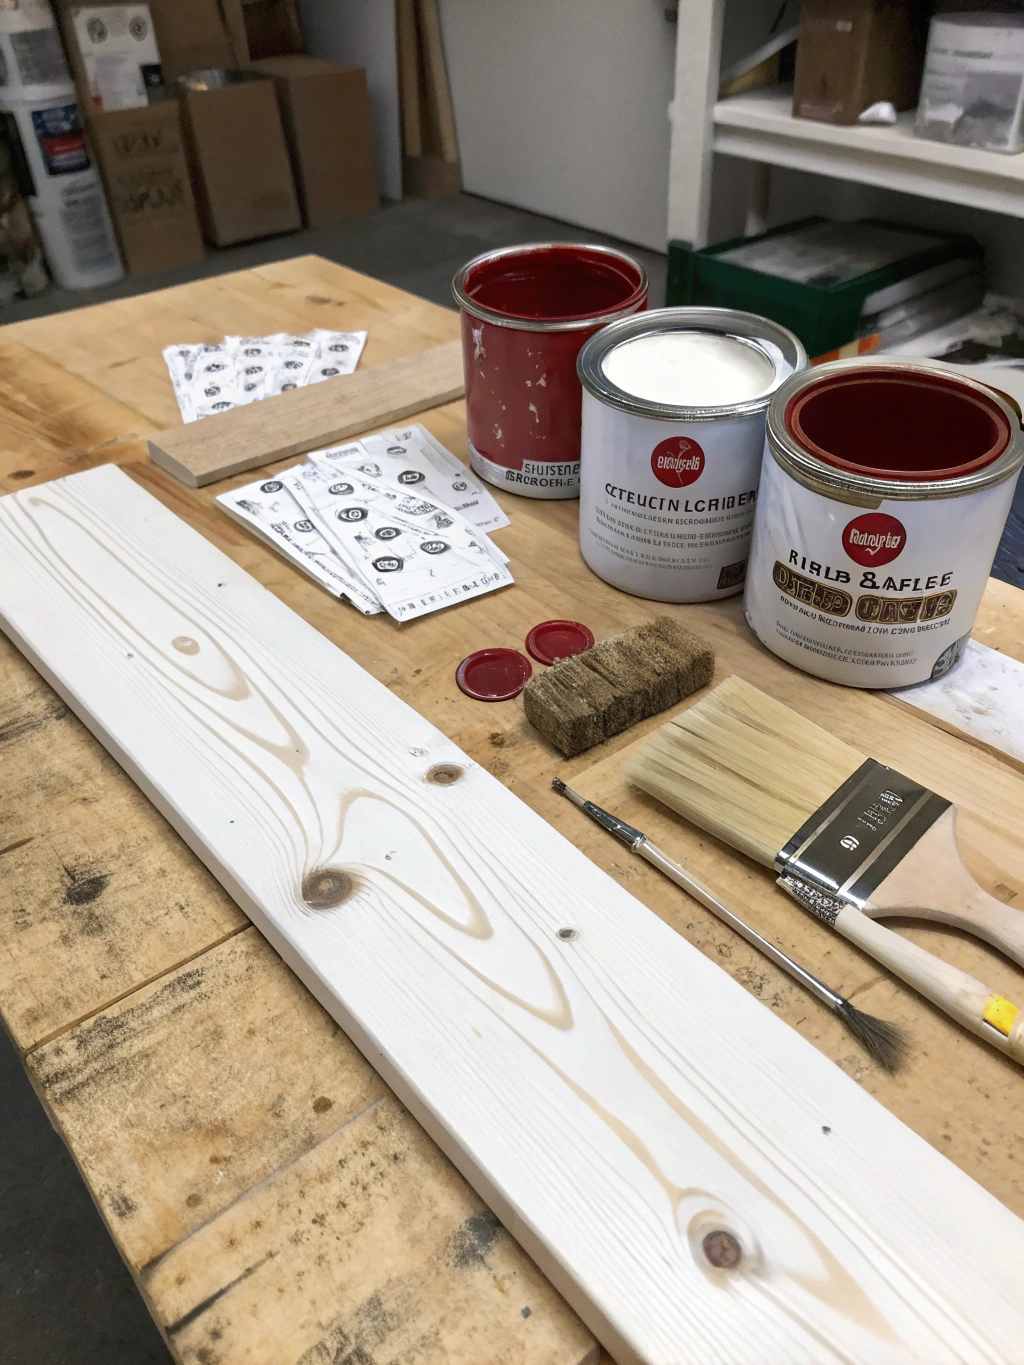
Before we dive into the fun part – the actual making – let’s gather all our supplies. Having everything ready will make the process smooth and enjoyable. Think of this as your pre-flight checklist for a successful crafting mission! Properly preparing your workspace and materials is a key step in any Farmhouse sign DIY project.

*Caption: All the essential tools and materials laid out, ready for your DIY farmhouse sign creation.*
Here’s a list of what you’ll need:
Materials:
- Wooden Board: This will be the base of your sign. Pine is a popular and affordable choice. Common sizes like 1×6, 1×8, or 1×12 boards work well. You can also use pre-cut wood panels from a craft store or even a piece of reclaimed wood for extra rustic charm. The size depends entirely on where you plan to display your sign and the length of your desired quote or design.
- Wood Stain (Optional but Recommended): For that classic farmhouse look. Colors like dark walnut, jacobean, or weathered gray are excellent choices. You can opt for oil-based or water-based, depending on your preference and dry time needs.
- Paint for Background: Typically white, off-white, or cream acrylic or chalk paint. This will be the main color of your sign’s face.
- Paint for Lettering: Black or dark gray acrylic or chalk paint is standard for farmhouse lettering, providing a sharp contrast.
- Wood for Frame (Optional): 1×2 or 1×3 pine strips are perfect for creating a simple, rustic frame. This adds a professional, finished touch.
- Sandpaper: A variety of grits (e.g., 120 and 220) for smoothing the wood and distressing (if desired).
- Stencil (or materials to make one): You can buy pre-made stencils, cut your own with a Cricut/Silhouette machine using adhesive vinyl, or use the freezer paper transfer method.
- Sealer (Optional but Recommended): A matte or satin finish clear polyurethane or wax to protect your sign, especially if it will be in a high-traffic area or a humid environment like a bathroom.
Tools:
- Paint Brushes: Various sizes – a larger one for the background and stain, and smaller detail brushes or a stencil pouncer for the lettering. Foam brushes are also great for applying stain and even coats of paint.
- Fine-Grit Sandpaper or Sanding Block: For smoothing the wood and distressing.
- Rags or Old T-shirts: For applying stain and wiping off excess.
- Measuring Tape or Ruler: Essential for centering your design and cutting frame pieces accurately.
- Pencil: For marking measurements and stencil placement.
- Saw (if cutting your own wood): A miter saw is ideal for frame pieces, but a hand saw and miter box can also work. If you don’t have a saw, most home improvement stores will cut wood to size for you.
- Wood Glue: For attaching the frame.
- Nail Gun or Hammer and Small Finishing Nails: For securing the frame to the sign base.
- Stencil Cutter (e.g., Cricut, Silhouette) or Craft Knife (if making your own stencil): For creating custom lettering.
- Weeding Tool (if using vinyl stencils): For removing the unwanted parts of your vinyl stencil.
- Transfer Tape (if using vinyl stencils): To move your vinyl design from its backing to the wood.
- Scraper Tool or Old Credit Card: For smoothing down vinyl stencils and burnishing transfers.
- Safety Gear: Gloves (especially for staining), safety glasses (if cutting wood), and a dust mask (for sanding).
Having these items on hand will streamline your Steps to make DIY farmhouse sign and ensure you are well-prepared for a fantastic crafting experience. Many home improvement enthusiasts find that investing in good quality basic tools pays off in the long run for various projects.
Step-by-Step Guide to Your Perfect DIY Farmhouse Sign
Alright, DIYers, roll up those sleeves! It’s time to transform that plain piece of wood into a work of art. We’ve broken down the process into five manageable steps. Follow along, take your time, and most importantly, have fun with it!
Step 1: Prepare Your Wooden Board to DIY farmhouse sign

*Caption: Step 1 in creating your DIY farmhouse sign – carefully sanding the wooden board for a smooth finish.*
The foundation of any great DIY farmhouse sign is a well-prepared board. This step is crucial because it dictates how well your stain and paint will adhere and how smooth your final finish will be. If you’re using a raw piece of lumber, it likely has some rough edges or a slightly uneven surface. Even pre-cut craft store panels can benefit from a light sanding.
First, take your sandpaper – start with a medium grit like 120 if the wood is particularly rough, then move to a finer grit like 220 for a super smooth finish. Sand in the direction of the wood grain. This prevents scratching and ensures a professional look. Pay extra attention to the edges and corners, smoothing out any splinters or sharp points.
If your board has any knots and you want a more rustic look, you can leave them, but ensure they are smooth and won’t snag. Once you’re satisfied with the smoothness, wipe away all the sanding dust with a tack cloth or a slightly damp rag. Any lingering dust can create a gritty texture in your paint or stain.
A common pitfall here is insufficient sanding, which can lead to an uneven paint job, or over-sanding, especially with softer woods like pine, which can create divots. Another mistake is not cleaning off the dust properly. Take your time with this stage; a little extra effort now makes a big difference later. This preparation is fundamental to many woodworking projects, similar to those you might find when exploring how to build various home decor items.
Step 2: Stain or Paint the Background of Your DIY Farmhouse Sign

*Caption: Step 2 in your DIY farmhouse sign creation – applying a rich stain to the prepared wooden board or painting the background.*
Now that your board is prepped, it’s time to give it some character! For a classic farmhouse look, many people opt to stain the entire board first (especially if they plan to sand the edges of the painted background later for a distressed look) or just the frame pieces if the sign face will be fully painted. Alternatively, you can directly paint your background color. Let’s discuss both.
If staining, put on your gloves! Dip a clean rag or foam brush into your chosen wood stain. Apply it evenly to the wood, working in the direction of the grain. Let the stain sit for a few minutes (check the manufacturer’s instructions, as penetration time varies). Then, using a clean rag, wipe off any excess stain. The longer you let it sit before wiping, the darker the color will generally be. Allow the stain to dry completely, typically 24 hours, though some quick-dry stains are faster.
If you’re painting the background (e.g., white or cream), ensure your board (or the stained board, if you stained first and it’s fully dry) is clean. Apply a thin, even coat of your background paint. Chalk paint is a popular choice for its matte finish and good adhesion, often requiring less prep. Acrylic paint works well too.
Use long, smooth strokes with your brush. Let the first coat dry completely. It might look a bit streaky or uneven don’t worry! A second coat (and sometimes a third, for lighter colors) will usually provide full, even coverage. Lightly sand between coats with fine-grit sandpaper if you notice any bumps or imperfections, wiping away dust before the next coat. This meticulous approach to layering paint is a technique you’ll find valuable in many “DIY farmhouse sign” projects.
A common mistake is applying paint too thickly, which can lead to drips, an uneven surface, and prolonged drying times. Patience is key here; thin coats are your friend. Another pitfall is not allowing adequate drying time between coats or before moving to the stenciling stage. Rushing can smudge your beautiful base.
Step 3: Create and Apply Your Stencil Design

*Caption: Step 3 for your custom DIY farmhouse sign – carefully applying the chosen stencil design onto the dried background.*
This is where your DIY farmhouse sign truly starts to take on its unique personality! Whether you’ve chosen a favorite quote, a family name, or a charming graphic, applying the design accurately is key. There are several methods for transferring your design.
Using a Vinyl Stencil (e.g., cut with Cricut/Silhouette):
If you’re using a vinyl stencil, cut your design using your machine. Remember to “weed” the design, which means removing the parts where you want the paint to go (the letters themselves). Once weeded, apply transfer tape over the top of your vinyl. Carefully peel the backing off the vinyl, ensuring the design sticks to the transfer tape. Position your stencil onto your dried, painted board. Use your ruler to ensure it’s centered and straight.
Once you’re happy with the placement, use a scraper tool or an old credit card to firmly burnish the vinyl onto the wood. This helps it adhere well and prevents paint bleed. Slowly peel away the transfer tape, leaving the vinyl stencil on the wood. Press down all edges of the stencil again, especially around the letters.
Freezer Paper Method:
Print your design (mirrored) onto the non-waxy side of freezer paper. Carefully cut out the letters to create a stencil. Place the freezer paper stencil, waxy side down, onto your board. Gently iron over the freezer paper with a dry iron on a medium setting. The wax will melt slightly, adhering the paper to the wood, creating a seal.
Pre-made Stencils or Carbon Paper Transfer:
If using pre-made stencils, secure them with painter’s tape. If using carbon paper, place it (carbon side down) on your board, then place your printed design on top. Trace over your design with a pencil or ballpoint pen to transfer the outlines to the wood, which you’ll then fill in by hand.
A critical pitfall in this step is improper stencil adhesion, leading to paint bleeding under the edges. Make sure your stencil is firmly secured. When using vinyl, ensure the background paint is completely cured (often longer than just dry to the touch, sometimes 24-48 hours) to prevent the vinyl from pulling up the paint when removed. Misalignment is another common issue, so take your time with measuring and placement. This meticulous part of “How to create a DIY farmhouse sign” can make or break the final look.
Step 4: Paint Your Lettering

*Caption: Step 4 in completing your DIY farmhouse sign – meticulously painting the letters using your applied stencil.*
With your stencil in place, it’s time for the magic of lettering! This step requires a bit of patience and a light touch. The goal is crisp, clean lines for your DIY farmhouse sign text.
Using your lettering paint (typically black or dark gray for farmhouse style) and a stencil brush, pouncer, or small detail brush, begin to apply the paint within your stencil. The key here is to use very little paint on your brush – this is called the “dry brush” technique. Dab off most of the paint onto a paper towel before dabbing it onto your stencil. Apply the paint in thin, even coats, using an up-and-down dabbing motion rather than brushing side-to-side. Brushing can force paint under the stencil edges. It’s better to apply two or three thin coats than one thick coat. This significantly reduces the chance of paint bleed.
Once you’ve applied enough coats for good coverage (waiting for each to be touch-dry before the next), it’s time for the big reveal. Carefully and slowly peel off your stencil while the last coat of paint is still slightly tacky but not fully wet. If you used freezer paper, it should peel off easily. If you used vinyl, peel it back at a sharp angle, slowly. Waiting until the paint is completely dry can sometimes cause the paint to peel off with the stencil or create jagged edges.
If any paint has bled, don’t panic! You can often clean it up with a very fine-tipped brush and your background paint, or a toothpick/craft knife to gently scrape away small imperfections once fully dry.
A major pitfall is using too much paint, causing bleed. Remember: less is more with stenciling. Another is removing the stencil too hastily, which can smudge wet paint or tear the design. Take your time with both application and removal. This lettering stage is central to many “Farmhouse sign DIY project, Steps to make DIY farmhouse sign, How to create a DIY farmhouse sign” tutorials found across various crafting communities like those on DIYnCrafts for decor inspiration.
Step 5: Frame and Finish Your DIY Farmhouse Sign

*Caption: Step 5, the grand finale for your DIY farmhouse sign – attaching the custom-made frame for a polished look.*
Your sign is looking amazing! The final step is to add a frame (if desired) and a protective finish. This elevates your DIY farmhouse sign from a painted board to a polished piece of decor.
Framing:
If you’re adding a frame, measure the sides of your sign. Cut your 1×2 or 1×3 wood strips to size. Typically, for a simple butt-jointed frame, two pieces will be the exact height of your sign, and two pieces will be the width of your sign plus twice the thickness of your frame wood (so they overlap the ends of the side pieces). You can also miter the corners at 45-degree angles for a more professional look, though this requires a miter saw or miter box.
Stain or paint your frame pieces as desired (often the same stain used on the board initially). Once dry, apply wood glue to the edges of your sign and/or the back of the frame pieces. Position the frame pieces around your sign and secure them with a brad nailer or small finishing nails. Wipe away any excess glue immediately.
Distressing (Optional):
If you want a more rustic, aged look, now is the time to distress your sign. Lightly sand the edges of the sign and frame, and perhaps very gently over some of the lettering or background, to reveal the wood or stain underneath. Focus on areas that would naturally show wear over time.
Sealing:
Once everything is dry and you’re happy with the look, apply a clear sealer if you wish. A matte or satin polyurethane or finishing wax will protect your sign from dust, moisture, and wear. Apply thin, even coats, following the manufacturer’s instructions. This is especially important if your sign will be in a kitchen or bathroom. Allow the sealer to cure completely.
Finally, add a sawtooth hanger or D-rings to the back for easy wall mounting. A common oversight is not pre-drilling pilot holes for nails if using harder wood for the frame, which can cause splitting. Also, ensure your frame is square and fits snugly before nailing. When distressing, it’s easy to overdo it, so start light and add more if needed. The finishing touches are what complete your unique DIY farmhouse sign and make it ready to display proudly.
Your Stunning DIY Farmhouse Sign: The Final Result!
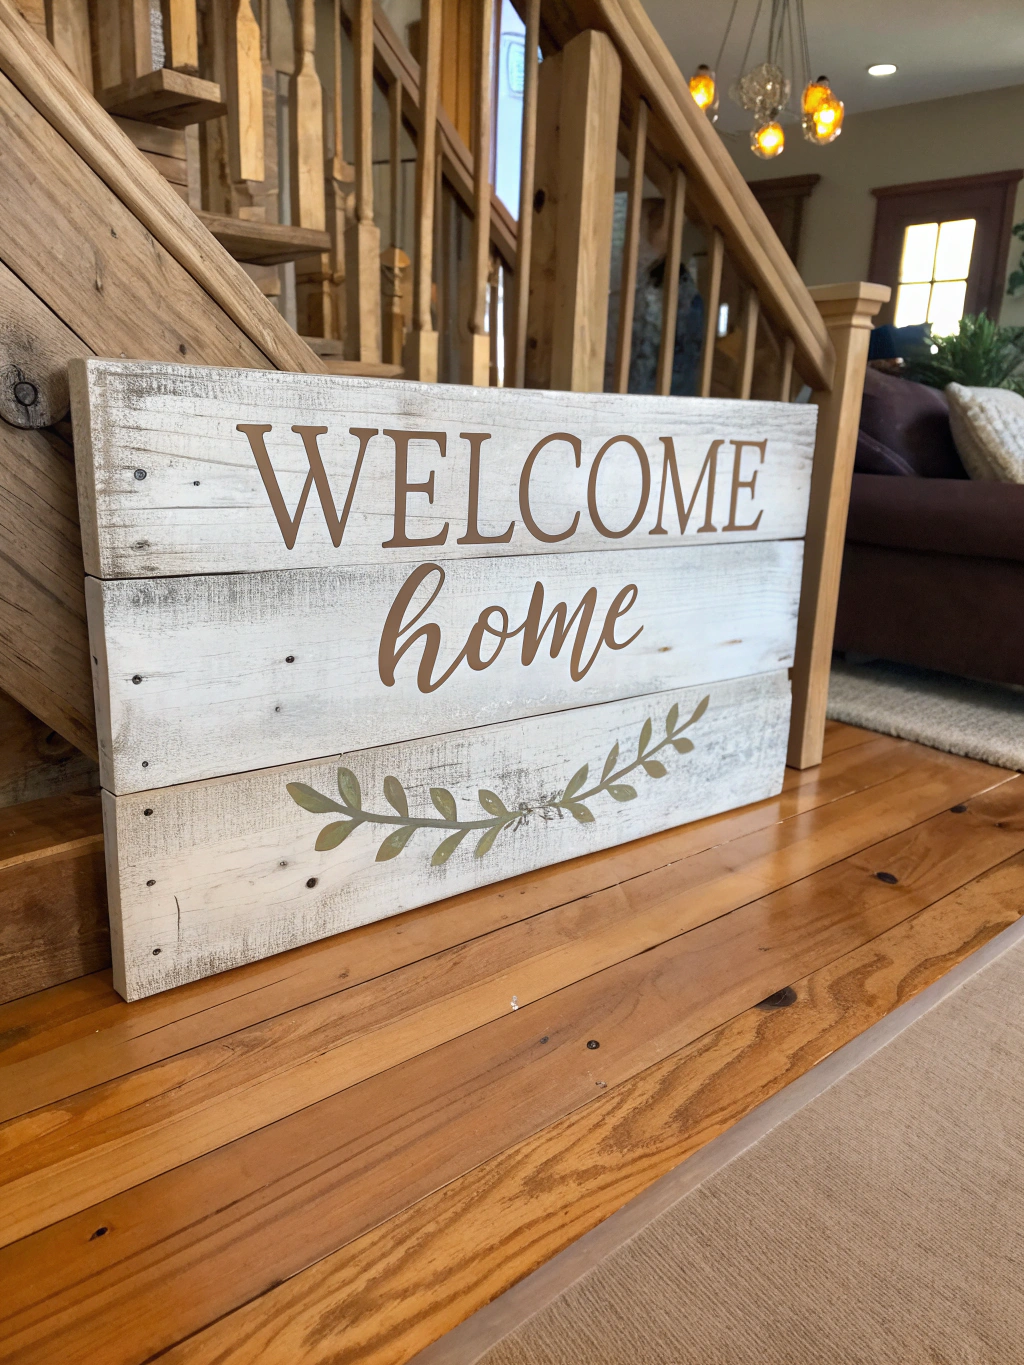
And there you have it! After following these steps, you should be looking at a gorgeous, custom DIY farmhouse sign that’s ready to add warmth and personality to your home. Take a moment to admire your handiwork – you made that!

*Caption: Your beautifully completed DIY farmhouse sign, adding rustic charm to your home decor.*
Imagine this beauty hanging in your entryway, above your mantel, or adding a cozy touch to your kitchen. The best part? It’s completely unique to you, reflecting your style and your message. This project not only saves you money compared to store-bought signs but also gives you a huge sense of accomplishment.
We’d absolutely love to see what you’ve created! Share a picture of your finished DIY farmhouse sign in the comments below, or tag us on social media. Let us know if you have any tips or tricks you discovered along the way – the DIY community thrives on shared knowledge! What quote or design did you choose for your sign?
Pro Tips & FAQs for Your Farmhouse Sign DIY Project
You’ve got the basics down, but here are a few extra tips and answers to common questions to help you master the art of the DIY farmhouse sign and tackle any potential hurdles.
What’s the best type of wood for a DIY farmhouse sign?
Pine is a fantastic and affordable choice for farmhouse signs. It’s readily available, easy to work with (sands, stains, and paints well), and has a nice grain that can add to the rustic charm. Common pine boards (like 1×6, 1×8, 1×10, or 1×12) are perfect. You can also use MDF for a super smooth, knot-free surface if you plan to paint it entirely, but it doesn’t take stain well. Plywood (especially higher-grade birch plywood) is another good option for larger signs as it’s stable and less prone to warping. For an extra rustic touch, reclaimed pallet wood or barn wood can be amazing, but ensure it’s cleaned and prepped properly.
How can I prevent paint from bleeding under my stencil?
This is a common frustration! Here are the key strategies:
- Seal the Stencil Edges: After applying your vinyl or freezer paper stencil, paint a very thin coat of your background color (or a clear matte medium) along the stencil edges. Let this dry. Any bleed will be in the background color, effectively sealing the edge for your lettering color.
- Dry Brush Technique: Use minimal paint on your stencil brush or pouncer. Dab most of it off onto a paper towel before dabbing paint onto the stencil.
- Dabbing Motion: Apply paint with an up-and-down dabbing motion, not brushing side-to-side. This pushes paint down rather than under the stencil.
- Thin Coats: Apply multiple thin coats rather than one thick coat. Let each coat dry to the touch before applying the next.
- Quality Stencil Adhesion: Ensure your stencil is firmly adhered to the wood, with no gaps along the edges. Burnish vinyl stencils well. For freezer paper, make sure the iron has properly melted the wax to create a seal.
- Timing an Removal: Remove the stencil when the last coat of lettering paint is still slightly tacky, not fully wet or bone dry. This often gives the crispest lines.
What are some popular farmhouse sign sayings or designs?
The beauty of a **Farmhouse sign DIY project** is its personalization! However, some popular themes include:
- Welcome Messages: “Welcome,” “Welcome to Our Home,” “Stay Awhile.”
- Family-Focused: Family names (“The [Last Name]s, Est. [Year]”), “Home Sweet Home,” “This is Us,” “Gather.”
- Kitchen Themes: “Bakery,” “Pantry,” “Eat,” “Coffee Bar,” “Bless the Food Before Us.”
- Inspirational Quotes: Short, meaningful phrases about gratitude, love, or simplicity.
- Seasonal Sayings: “Hello Fall,” “Merry Christmas,” “Spring has Sprung.”
- Simple Graphics: Laurels, arrows, farm animal silhouettes (cows, chickens), Mason jars.
Consider the room where the sign will hang and the feeling you want to evoke. Keeping it simple often has the biggest impact. Many crafters also find inspiration by looking at various “”Farmhouse sign DIY project, Steps to make DIY farmhouse sign, How to create a DIY farmhouse sign”” examples on sites like DIYnCrafts for home decor ideas to spark their creativity.
How do I get that popular distressed look on my DIY farmhouse sign?
Distressing adds to the rustic, aged charm. Here are a few techniques:
- Sanding: After your sign is fully painted and assembled (including lettering), use medium or fine-grit sandpaper (e.g., 150-220 grit) to gently sand the edges and corners of the board and frame. You can also lightly sand over the face of the sign, including some of the lettering, to make it look worn. Focus on areas that would naturally experience wear and tear. If you stained your board before painting the background, sanding will reveal some of that stained wood underneath.
- Vaseline or Wax Resist: Before applying your top coat of paint (the background color), rub a bit of Vaseline or a wax candle randomly in small spots where you want distressing. After the paint dries, gently rub or sand these areas, and the paint will easily come off, revealing the wood or base stain underneath.
- Dry Brushing for an Aged Effect: After your main sign is done, you can very lightly dry brush a contrasting color (like a touch of gray over white, or white over dark stain) to give an aged, weathered appearance. Use an almost-dry brush and very light strokes.
The key to distressing is subtlety. Start light – you can always add more, but it’s hard to undo over-distressing.
Can I make a DIY farmhouse sign without a stencil cutting machine like a Cricut?
Absolutely! While cutting machines are handy, they aren’t essential. Here are alternatives for your “How to create a DIY farmhouse sign” project:
- Pre-made Stencils: Craft stores offer a wide variety of letter, number, and design stencils.
- Freezer Paper Method: Print your design (mirrored) onto the non-waxy side of freezer paper. Carefully cut out the letters with a craft knife to create your stencil. Iron it (waxy side down) onto your board.
- Carbon Paper Transfer: Print your design normally. Place carbon paper (graphite paper) ink-side down on your wood, then place your printed design on top. Trace firmly over the design with a pencil or ballpoint pen. This will transfer the outlines to the wood, which you can then carefully hand-paint with a fine detail brush.
- Projector Method: If you have a small projector, you can project your design onto the board and trace it with a pencil, then hand-paint.
- Sticker Letters: For a simpler approach, you can use high-quality sticker letters, though this may not be as durable or have the same painted charm.
Hand-painting, while more time-consuming, can also give a uniquely rustic and charming look that is authentically handmade.
We hope this comprehensive guide empowers you to create your very own stunning DIY farmhouse sign! It’s a project that combines creativity with a touch of woodworking and results in a piece you can be proud of for years to come.
What are you waiting for? Gather your supplies and start crafting! Don’t forget to share your masterpieces with us in the comments below. If you have any more questions or want to share your favorite farmhouse sign tips, we’re all ears.
Happy DIYing!
P.S. Loved this tutorial? Sign up for our newsletter for more DIY projects, home improvement tips, and exclusive content delivered straight to your inbox! And be sure to share this post with your fellow craft-loving friends on social media!


