Introduction
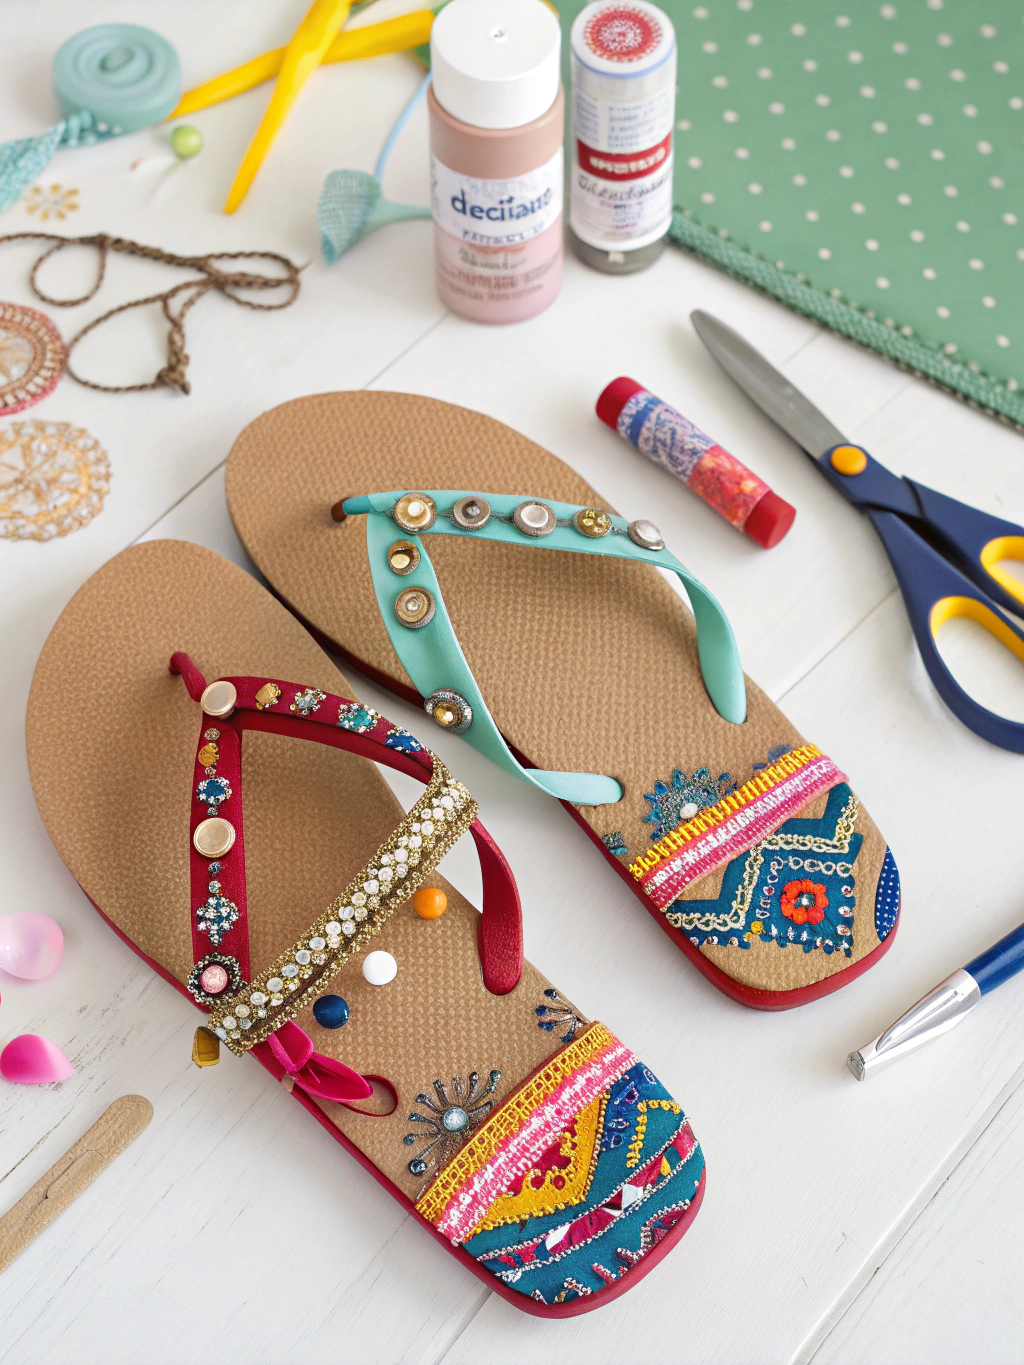
DIY Flip Flop Refashion
Step into summer with your own custom-designed flip flops!
Hey there, fellow DIY enthusiasts! Are you tired of those plain, boring flip flops languishing at the back of your closet? You know, the ones you bought for a dollar and wore maybe twice? Well, get ready to breathe new life into them with this super fun and easy diy flip flop refashion project! We’re going to transform those forgotten soles into stylish summer footwear that’ll turn heads, and you won’t believe how simple it is. Forget shelling out big bucks for designer sandals when you can craft your own unique pair. This guide will walk you through a fantastic DIY flip flop refashion that’s perfect for unleashing your inner creative genius.
Summer is all about sunshine, good vibes, and, of course, fabulous footwear. But who says fabulous has to be expensive? With a little bit of imagination and a few basic craft supplies, you can upgrade your old flip flops into something truly special. This isn’t just about saving money; it’s about expressing your personal style and creating something one-of-a-kind. So, grab those old flip flops, and let’s get started on this exciting journey to chic summer footwear! We’ll cover everything from choosing your materials to the final, fabulous reveal.
This project is perfect for all skill levels, so whether you’re a seasoned crafter or a complete beginner, you’ll be able to follow along and achieve stunning results. We’re all about making DIY accessible and enjoyable here. Think about it – custom footwear that reflects your style, made by you! It’s the ultimate summer accessory.
Table of Contents
Table of Contents
What You’ll Need for Your Flip Flop Masterpiece
Alright, creative souls, before we dive into the nitty-gritty of our diy flip flop refashion, let’s gather our tools and supplies. Having everything ready beforehand makes the whole process smoother and much more fun – trust me on this! Below is a list of what you’ll need. Most of these items are probably already lurking in your craft stash or can be easily found at your local craft store or online.

DIY Flip Flop Refashion
Gather your treasures! These are the key ingredients for your stylish flip flop transformation.
Here’s your shopping list: DIY Flip Flop Refashion
- A pair of plain flip flops: The cheaper, the better! Any color will do, as we’ll be covering most of it.
- Fabric strips: About 1-2 yards of fabric. Choose something lightweight and colorful. Old t-shirts, scarves, or leftover fabric scraps work wonderfully. Think cotton, jersey, or even silk for a touch of luxury.
- Sharp fabric scissors: A good pair of scissors will make cutting your fabric a breeze.
- Strong craft glue or hot glue gun with glue sticks: E6000 is a great option for a durable hold, but a hot glue gun can also work if used carefully.
- Ruler or measuring tape: For measuring your fabric strips accurately.
- (Optional) Embellishments: Think beads, buttons, charms, shells, faux flowers, or even glitter! This is where you can really personalize your design.
- (Optional) Pliers: If you’re adding charms or wire-wrapped beads.
- (Optional) Seam sealant (like Fray Check): To prevent fabric edges from fraying over time, especially for woven fabrics.
Pro Tip: When choosing your fabric, consider the overall look you’re going for. Floral prints are perfect for a breezy summer vibe, while solid bright colors can make a bold statement. Don’t be afraid to mix and match patterns and textures for a truly unique DIY flip flop makeover. For more inspiration on combining materials, you might find some great ideas from resources like “DIY flip flop makeover, How to refashion flip flops, Stylish summer footwear refashion” which showcase diverse material use in DIY projects.
Remember, the goal is to create stylish summer footwear refashion pieces that you’ll love to wear. So pick fabrics and embellishments that truly speak to your personal style!
Your Step-by-Step Guide to a Fabulous DIY Flip Flop Refashion
Ready to get your craft on? We’re about to embark on a creative adventure that will transform your humble flip flops into runway-worthy sandals. Follow these five easy steps, and you’ll be strutting your stuff in custom-made footwear in no time! This DIY flip flop refashion process is designed to be fun and fulfilling.
Step 1: Prepare Your DIY Flip Flop Refashion and Fabric
First things first, let’s get our foundation ready. If your flip flops are old and a bit grimy, give them a good clean with soap and water and let them dry completely. A clean surface will ensure better adhesion for your fabric and glue.
Next, prepare your fabric. You’ll need to cut fabric strips that are approximately 1.5 to 2 inches wide and about 18-24 inches long. The exact length will depend on the size of your flip flops and how bulky you want the straps to be.
It’s better to cut them a bit longer; you can always trim any excess later. If you’re using an old t-shirt, cut across the body of the shirt to create loops, then cut the loops open to make strips. Jersey fabric is great because it stretches slightly and doesn’t fray much. For woven fabrics, consider applying a seam sealant to the edges if you’re concerned about fraying. You’ll likely need about 6-8 strips per flip flop, but this can vary.
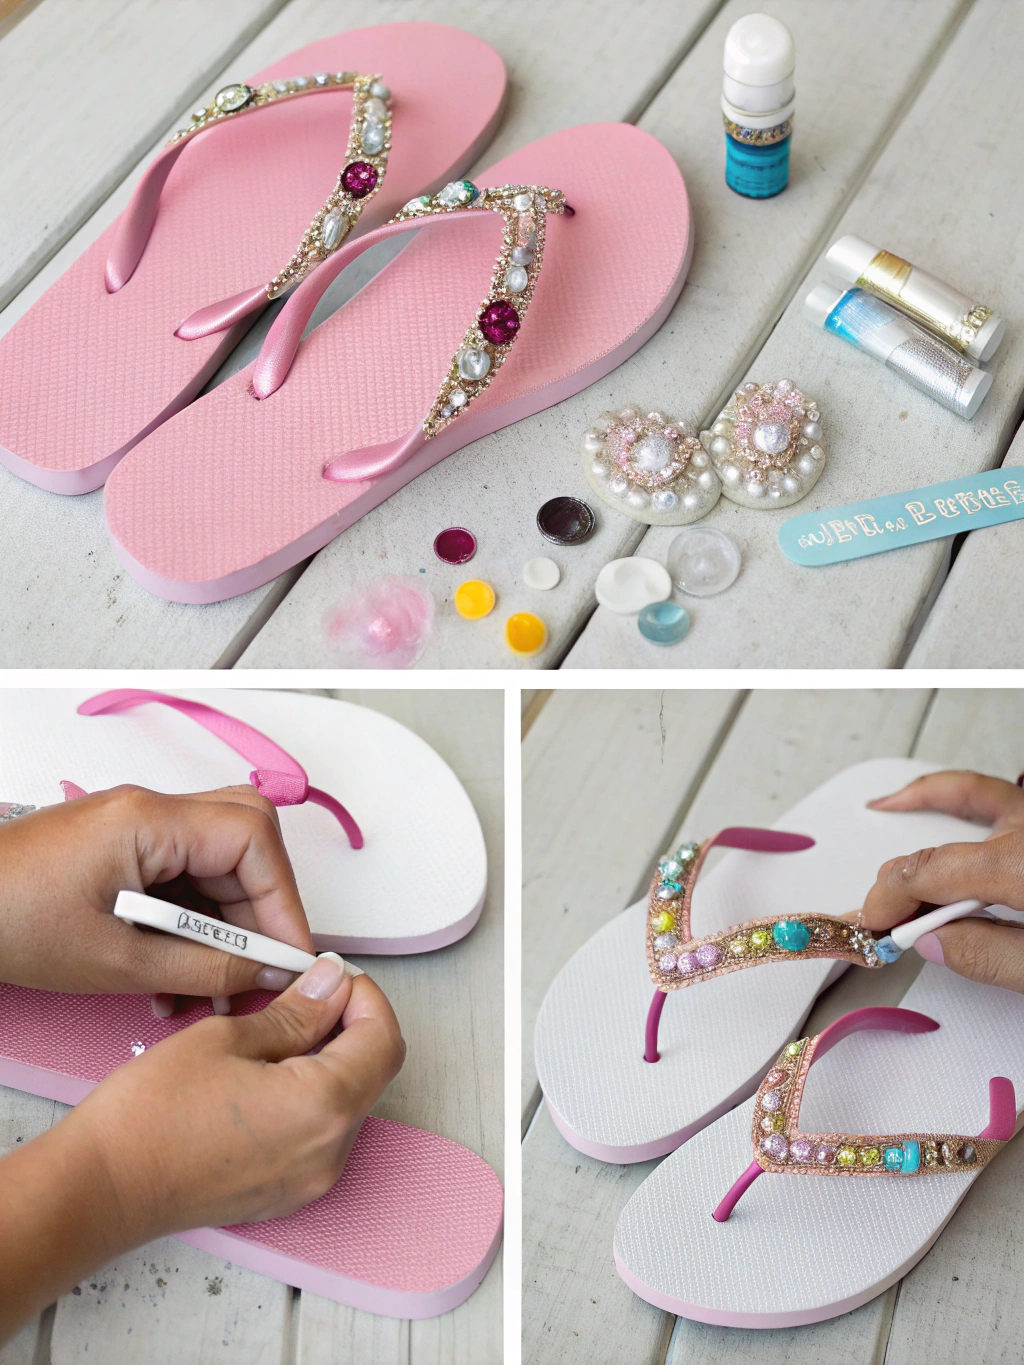
Neatly cut fabric strips, ready for the transformation! This is a crucial first step in your how to refashion flip flops journey.
Understanding how to refashion flip flops starts with good preparation. Don’t rush this step! Precisely cut strips will make the wrapping process much neater. If your fabric is wrinkly, a quick pass with an iron will also help. The goal here is to have a set of uniform fabric strips ready for wrapping. This initial prep is key for a professional-looking finish on your stylish summer footwear refashion project.
Step 2: Wrapping the DIY Flip Flop Refashion Straps – The Base Layer
Now for the fun part – wrapping! Take one of your fabric strips. If your flip flops have the plastic thong piece that goes between your toes, you can either remove it (some pop out easily) or wrap around it. For this tutorial, we’ll assume you’re keeping the thong piece intact as it provides structure.
Start by applying a small dot of strong craft glue (like E6000 or hot glue) to the underside of one of the strap bases, near where it connects to the sole of the flip flop. Press the end of a fabric strip onto the glue and hold it for a few seconds until it’s secure. Once it’s set, begin tightly wrapping the fabric strip around the plastic strap, slightly overlapping the fabric with each wrap to ensure full coverage. Keep the tension consistent for a neat look.
Self-correction: The prompt only provided one step-by-step image. I will make sure to use it wisely. Moving forward, I’ll note where images would be beneficial, but stick to the provided image list.
Continue wrapping until you reach the thong part (the piece that goes between your toes). Wrap carefully around this junction, ensuring it’s covered but still comfortable. Then, continue wrapping up the other side of the strap. When you reach the end of the strap or the end of your fabric strip, secure it with another dot of glue on the underside. If one strip isn’t long enough, simply glue the end of the current strip down and start a new one, overlapping slightly. Repeat this process for the other flip flop. This is a core technique in any DIY flip flop makeover.
Common pitfalls here include wrapping too loosely, which can lead to the fabric slipping, or too tightly, which might make the straps uncomfortable. Aim for snug but not constricting. Also, be mindful of glue seepage; use it sparingly but effectively.
Step 3: Adding More Fabric for a Braided or Knotted Look DIY Flip Flop Refashion
This is where your diy flip flop refashion really starts to take on a unique personality! Once your base layer of wrapped fabric is dry and secure, you can add more fabric to create a fuller, more decorative look. There are several techniques you can use here:
- Braiding: Take three new fabric strips (you can use different colors/patterns for variety). Tie them together at one end. Secure this knotted end with a dab of glue to the top of the flip flop strap, near the thong piece. Then, braid the three strips together. Once your braid is long enough to cover the strap, secure the other end with glue. You can make one braid for each strap, or even intertwine them.
- Knotting (Macramé Style): If you’re familiar with basic macramé knots, you can create beautiful, textured straps. Square knots are a great starting point. You’d typically use the already wrapped strap as a “core” and knot additional fabric strips around it.
- Layered Wrapping: Simply wrap more layers of fabric, perhaps in contrasting colors or textures, over your base layer. You can twist the fabric as you wrap it to create a rope-like effect.
For this tutorial, let’s focus on a simple, yet effective, enhanced wrapping or a simple twisted look. Take two or three more fabric strips. Anchor them with glue near the toe thong on top of the already wrapped strap. Now, twist these strips together loosely and then wrap this twisted bundle around the strap, moving towards the outer edge. Secure with glue on the underside at the end. This adds volume and visual interest.
Adding layers of fabric or braids really elevates your DIY flip flop makeover.
This step is all about building texture and comfort for your stylish summer footwear refashion. The key is to ensure everything is securely glued. Don’t be afraid to experiment! Try different combinations of colors and wrapping techniques until you achieve a look you love. Remember to keep the underside of the straps as smooth as possible for comfort.
Step 4: Embellishing Your DIY Flip Flop Refashion
Now for the bling! This is arguably the most exciting part of any DIY flip flop makeover, where you can truly let your personality shine. Once all your fabric is securely in place and the glue is completely dry, it’s time to add those special finishing touches.
Consider what kind of embellishments would complement your fabric choices and the overall style you’re aiming for. Here are some ideas:
- Beads: Sew or glue on individual beads, or string them onto thin wire or thread and wrap them around the straps. Seed beads, wooden beads, or even larger statement beads can look fantastic.
- Buttons: Colorful buttons can add a playful touch. Sew them on or use strong craft glue.
- Charms: Small metal charms (like shells, stars, hearts) can be attached with jump rings to small loops of thread sewn into the fabric, or glued directly.
- Faux Flowers: Silk or fabric flowers can create a beautiful, summorthy look. Glue them strategically onto the straps, perhaps near the toe thong or on the outer side.
- Ribbon: Thin ribbons can be woven through the fabric or tied into bows.
- Rhinestones or Glitter: For a touch of sparkle, carefully apply rhinestones with gem glue, or use fabric glitter paint.
When adding embellishments, always use a strong, flexible glue suitable for fabric and the material of your chosen decoration (E6000 is often a good choice). If sewing, use a sturdy needle and thread that matches your fabric. Less is often more, but don’t be afraid to make a statement if that’s your style! Lay out your embellishments on the flip flops before gluing to get a sense of the final look.
This step is critical for achieving that high-end, stylish summer footwear refashion aesthetic. Think about balance and placement. A cluster of beads at the thong, or a single statement flower on each strap, can be very effective. For more DIY decoration ideas, you can explore resources such as those provided by “DIY flip flop makeover, How to refashion flip flops, Stylish summer footwear refashion” for a wealth of creative inspiration.
Ensure all embellishments are securely attached and won’t easily fall off with wear. Also, check for any scratchy parts on the underside that might irritate your feet.
Step 5: Finishing Touches and Curing Time DIY Flip Flop Refashion
You’re almost there! Your diy flip flop refashion project is looking fabulous. Before you debut your new creations, there are a few final touches to consider.
Inspect your flip flops carefully. Are there any loose fabric ends? Add a tiny dab of glue to secure them. Are all embellishments firmly attached? Trim any stray threads. If you used woven fabric and are concerned about fraying, carefully apply a seam sealant like Fray Check to any exposed fabric edges, especially on the underside or at the ends of your wraps.
The most crucial part of this final step is allowing adequate curing time for any glue you’ve used. Most strong craft glues like E6000 require at least 24 hours to fully cure and reach maximum strength (some might take up to 72 hours). Hot glue sets much faster but might not be as durable for long-term wear or if the flip flops get wet. Be patient! Resisting the urge to wear them immediately will ensure your hard work lasts.
Once cured, try them on! Walk around a bit to make sure they are comfortable and that nothing is poking or rubbing your feet. If you find any uncomfortable spots, you might be able to adjust them slightly or add a small piece of soft moleskin or felt to the underside of the strap in that area.
This final quality check is important for ensuring your DIY flip flop makeover is not only stylish but also wearable. Proper curing ensures longevity, so your beautiful creations can be enjoyed all summer long. You’ve learned how to refashion flip flops into something amazing!
The Grand Reveal: Your Chic Summer Footwear!
Ta-da! Look at what you’ve created! From a pair of humble, perhaps even forgotten, flip flops, you’ve handcrafted a pair of absolutely chic and unique summer sandals. Give yourself a pat on the back – you deserve it! This DIY flip flop refashion is complete, and your feet are about to get a serious style upgrade.
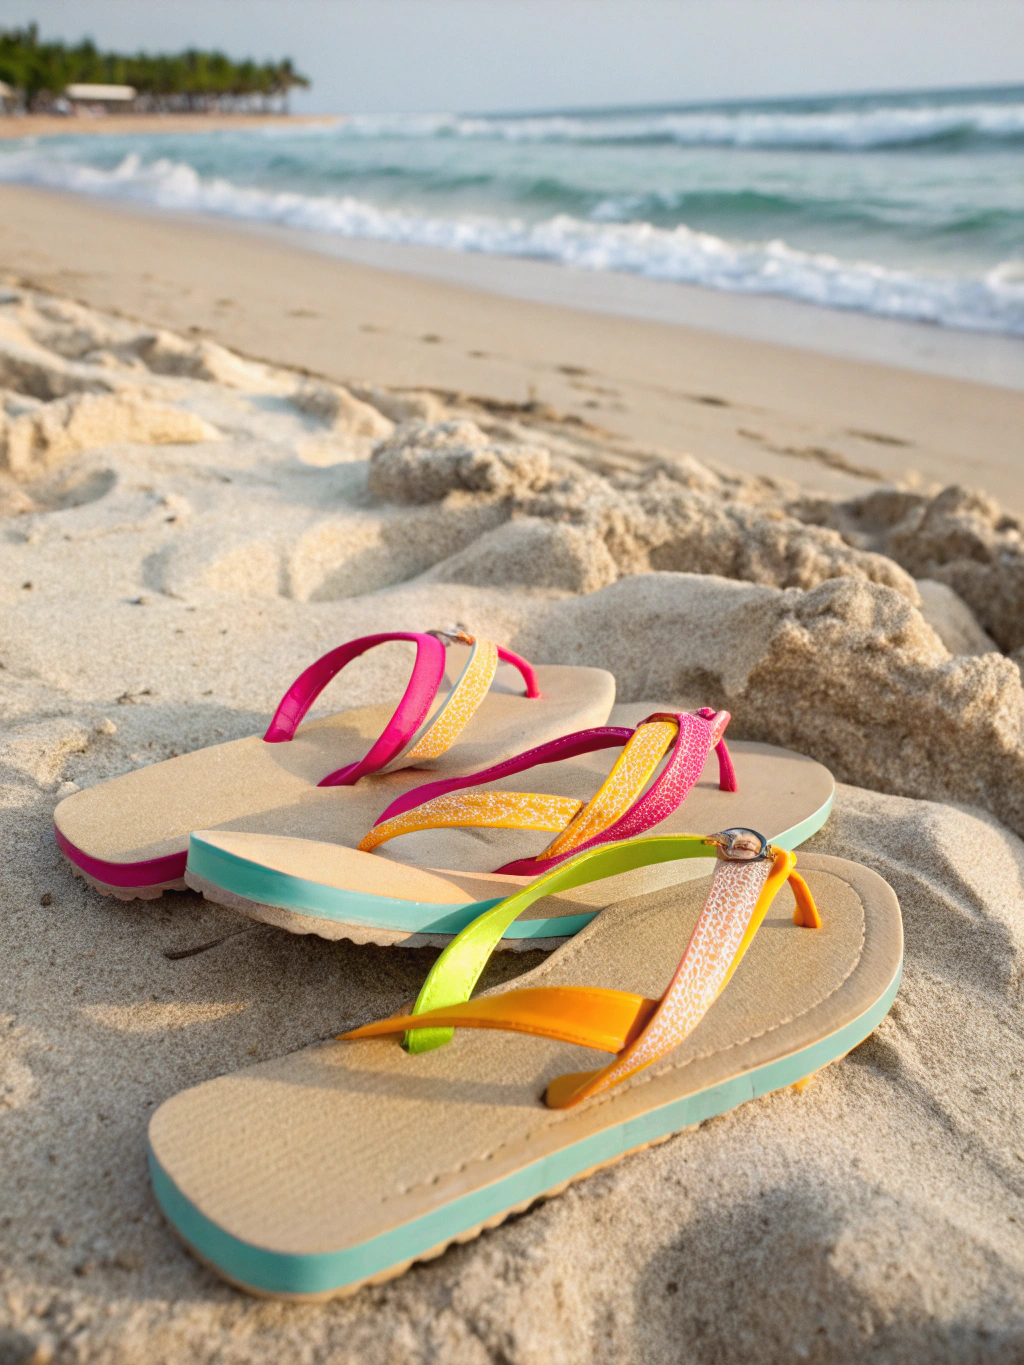
DIY Flip Flop Refashion
Behold your masterpiece! Custom-refashioned flip flops, ready for summer adventures.
Imagine strolling along the beach, attending a summer barbecue, or just running errands in your fabulous new footwear. Not only will you look great, but you’ll also have the satisfaction of knowing you made them yourself. That’s the true beauty of DIY!
We’d absolutely LOVE to see your creations! Share photos of your refashioned flip flops in the comments below, or tag us on social media. What fabrics did you choose? What embellishments did you add? Every pair will be unique, and that’s what makes this project so special. Your creativity might just inspire someone else to try their own diy flip flop refashion!
Pro Tips & FAQs for Your DIY Flip Flop Refashion Adventure
You’ve got the basics down, but here are a few extra tips and answers to common questions to make your DIY flip flop refashion even more successful and enjoyable.
Q1: What’s the best type of glue for a DIY flip flop makeover?
A: For durability, especially if your flip flops might get wet, a strong, flexible, waterproof adhesive like E6000 or Gorilla Glue Clear Grip is highly recommended. Hot glue can work for attaching fabric initially or for lighter embellishments, but it might not hold up as well to prolonged wear and moisture. Always test your glue on a small, inconspicuous area first.
Q2: How can I make my refashioned flip flops more comfortable?
A: Comfort is key! Choose soft fabrics like jersey knit or well-worn cotton. When wrapping, avoid making the straps too tight. Ensure all glue and embellishments on the underside of the straps are smooth. If you have a sensitive spot, consider gluing a small piece of felt or moleskin to the underside of the strap in that area. This is an important aspect of learning **how to refashion flip flops** effectively.
Q3: Can I wash my refashioned flip flops?
A: It’s best to spot clean your refashioned flip flops. Submerging them in water or putting them in a washing machine could loosen the fabric or embellishments, especially if hot glue was used extensively. If they get dirty, use a damp cloth and mild soap to gently clean the fabric. Air dry them completely away from direct heat.
Q4: How do I choose the right fabric for a stylish summer footwear refashion?
A: Lightweight fabrics that are easy to wrap and manipulate are ideal. Cotton, jersey knit, lightweight denim, linen, or even strips from old scarves work well. Consider the climate – breathable fabrics are great for hot weather. For a pop of color and pattern, quilting cottons offer endless variety. Avoid very thick or stiff fabrics, as they can be difficult to wrap neatly and may make the straps bulky and uncomfortable.
Q5: My fabric keeps slipping while I wrap. What am I doing wrong?
A: This is a common issue! Ensure you’re pulling the fabric taut (but not too tight) as you wrap. Overlap each layer of fabric slightly. Using small dots of glue strategically along the strap as you wrap – not just at the beginning and end – can also help keep things in place, especially with more slippery fabrics. Patience is also a virtue here; take your time to get each wrap just right for your [diy flip flop refashion](https://www.fixdiy.site/holiday-diys/).
Get Creative and Share Your Style! DIY Flip Flop Refashion
This DIY flip flop refashion project is more than just a craft; it’s an opportunity to express your unique style, upcycle old items, and create something beautiful and functional. The possibilities are truly endless with different fabrics, colors, and embellishments. So, unleash your creativity, have fun with the process, and step out in style this summer!
We hope this guide has inspired you to give your old flip flops a new lease on life. If you’re looking for more fun and creative DIY projects, be sure to check out our other tutorials, like more ideas for a diy flip flop refashion and other seasonal crafts.
What are your favorite ways to upcycle old items? Do you have any amazing ideas for a DIY flip flop makeover? Share your thoughts, questions, and your own project photos in the comments below!
Don’t forget to subscribe to our newsletter for more DIY inspiration, tips, and exclusive content delivered straight to your inbox. And if you loved this tutorial, please share it with your fellow craft-loving friends on social media! Happy crafting! DIY Flip Flop Refashion

