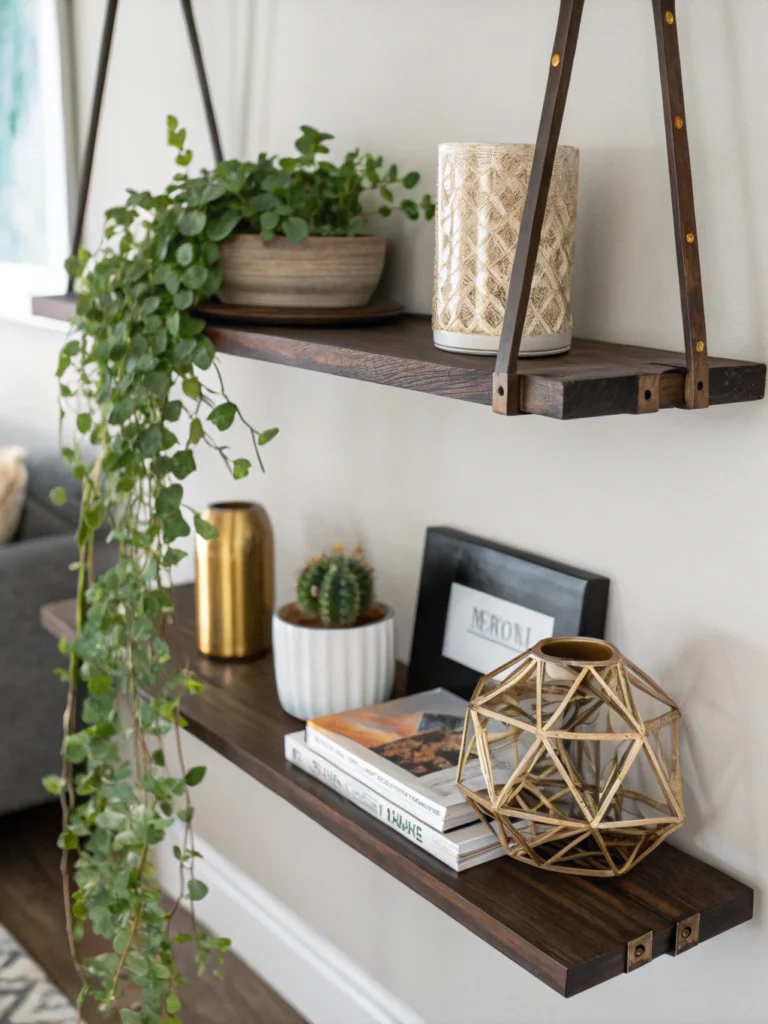
Welcome, home decor enthusiasts and aspiring DIYers! Are you looking for a simple yet impactful way to elevate your home’s style and organization? Look no further than the versatile and charming DIY hanging shelf. These beauties aren’t just shelves; they’re statements. A hanging shelf is essentially a plank of wood (or other material) suspended on a wall, typically either by ropes for a rustic or bohemian vibe, or by sleek brackets for a more modern or industrial look.
The benefits are plentiful: they save precious floor space, turn empty walls into eye-catching displays, offer a fantastic way to showcase your favorite trinkets, books, or plants, and best of all, they’re incredibly customizable! Today, we’re diving deep into how you can create your very own. We’ll explore two popular methods: the ever-charming rope-suspended shelf and the sturdy, classic hidden-bracket (or visible bracket) shelf. Get ready to unleash your inner craftsperson!
Quick Guide: Learn to craft a stylish DIY hanging shelf! This easy tutorial guides you through building beautiful storage using rope or brackets, perfect for any room.
Table of Contents
Why Choose a DIY Hanging Shelf? Beyond Just Storage
Sure, a shelf holds things. But a DIY hanging shelf? That’s a whole different story. It’s about infusing your personality into your living space.
- Cost-Effective Charm: Let’s be honest, custom shelving can be pricey. Going the DIY route means you get high-end style on a friendly budget. You control the material costs and avoid labor charges.
- Perfectly Personalized: Dream of a dark walnut finish? Or perhaps a vibrant pop of color? With a DIY project, you’re the designer. Choose the wood, the stain, the rope color, or the bracket style to perfectly match your existing decor.
- A Dose of DIY Satisfaction: There’s an incredible sense of accomplishment that comes with creating something beautiful and functional with your own two hands. Every time you admire your shelf, you’ll feel that little spark of pride.
- Ideal for Awkward Nooks & Crannies: Got a small, underutilized wall space? A compact DIY hanging shelf can transform it into a focal point or a nifty storage spot. They’re brilliant for bathrooms, hallways, or above desks.
- Beginner-Friendly Fun: This project is a fantastic entry point into the world of DIY. The steps are straightforward, and the results are impressively quick, giving you that much-needed confidence boost for future projects.

Your Essential DIY Hanging Shelf Toolkit
Before you embark on your creative journey, let’s gather the troops – your materials and tools! Having everything ready will make the process smooth and enjoyable.
Materials: DIY Hanging Shelf
- Wood Board: Pine is a popular, affordable choice for beginners. Oak, maple, or even reclaimed wood can add unique character. Ensure it’s at least ¾ inch thick for sturdiness.
- For Rope-Suspended Shelves: DIY Hanging Shelf
- Rope: Natural jute, cotton rope, or even leather cording. Choose a thickness that complements your shelf size (e.g., ¼ to ½ inch diameter).
- Ceiling Hooks or Wall-Mounted Decorative Rings/Cleats: Ensure they are rated to hold more than the anticipated weight of your shelf and its contents.
- For Bracket Shelves: DIY Hanging Shelf
- Shelf Brackets: Two per shelf (or more for very long shelves). These come in various styles: simple L-brackets, decorative scroll brackets, or “invisible” floating shelf brackets.
- Wood Screws: Appropriate length for your wood thickness and bracket type.
- Wall Anchors (if not screwing into studs): Crucial for drywall installations. Ensure they are rated for the weight.
- Sandpaper: Various grits (e.g., 120 and 220) for a smooth finish.
- Wood Stain, Paint, or Sealer (Optional): To customize and protect your shelf.
Tools: DIY Hanging Shelf
- Drill with Drill Bits: For pilot holes, rope holes, and driving screws.
- Saw (Hand Saw, Jigsaw, or Miter Saw): If your wood isn’t pre-cut to your desired length. Many hardware stores will cut wood for you.
- Stud Finder: Absolutely essential for securely mounting your shelf to the wall.
- Level (Torpedo or longer): To ensure your shelf isn’t wonky.
- Measuring Tape & Pencil: For accurate measurements.
- Safety Goggles & Gloves: Safety first, always!
- Clamps (Optional but helpful): To hold wood steady while drilling or gluing.
- Paintbrushes or Rags: For applying stain or paint.
Step-by-Step: Building Your DIY Hanging Shelf
Alright, tools at the ready? Let’s get building! We’ll walk through the general process, with specific call-outs for rope versus bracket methods.
Step 1: Plan Your Perfect Shelf DIY Hanging Shelf
- Location, Location, Location: Decide where your shelf will go. Use your stud finder to locate wall studs. This is the most secure place to anchor your shelf, especially for heavier items. Mark the stud locations lightly with a pencil.
- Size Matters: Determine the length and depth of your shelf. Consider what you’ll place on it. A common depth is 6-10 inches.
- Sketch it Out: A quick sketch can help visualize the final look and rope/bracket placement.
Step 2: Prepare Your Wood Plank
- Cut to Size: If your wood isn’t already the desired length, carefully measure and cut it using your saw. Remember to measure twice, cut once! If you’re not comfortable an_t_d_o_, this, most hardware stores offer a cutting service.
- Sand it Smooth: Start with a coarser grit sandpaper (like 120) to smooth out any rough edges or imperfections. Follow up with a finer grit (like 220) for a silky-smooth finish. Wipe away all dust with a tack cloth or damp rag.
- Optional Pre-Finishing: Some people prefer to stain or paint their shelf before assembly, especially for rope shelves where it might be trickier to paint around the ropes later. If you do this, allow it to dry completely according to the product instructions.

Step 3: Prepare for Your Chosen Hanging Method
- For Rope-Suspended Shelves – Drilling Holes:
- Decide how far in from the edges you want your ropes. A common distance is 1-2 inches from each side and the front/back edges.
- Mark four equally spaced hole locations (two near each end of the plank).
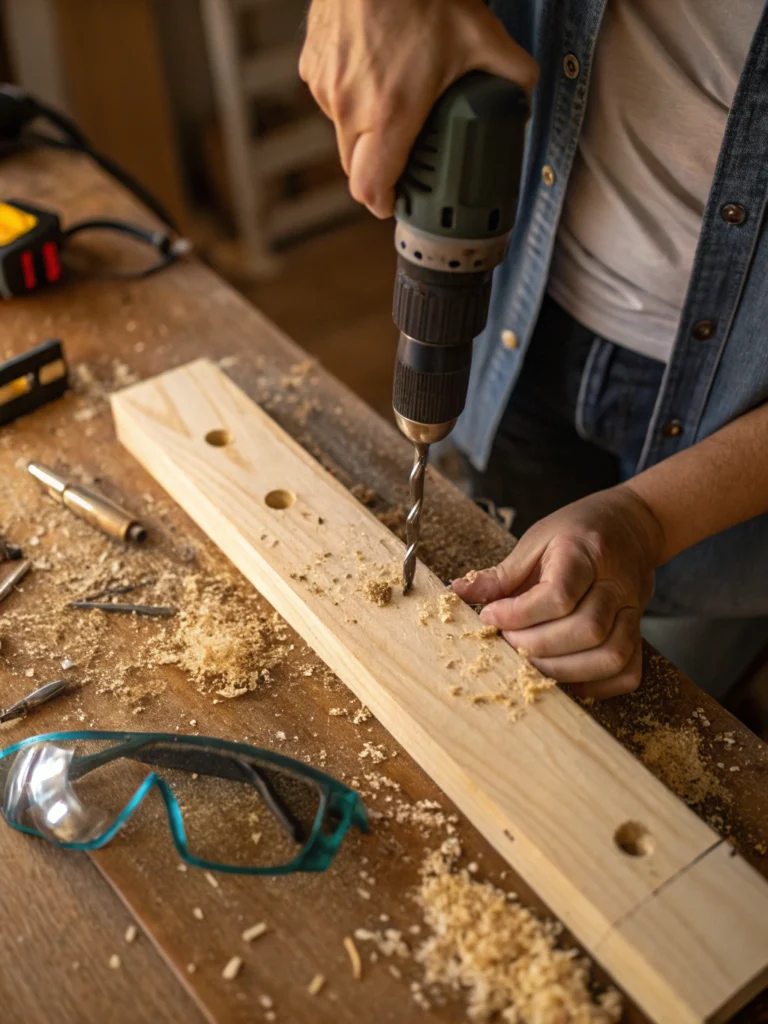
- Choose a drill bit slightly larger than your rope’s diameter so the rope can pass through easily.
- Place a scrap piece of wood underneath your shelf plank to prevent tear-out as the drill bit exits.
- Carefully drill your four holes.
- For Bracket Shelves – Marking Bracket Placement on Shelf:
- Position your brackets on the underside of your shelf where you want them. Ensure they are an equal distance from the ends of theshelf and set back slightly from the front edge for a cleaner look.
- Use a pencil to mark the screw hole locations of the brackets onto the wood.
- Drill small pilot holes at these marks. This makes it easier to drive the screws straight.
Step 4: Installation – The Exciting Part!
- For Rope-Suspended Shelves:
- Thread the Rope: Cut two long, equal lengths of rope. The exact length depends on how low you want your shelf to hang – it’s better to have too much than too little!
- Thread one end of a rope down through one front hole and up through the corresponding back hole on one side of the shelf. Repeat with the other rope on the other side.
- The Lark’s Head Knot: This is a simple, secure knot perfect for hanging. Take the two ends of one rope piece (which are now above the shelf) and bring them together. You’ll create a loop. If using a ceiling hook, pass this loop over the hook. If using a ring or cleat, pass the loop through the ring/around the cleat, then pass the tails of the rope through the loop and pull tight.
- Initial Leveling & Underside Knots: Roughly level the shelf by adjusting the ropes.
- Underneath the shelf, tie a secure knot (like a figure-eight or a simple overhand knot with a few repeats) in each of the four rope ends hanging below the shelf. These knots will bear the weight. Leave some tail on the ropes for final adjustments.
- For Bracket Shelves:
- Attach Brackets to Wall: Hold one bracket against the wall at your desired height, ensuring it aligns with a stud marking. Use your level to make sure it’s perfectly vertical. Mark the screw holes. Drill pilot holes into the stud. Screw the bracket securely to the wall.
- Repeat for the second bracket, using your level across the tops of the two brackets to ensure they are perfectly aligned horizontally before marking and drilling. This is crucial for a level shelf!
- Attach Shelf to Brackets: Place your prepared shelf plank on top of the mounted brackets. Secure it by driving screws up through the bracket holes into the pilot holes you made on the underside of the shelf.
Step 5: Level Up! (Crucial for Both Methods)
- Place your level on the shelf.
- For Rope Shelves: Adjust the knots underneath the shelf or how the rope sits in the top hanging loop/hook until the bubble on your level is perfectly centered, both front-to-back and side-to-side. This might take a bit of gentle persuasion!
- For Bracket Shelves: If you leveled your brackets properly in Step 4, your shelf should be level. If it’s slightly off, you may need to loosen screws, make micro-adjustments, and re-tighten.
Step 6: Secure Everything
- For Rope Shelves: Once perfectly level, ensure all your knots are tight and secure. Trim any excess rope, leaving a short, neat tail, or let it hang decoratively.
- For Bracket Shelves: Double-check that all screws (into the wall and into the shelf) are snug.
Step 7: Finishing Touches (If Not Done Earlier)
- If you haven’t already, now’s the time to apply your chosen wood stain, paint, or sealer. Follow the product instructions carefully, allowing adequate drying time between coats. This not only enhances the look but also protects the wood.
Styling Your New DIY Hanging Shelf Like a Pro
You’ve built it, now it’s time to make it shine! Styling your DIY hanging shelf is where your personality truly comes to the fore.
- Choose the Right Finish:
- Stains: From light, natural pine to rich walnut or weathered grey, stains enhance the wood grain.
- Paints: Go classic with white or black, or choose a bold accent color that ties into your room’s palette. Chalk paint can give a lovely matte, vintage feel.
- Accessorizing with Flair:
- Vary Heights and Textures: Mix tall items (like a slender vase) with shorter ones (like a stack of small books). Incorporate different textures – smooth ceramics, rough-hewn pottery, an_the_meta_details of a picture frame.
- The Rule of Threes (or Odds): Grouping items in odd numbers (1, 3, 5) is often more visually appealing.
- Books & Bookends: Stack books horizontally or lean them vertically with stylish bookends.
- Greenery is Key: Small potted plants, succulents, or trailing ivy can bring life and freshness.
- Personal Touches: Display framed photos, favorite mementos, or small art pieces.
- Create Balance, Not Symmetry: Aim for visual balance rather than perfect symmetry. A larger item on one side can be balanced by a few smaller items on the other.
- Leave Some “Breathing Room”: Don’t overcrowd the shelf. Negative space is important for a clean, curated look.

Loving Your New Look? Let’s Connect!
Creating your own DIY hanging shelf is more than just a project; it’s an addition of your unique style and effort into your home. We hope this guide has inspired you to pick up those tools and get crafting!
For more ways to personalize your space, why not check out our guide on Chic DIY Bookshelf Makeovers for larger storage solutions? And if you’ve caught the woodworking bug, our tutorial on Building a Rustic Farmhouse Coffee Table might be your next weekend adventure!
We would absolutely LOVE to see your finished DIY hanging shelf creations! Share your photos on social media using the hashtag #MyHomeStoryShelf (or your preferred brand/community hashtag) and be sure to tag us.
Don’t miss out on more easy DIY projects, home decor inspiration, and expert tips! Subscribe to our newsletter below for a regular dose of creativity delivered straight to your inbox.
Happy building!


