
Welcome, holiday crafters! If you’re looking to add a sprinkle of handmade magic to your festive season, you’ve come to the exactly right place. This year, DIY paper Christmas decorations are taking center stage, and for wonderfully good reasons. They’re not just incredibly charming; they’re also a fantastic way to celebrate sustainably and keep your holiday budget in check. As noted in a recent guide by The Spruce on the growing popularity of paper holiday decor (May 2024), these delicate creations are trending massively for their versatility and eco-conscious appeal.
Crafting with paper is an accessible joy for all ages and skill levels. It requires minimal, inexpensive supplies – many of which you might already have stashed away! Plus, choosing paper means you can often opt for recycled or recyclable materials, making your festive flair kinder to our planet. So, let’s grab our scissors and some festive tunes, and dive into creating some truly unique ornaments that will make your home shine bright without breaking the bank or compromising on style.
Table of Contents
Quick Guide: Craft stunning DIY paper Christmas decorations! Learn to make Danish hearts, minimalist stars, and accordion chains easily with our budget-friendly tutorials.
Why You’ll Adore DIY Paper Christmas Decorations
Before we dive into the how-to, let’s celebrate why these paper creations are so perfect for the holiday season:
- Budget-Friendly Bliss: Let’s be honest, decking the halls can get pricey! Paper is an incredibly affordable medium, allowing you to create an abundance of decorations without emptying your wallet.
- Eco-Conscious Crafting: Opt for recycled paper, old maps, sheet music, or even last year’s gift wrap to make your decorations truly sustainable. Paper is also biodegradable and often recyclable.
- Uniquely Personal: Store-bought decorations are lovely, but there’s something truly special about ornaments made with your own hands. Each piece carries a story and a personal touch.
- Family Fun Activity: Paper crafting is a wonderful activity to share with family and friends. Gather around the table and create festive memories together.
- Lightweight & Versatile: Paper ornaments are light enough to hang anywhere – from the tree to garlands, windows, or even as gift toppers. Their versatility is unmatched!
Gather Your Festive Supplies: Materials & Tools
The beauty of paper crafts is their simplicity. You likely have many of these items already. For our featured DIY paper Christmas decorations, you’ll want to have these on hand:
- Colored Cardstock or Heavy Paper: Think festive reds, greens, whites, golds, silvers, or even kraft paper for a rustic look. Patterned scrapbook paper also works beautifully.
- Scissors: Sharp scissors are key for clean cuts. A craft knife and cutting mat can be useful for more intricate designs but aren’t essential for these projects.
- Craft Glue: A good quality liquid craft glue (like PVA or tacky glue) or a glue stick that offers a strong hold.
- Ruler & Pencil: For measuring and marking.
- Twine, String, or Ribbon: For hanging your beautiful creations.
- Hole Punch: For easily creating hanging holes.
- Optional Embellishments:
- Glitter: For that extra festive sparkle!
- Washi Tape: Adds instant pattern and color, especially great for the minimalist stars.
- Beads or Small Bells: To add to hanging loops.
- Markers or Paint Pens: For adding details or patterns.
Craft Your Own DIY Paper Christmas Decorations: 3 Easy Tutorials
Ready to get crafting? We’ve chosen three delightful and distinct paper ornament tutorials that are perfect for beginners but offer stunning results. Let’s make some magic!
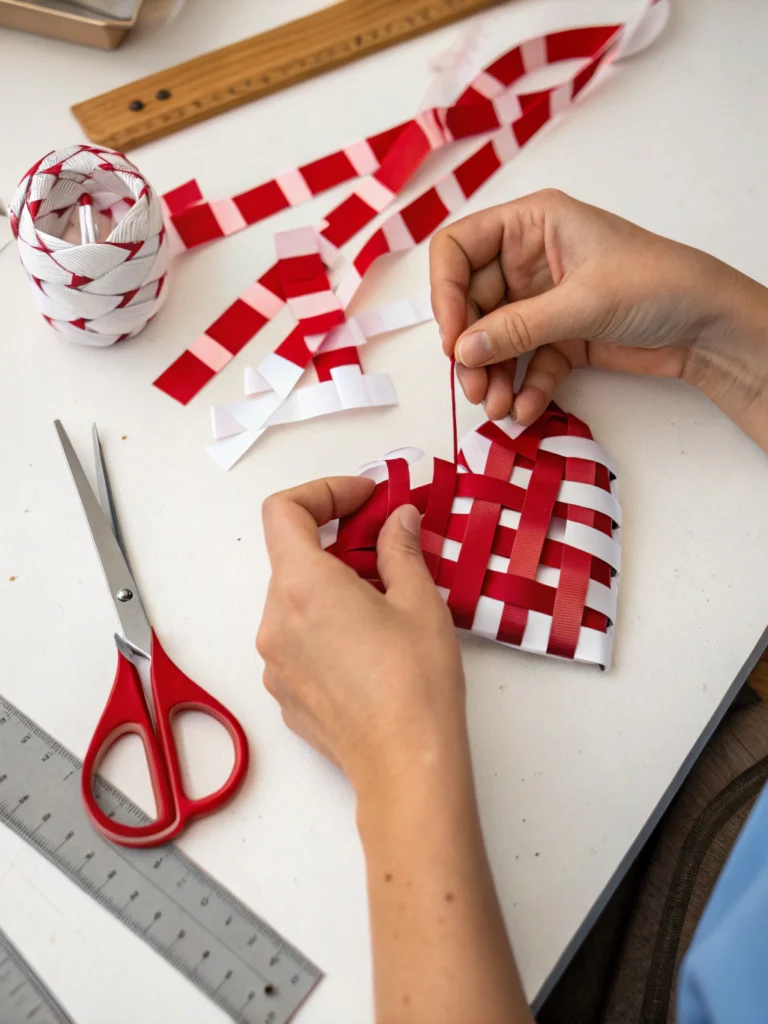
1. Timeless Danish Woven Paper Hearts (Julehjerter)
These classic Scandinavian hearts are a symbol of Christmas love and hygge. They look intricate but are surprisingly simple once you get the hang of the weave.
Materials specific to this craft:
- Two contrasting colors of cardstock (e.g., red and white)
- Ruler
- Pencil
- Scissors
- Glue (optional, for securing)
- Twine or ribbon for hanging loop
Step-by-Step:
- Prepare Your Strips: For each heart, cut two pieces of cardstock, one of each color. A good starting size is 4 inches wide by 6 inches long. Fold each piece in half lengthwise, so you have two folded pieces measuring 2 inches wide by 6 inches long.
- Shape the Top: With the folded edge at the bottom, round off the two open top corners of each folded piece to create a semi-circle top. Alternatively, you can cut them straight for a more modern look, but the rounded top is traditional.
- Cut the Weaving Strips: On each folded piece, starting from the cut (rounded or straight) edge and cutting towards the fold, make 2-3 evenly spaced parallel cuts. Stop about 1/2 inch from the folded edge. The number of cuts will determine the number of “loops” you weave. For beginners, 2 cuts (creating 3 strips) is a good start.
- Example: If you made 2 cuts on your 2-inch wide folded piece, you’ll have three 0.66-inch wide strips still attached at the fold.
- The Weave – The Magic Part!:
- Take one folded piece (Color A) and orient it vertically with the fold at the bottom and the cut strips pointing upwards.
- Take the other folded piece (Color B) and orient it horizontally, with its fold to the left and its cut strips pointing to the right.
- Now, weave the first strip of Color B through the first strip of Color A. Then weave the second strip of Color B around the first strip of Color A. Continue alternating – through, around, through – for all strips of Color A with the first strip of Color B.
- For the second strip of Color B, reverse the pattern: weave it around the first strip of Color A, through the second, around the third, and so on.
- Continue this alternating pattern for all strips of Color B, pushing them up gently to nestle snugly. You’ll see the checkerboard heart pattern emerge!
- Secure (Optional) & Add Hanger: Once woven, the heart should hold its shape. If you like, you can add tiny dabs of glue inside where the strips overlap for extra security, especially if using thinner paper.
- Add a Hanging Loop: Cut a small piece of twine or ribbon, form a loop, and glue or staple it to the inside top of one of the heart’s “pockets.”
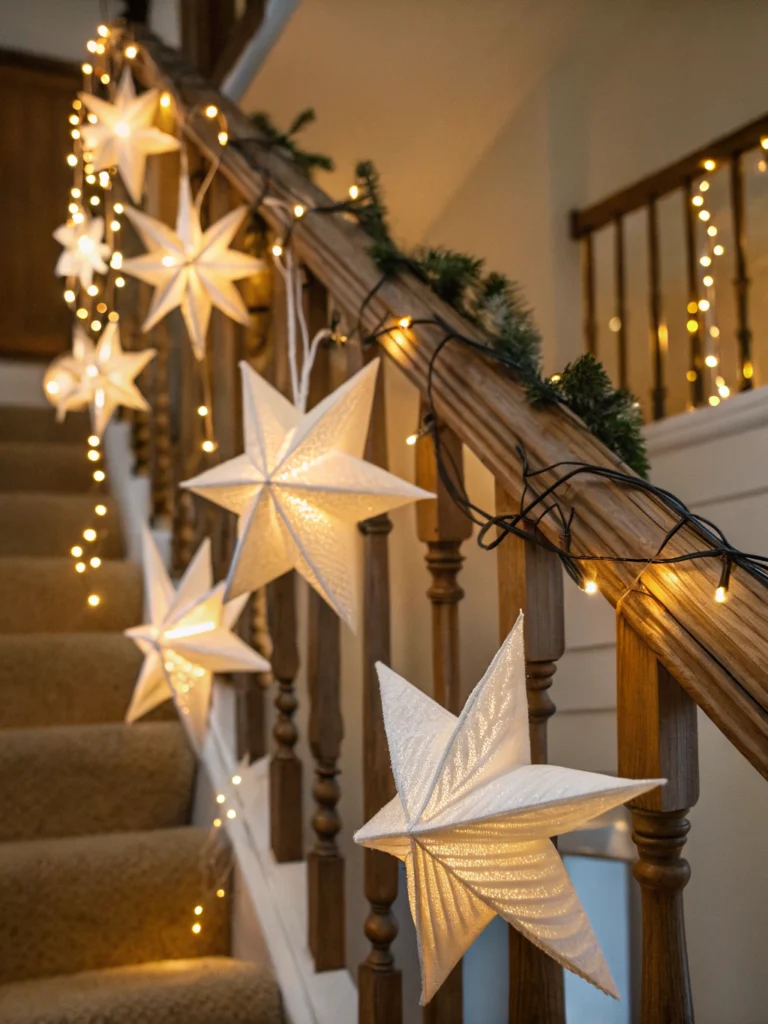
2. Modern Minimalist Paper Stars
These five-pointed stars are incredibly chic and can be adapted to any color scheme. They add a touch of understated elegance.
Materials specific to this craft:
- Cardstock (any color)
- Pencil
- Ruler
- Scissors
- Washi tape or markers (optional, for embellishment)
- Hole punch
- Twine or ribbon
Step-by-Step:
- Create a Pentagon Template (Optional but helpful): If you’re making many stars, drawing a perfect pentagon template first can save time. You can find printable pentagon templates online or draw one using a protractor (each internal angle of a regular pentagon is 108 degrees).
- Cut Your Pentagon: Trace and cut out a pentagon shape from your cardstock. A good size to start with is one where each side is about 2-3 inches long.
- Mark the Fold Lines: From each point (vertex) of the pentagon, lightly draw a pencil line to the center of the opposite side. You should have 5 lines intersecting in the middle.
- Score and Fold: Carefully score along these five lines using your ruler and a dull edge (like the back of a butter knife or an empty pen). This makes for crisper folds. Fold inward (valley fold) along each scored line, from the point towards the center.
- Pinch to Form the Star: As you make these folds, the paper will naturally want to pop up. Gently pinch the paper between the folds to create the star’s raised points. You might need to gently crease the “armpit” lines that form between the points to help the star hold its 3D shape.
- Embellish (Optional): This is where the washi tape comes in! Add strips of contrasting or glittery washi tape along the edges of the star’s points or create patterns. You can also use markers to draw designs.
- Add Hanger: Punch a hole in one of the star’s points, thread your twine or ribbon through, and tie a loop.
3. Whimsical Accordion Paper Chains & Bulb Ornaments
These 3D ornaments look impressive hanging individually or strung together as a festive garland.
Materials specific to this craft:
- Colored cardstock or sturdy scrapbook paper
- Ruler
- Pencil
- Scissors or paper trimmer
- Craft glue
- Hole punch
- Twine or ribbon
Step-by-Step (for individual bulb ornaments, adaptable for chains):
- Cut Your Strips: For one ornament, cut several identical strips of paper. For a nice full bulb, aim for 8-12 strips. A good starting size for each strip is 1 inch wide and 6-8 inches long. The longer and more numerous the strips, the fuller your ornament.
- Fold Each Strip: Take each strip and fold it in half lengthwise. Then, fold it in half again in the same direction. You’ll end up with a thin, multi-layered strip. This gives the ornament structure. (Alternatively, for a simpler look, just fold once in half lengthwise).
- Stack and Punch: Stack all your folded strips neatly on top of each other, ensuring the ends are aligned. Punch a hole through both ends of the stacked strips, about 1/4 inch from each edge.
- Fan and Glue – First Side: Take one strip. Apply a small dot of glue near one of the punched holes. Take the next strip and press its corresponding punched hole area onto the glue. Continue fanning out and gluing the strips together at this one end, stacking them in a circle.
- Fan and Glue – Second Side: Once all strips are glued together at one end to form a semi-circle fan, gently bring the other ends of the strips together. Apply glue between the layers at this other punched-hole end, fanning them out to meet the first strip and complete the circular, 3D bulb shape. You may need to hold it for a moment while the glue sets.
- Add Hanger: Thread twine or ribbon through the top holes and tie a loop for hanging.
- For a Chain: Create multiple “bulb” ornaments. Instead of individual hanging loops, thread a long piece of twine through the central holes of each ornament, spacing them out as desired to create a garland. You can add a dab of glue where the twine meets the ornament to keep them in place.
Styling Your Handmade Treasures: Display Tips
You’ve made your gorgeous DIY paper Christmas decorations! Now, how to show them off?
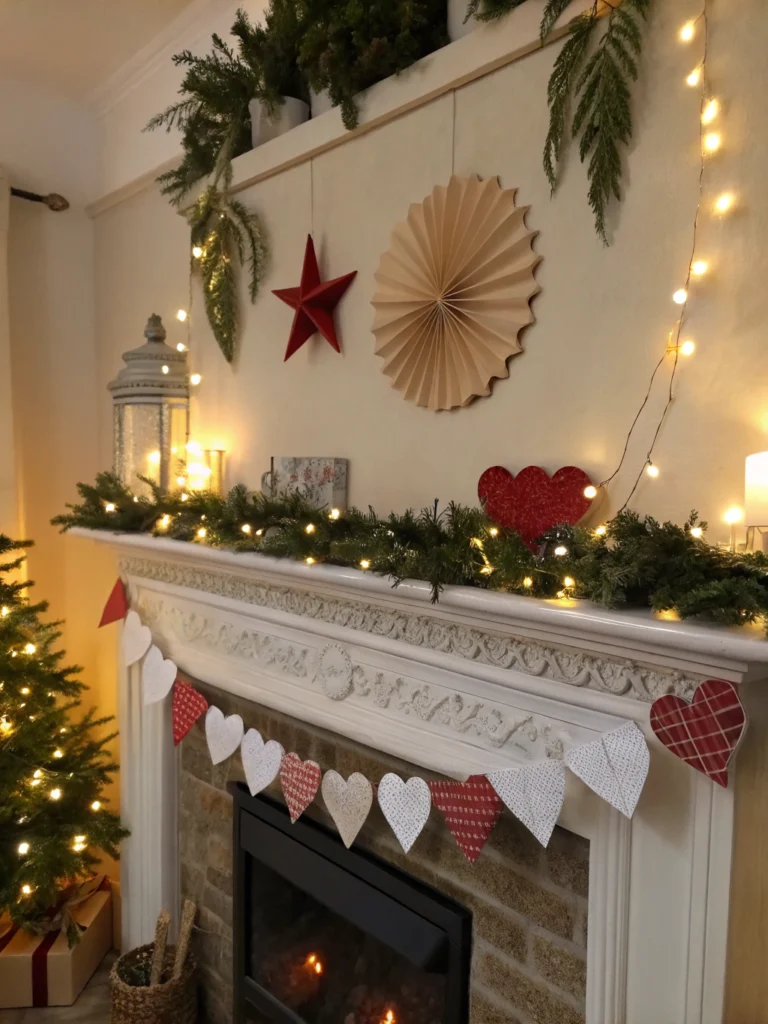
- Mantel Magic: Drape accordion paper chains across your mantelpiece. Create clusters of Danish hearts and minimalist stars hanging at varying lengths. Intertwine with evergreen sprigs or battery-operated fairy lights for a truly cozy glow.
- Tree Trimmings: Paper ornaments are lightweight, making them perfect for any size Christmas tree, even delicate branches. Mix them with traditional baubles for an eclectic look.
- Window Wonderland: Hang individual stars or hearts in your windows using clear fishing line for a “floating” effect. They’ll catch the light beautifully.
- Garland Grandeur: String your paper creations together to make stunning garlands for staircases, doorways, or along walls.
- Gift Toppers: A small paper heart or star makes a thoughtful and beautiful alternative to a traditional gift bow.
- Table Centerpieces: Arrange a few paper ornaments around LED candles or a bowl of pinecones for a simple yet elegant holiday table centerpiece.
Sustainability & Reuse: Crafting with a Conscience
One of the best things about paper crafts is their potential for eco-friendliness:
- Scrap Happy: Don’t throw away those smaller offcuts of cardstock! They’re perfect for tiny stars, heart embellishments, or future projects.
- Repurpose & Reimagine: Last year’s nicer quality gift wrap can be given a new life as a colorful accordion chain. Old maps, sheet music, or even pages from damaged books can add a wonderfully vintage touch.
- Choose Recycled: When buying new supplies, look for cardstock or paper made from recycled content.
- Store with Care: Carefully pack away your paper decorations after the holidays (flat if possible, or in boxes with tissue paper) and they can be enjoyed for many seasons to come.
Let Your Creativity Sparkle!
Creating your own DIY paper Christmas decorations is more than just a craft; it’s a way to slow down, connect with the festive spirit, and infuse your home with love and personality. The possibilities are endless, limited only by your imagination!
If you’re feeling inspired to continue your handmade holiday journey, why not explore our tutorials on creating Unique DIY Advent Calendar Ideas or crafting some Eco-Friendly Holiday Gift Wrapping Solutions?
We absolutely adore seeing your creations! Please share photos of your finished paper ornaments on social media using the hashtag #PaperHolidayMagic and tag us so we can admire your festive flair.
Don’t miss out on more seasonal DIY guides, holiday inspiration, and crafting tips! Subscribe to our newsletter below for a regular dose of creativity delivered straight to your inbox.
Happy crafting, and may your holidays be merry, bright, and beautifully handmade!