Alright DIY enthusiasts, let’s dive into the wonderful world of crafting! Summer’s here, and what better way to embrace the sunny vibes than with some delightful diy popsicle stick summer crafts? Forget expensive store-bought decorations or complicated projects that leave you frustrated. We’re talking about taking those humble wooden sticks – yes, the ones leftover from your favorite frozen treats – and transforming them into something truly special. It’s the perfect way to keep little hands busy, add a personal touch to your home, or even create charming, handmade gifts. This guide is packed with seven easy popsicle stick projects that are perfect for all skill levels, ensuring you can create beautiful things without breaking a sweat (or the bank!).
Table of Contents
Table of Contents
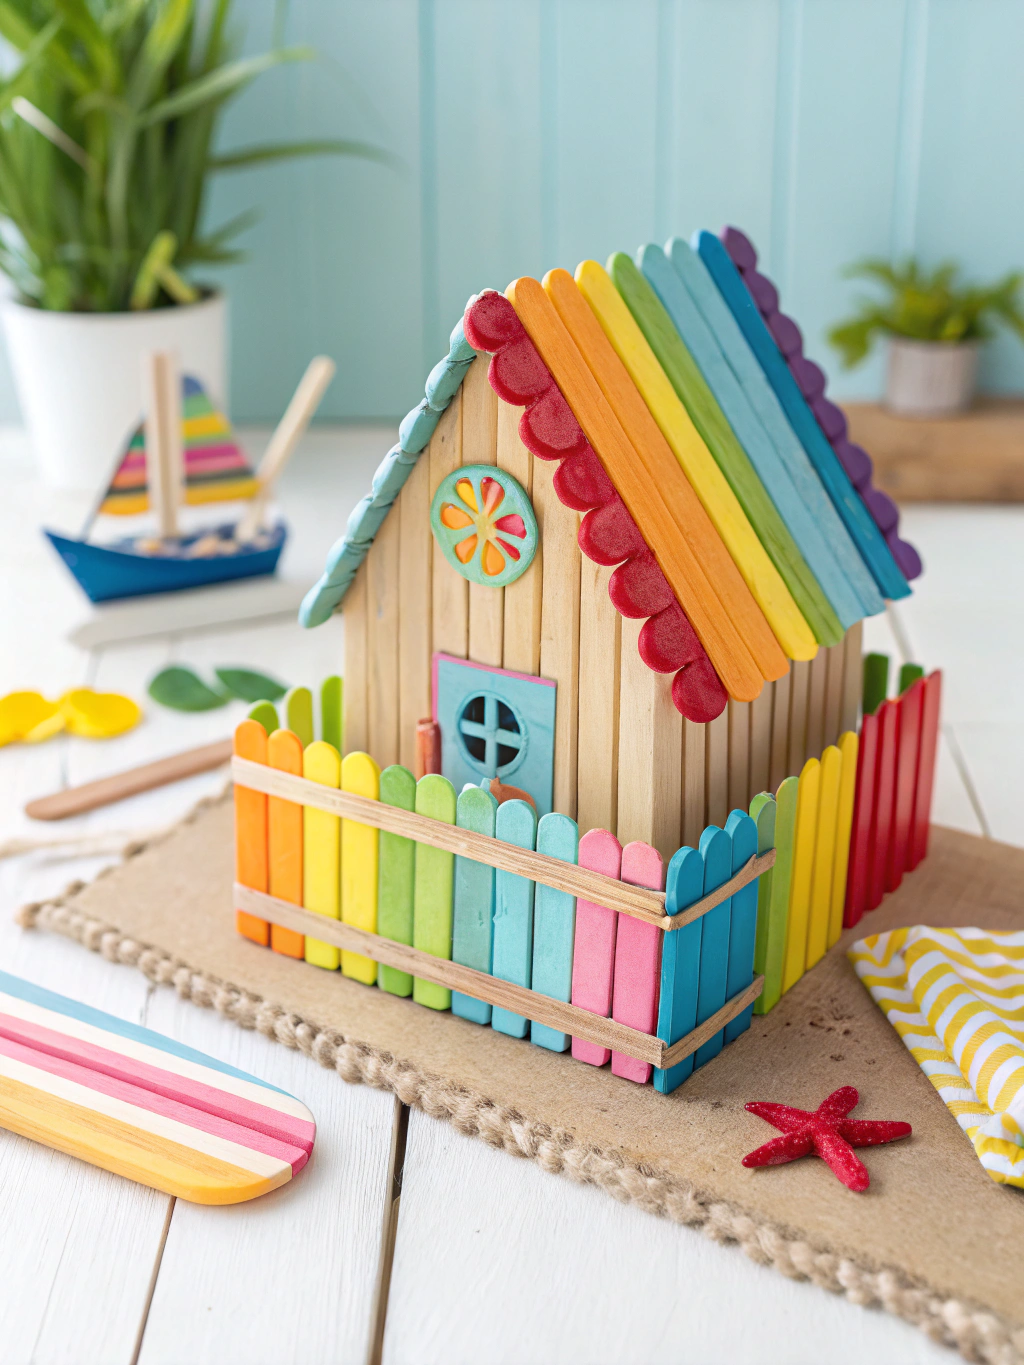
DIY Popsicle Stick Summer Crafts
Caption: Dive into a summer of creativity with these fun and easy DIY popsicle stick summer crafts!
The beauty of diy popsicle stick summer crafts lies in their simplicity and versatility. Whether you’re looking for “DIY summer crafts for kids” to banish boredom on a hot afternoon, or you’re an adult seeking a relaxing, creative outlet, popsicle sticks are your best friend. They’re inexpensive, readily available, and surprisingly sturdy. Plus, the satisfaction of making something with your own hands is unbeatable! So, grab a handful of sticks, and let’s get crafting!
What You’ll Need for Your Popsicle Stick Adventures
Before we jump into the project steps, let’s gather our supplies. The great thing about diy popsicle stick summer crafts is that you probably have most of these items already lying around your home or craft stash. No need for fancy, expensive tools here!
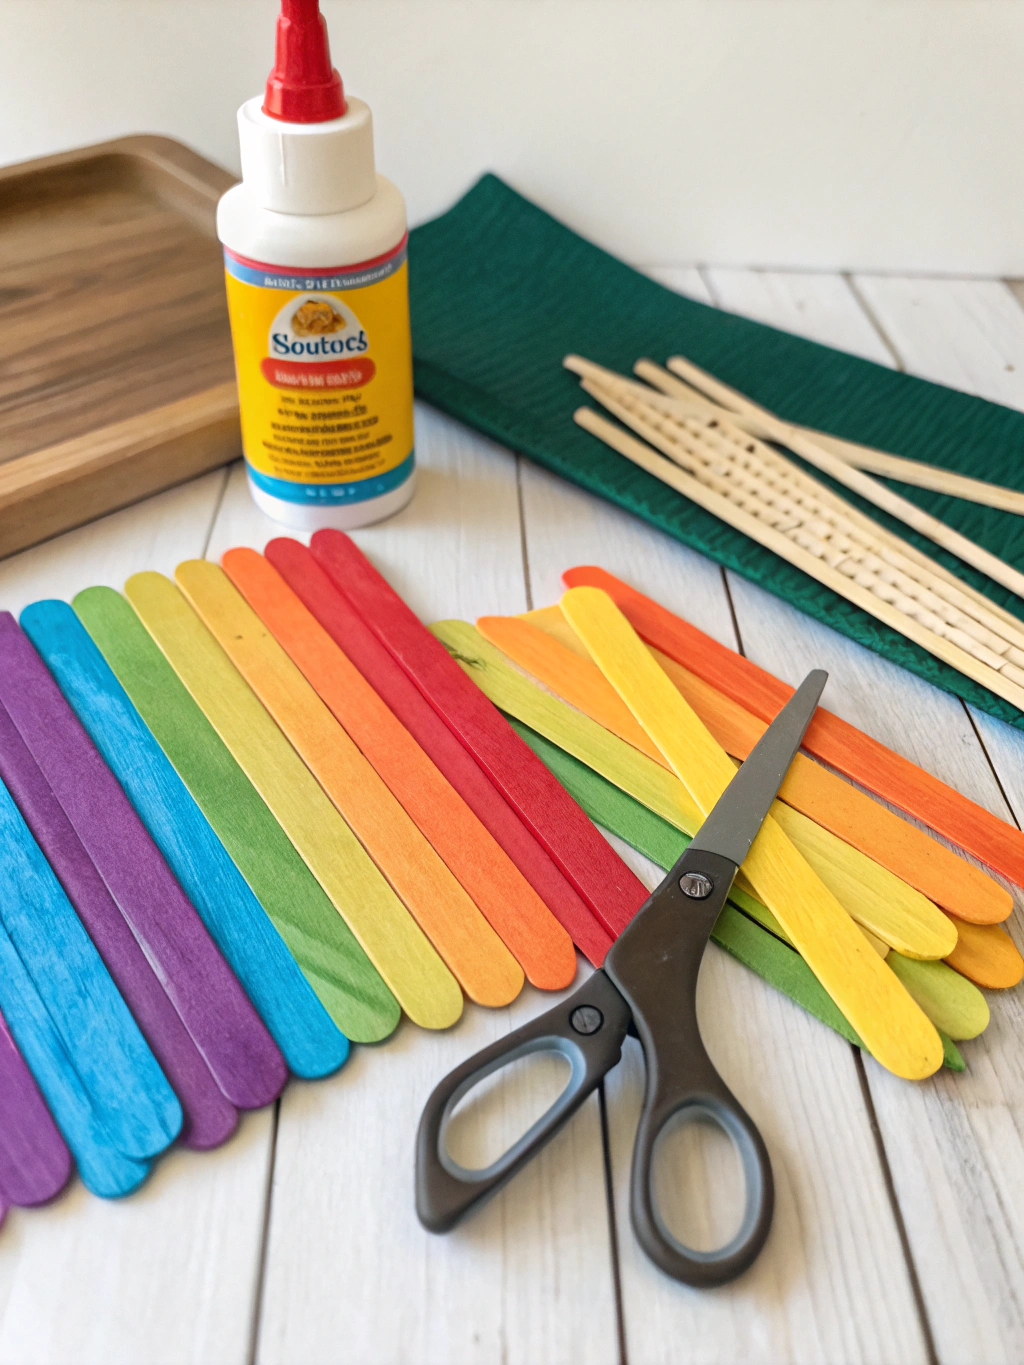
DIY Popsicle Stick Summer Crafts
Caption: Your basic toolkit for transforming simple popsicle sticks into summer masterpieces.
Here’s a general list of what you’ll typically need for most popsicle stick projects. Specific projects might require a few extra bits and bobs, but this covers the basics:
- Popsicle Sticks: The star of the show! You can buy these in craft stores in various sizes and colors, or simply save them up. We recommend having a good stash of standard-sized natural wood sticks.
- Glue: Wood glue or a strong craft glue (like Tacky Glue) works best for a durable hold. A hot glue gun can also be used for quicker adhesion, especially for older kids and adults (with caution!).
- Paints: Acrylic paints are fantastic for popsicle sticks as they offer vibrant colors and good coverage. washable tempera paints are a great option for younger children.
- Brushes: A selection of small to medium paintbrushes.
- Scissors: Good quality craft scissors for cutting paper, felt, or other embellishments. Heavy-duty scissors or craft clippers might be needed if you plan on cutting the popsicle sticks themselves (adult supervision required).
- Markers: Permanent markers or paint pens for adding details.
- Embellishments (Optional but Fun!):
- Glitter
- Sequins
- Buttons
- Yarn or string
- Googly eyes
- Colored paper or cardstock
- Fabric scraps
- Natural elements like small shells or twigs
- Ruler: For measuring, if needed for precise projects.
- Pencil: For marking cutting lines or designs.
- Protective Covering: Old newspapers or a plastic tablecloth to protect your work surface.
- Patience and Imagination: The most important tools of all!
Having these supplies on hand will set you up for success as you explore the amazing world of “Easy popsicle stick projects”. Now, let’s get to the fun part – making stuff!
Project 1: Sunny Sunburst Mirror DIY Popsicle Stick Summer Crafts
Let’s kick things off with a project that screams summer: a vibrant Sunny Sunburst Mirror. This is a fantastic way to add a pop of color and personality to any room. It’s one of those diy popsicle stick summer crafts that looks impressive but is surprisingly simple to make.
Step 1: Gather Your Sunburst Supplies to DIY Popsicle Stick Summer Crafts
For this project, in addition to the basics, you’ll specifically need:
- Around 30-40 standard popsicle sticks
- A small round craft mirror (about 3-5 inches in diameter)
- Yellow and orange acrylic paint
- Strong craft glue or hot glue gun
- A piece of cardboard slightly larger than your mirror
- String or ribbon for hanging
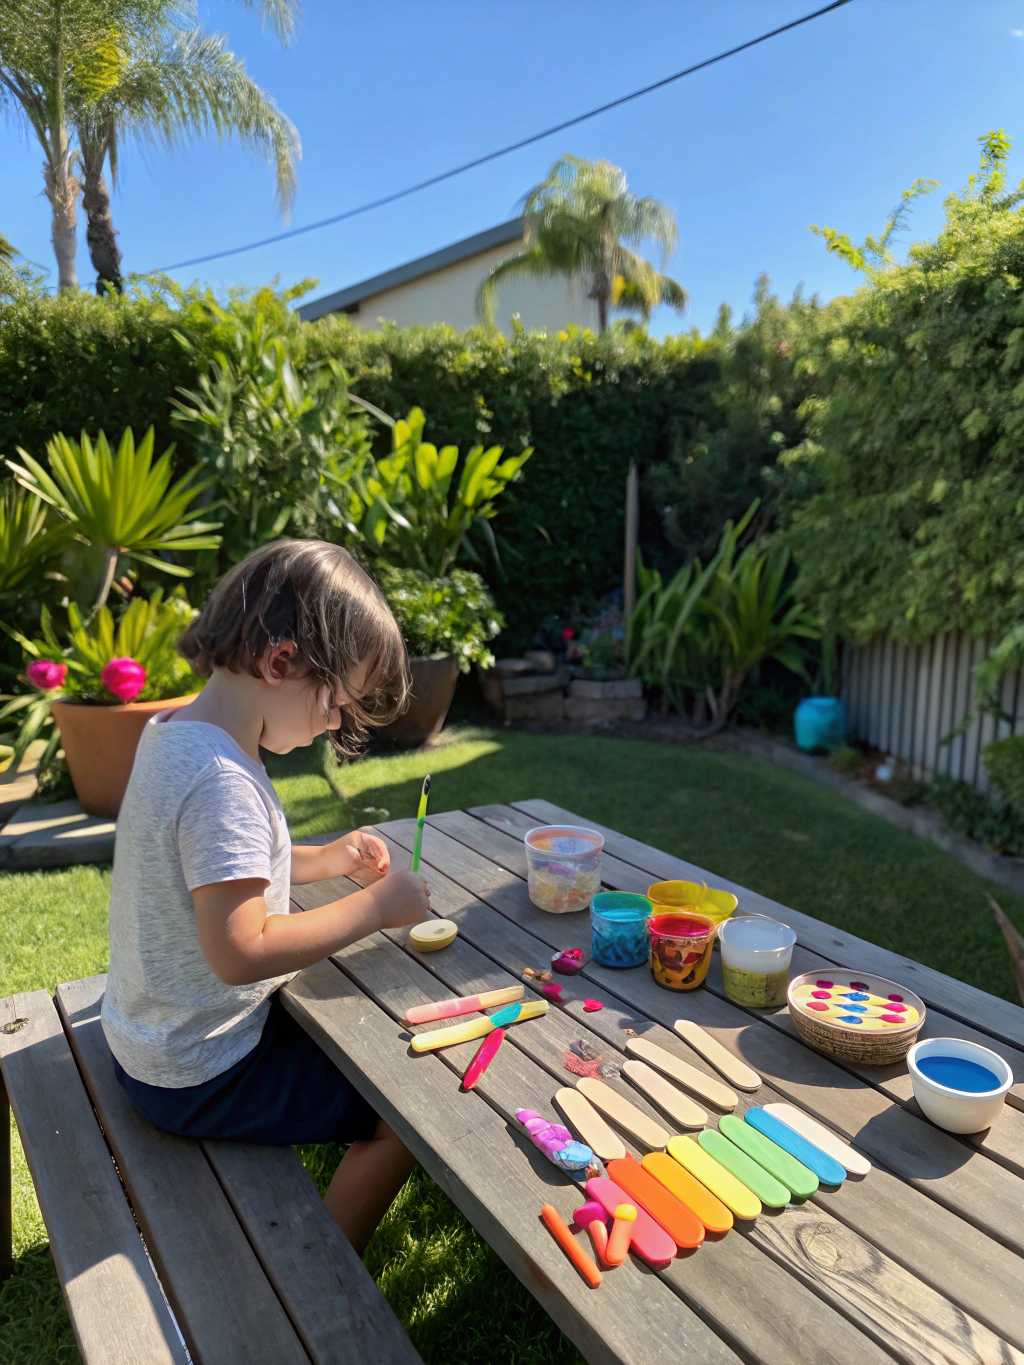
Caption: Step 1: Brightening up our popsicle sticks for a radiant sunburst mirror – a key part of our DIY popsicle stick summer crafts.
First things first, protect your workspace. Then, paint your popsicle sticks. We’re going for a classic sun look, so paint about half your sticks a cheerful yellow and the other half a warm orange. You might need two coats for full, vibrant coverage. Let them dry completely. This is a crucial step; attempting to glue wet sticks will lead to a messy and unstable craft.
Step 2: Create the Mirror Backing
Take your piece of cardboard and trace your round mirror onto it. Cut out this circle. This cardboard circle will serve as the base for your sunburst, providing a sturdy backing to glue your sticks and mirror onto.
Next, glue your mirror to the center of the cardboard circle. Apply a generous amount of strong craft glue or use a hot glue gun for a quick bond. Press firmly and allow it to set. Ensuring the mirror is well-centered is key for a balanced final look.
Step 3: Arrange and Glue the “Sun Rays”
Now for the fun part – creating the sun’s rays! Start by gluing your painted popsicle sticks around the edge of the cardboard circle, radiating outwards. Alternate between yellow and orange sticks for a dynamic look. You can have them all the same length or trim some for varied ray lengths.
Apply glue to one end of a popsicle stick and press it onto the back of the cardboard disc, ensuring about half an inch of the stick is secured. Continue this process, overlapping the sticks slightly if you like, until you’ve gone all the way around. Take your time here to ensure the sticks are evenly spaced. A common pitfall is rushing and ending up with lopsided rays.
Step 4: Add a Second Layer (Optional) and Hanging Loop
For a fuller, more dimensional sunburst, consider adding a second layer of popsicle sticks. You can glue these in the gaps between the first layer, perhaps using shorter sticks or angling them slightly differently. This step really elevates the “How to make popsicle stick crafts” aspect from simple to stunning.
Finally, create a hanging loop. Cut a short piece of string or ribbon, form a loop, and glue the ends securely to the back of the cardboard. Make sure it’s centered and strong enough to hold the weight of your mirror. Let everything dry completely, preferably overnight, before hanging your beautiful DIY Sunny Sunburst Mirror.
Project 2: Adorable Popsicle Stick Picture Frames DIY Popsicle Stick Summer Crafts
Next up, let’s create something to cherish those summer memories: adorable popsicle stick picture frames. These are incredibly versatile “DIY summer crafts for kids” and make fantastic personalized gifts.
What You’ll Need: DIY Popsicle Stick Summer Crafts
- Standard popsicle sticks (4 per frame, or more for decorative elements)
- Craft glue
- Paints, markers, glitter, buttons, etc. for decoration
- A photograph
- A small piece of cardstock or thin cardboard for backing (optional)
- Magnets (optional, for fridge frames)
Step 1: Construct the Basic Frame
Take four popsicle sticks. Lay two sticks parallel to each other, about the width of your photo apart. Then, apply glue to the ends of the other two sticks and lay them across the first two, forming a square or rectangle. This creates your basic frame structure.
Press down firmly and allow the glue to set. It’s important to ensure your corners are as square as possible for a neat finish. A common mistake is not using enough glue, causing the frame to be flimsy.
Caption: Step 1: Assembling the foundation of our popsicle stick picture frame, a classic among DIY popsicle stick summer crafts.
Step 2: Decorate Your Frame
Once the glue is dry, it’s time to unleash your creativity! Paint your frame in your favorite summer colors, draw patterns with markers, or cover it in glitter. You can glue on additional popsicle stick pieces for a layered effect, or add buttons, sequins, or small shells.
This is where the “Easy popsicle stick projects” aspect really shines, as even the simplest decorations can look fantastic. Let your imagination run wild! If kids are involved, provide a variety of materials and let them personalize their frames.
Step 3: Attach Your Photo
Cut your photograph to fit slightly smaller than the opening of your frame. Apply a thin line of glue around the back edges of the photo and carefully position it onto the back of the popsicle stick frame.
Alternatively, you can create a backing. Cut a piece of cardstock slightly larger than your photo. Glue the photo to the cardstock, then glue the cardstock to the back of the frame. This provides a neater finish and extra support for the photo.
Step 4: Add a Stand or Magnet (Optional)
To make your frame stand up, you can glue an extra popsicle stick diagonally across one of the back corners, creating a simple easel stand.
If you want to turn it into a fridge magnet, simply glue one or two craft magnets to the back of the frame. Ensure they are strong enough to hold the frame and photo. And there you have it – a charming popsicle stick photo frame! These are perfect for showcasing summer adventure snapshots.
Project 3: Cheerful Popsicle Stick Flowers DIY Popsicle Stick Summer Crafts
Brighten up any space with these cheerful popsicle stick flowers. They are super easy to make and can be used as decorations, plant stakes, or even attached to gifts. This is a wonderful project when you’re looking for simple “DIY summer crafts for kids”.
What You’ll Need: DIY Popsicle Stick Summer Crafts
- Popsicle sticks (6-8 for petals, 1 for the stem per flower)
- Craft glue
- Paints (various bright colors)
- Green paint for the stem
- A button or pom-pom for the flower center
- Optional: Green craft foam or paper for leaves
Step 1: Paint Your Popsicle Sticks
First, paint the popsicle sticks that will become your petals in various bright colors – think sunny yellows, pretty pinks, vibrant blues, and lovely lavenders. You’ll need 6 to 8 sticks per flower. Paint one stick green for the stem.
Let the paint dry completely. Applying a second coat can make the colors really pop. Remember, good preparation is key for any successful diy popsicle stick summer crafts.
Caption: Step 1: Painting our popsicle stick ‘petals’ and ‘stems’ for vibrant DIY summer flowers.
Step 2: Assemble the Flower Petals
Take your painted petal sticks. Apply a dab of glue to one end of each stick. Arrange them in a circle, with the glued ends meeting in the center, to form the flower shape. You might find it easier to glue them onto a small circle of cardstock for extra stability, though it’s not strictly necessary.
Overlap the ends slightly to create a full flower. Press firmly and allow the glue to dry. Don’t worry if it’s not perfectly symmetrical; a little شناوری (that’s Farsi for ‘fluidity’ or ‘artistic irregularity’!) adds to the charm.
Step 3: Attach the Stem and Center
Once the petals are securely glued, take your green-painted popsicle stick (the stem) and glue it to the back of the flower, extending downwards.
For the flower’s center, glue a colorful button or a fluffy pom-pom right in the middle, where the petal ends meet. This adds a lovely finishing touch and hides any messy glue spots. Much like the expert tips you might find on HGTV for handmade holiday ideas, these little details elevate your craft.
Step 4: Add Leaves (Optional)
If you’d like, cut out some simple leaf shapes from green craft foam or paper. Glue these to the sides of the stem.
These popsicle stick flowers are so versatile. Make a whole bouquet! They’re a fantastic example of “How to make popsicle stick crafts” that are both easy and impactful.
Project 4: Miniature Popsicle Stick Beach Chairs DIY Popsicle Stick Summer Crafts
Bring a touch of coastal charm to your home with these adorable miniature popsicle stick beach chairs. They are perfect for dollhouses, fairy gardens, or just as cute summer decorations. This project requires a bit more precision but is still very achievable.
What You’ll Need: DIY Popsicle Stick Summer Crafts
- Standard popsicle sticks (approximately 10-12 per chair)
- Jumbo popsicle sticks (2 per chair for the main frame, optional but sturdier)
- Craft glue (wood glue recommended for strength)
- Ruler
- Pencil
- Craft clippers or strong scissors (adult supervision needed for cutting)
- Fabric scraps or wide ribbon for the seat
- Paint (optional)
Step 1: Prepare the Chair Frame Pieces
You’ll need to cut some popsicle sticks to specific lengths.
- For the two main side frames: Use two jumbo popsicle sticks as they are, or if using standard sticks, you might glue two together side-by-side for strength. These will be the longer pieces that form the backrest and back legs.
- Front Legs: Cut two standard popsicle sticks to about 2.5 inches long.
- Seat Supports: Cut two standard popsicle sticks to about 2 inches long.
- Backrest Supports: Cut two standard popsicle sticks to about 1.5 inches long.
Caption: Step 1: Measuring and cutting popsicle sticks for our miniature beach chair – precision is key for this DIY popsicle stick summer craft.
Carefully measure and mark your sticks before cutting. Sand any rough edges smooth. If you plan to paint your chair, do it now before assembly, or you can paint it once it’s built.
Step 2: Assemble the Side Frames
Take one long side frame piece (jumbo stick or doubled standard sticks). Glue one 2.5-inch front leg piece to the bottom front of this long piece, forming an “L” shape. The front leg should be perpendicular to the main frame.
Repeat for the other side. You now have two identical side frames. Ensure they are mirror images if there’s a specific “front” or “back” due to cutting.
Step 3: Connect the Side Frames
Now, connect your two side frames using the seat support and backrest support pieces.
Glue one 2-inch seat support horizontally between the two side frames, near the point where the front legs meet the main frame. This will be the front edge of your seat.
Glue the other 2-inch seat support horizontally a bit further back, creating the back edge of the seat area.
Next, glue the two 1.5-inch backrest supports horizontally between the main frame pieces, higher up, to form the top and middle supports for the fabric backrest.
Let the entire frame dry thoroughly. This is a crucial stage; a wobbly frame won’t hold up. Patience is your friend here!
Step 4: Add the Fabric Seat and Backrest
Cut a piece of fabric or wide ribbon for the seat. It should be wide enough to span between the seat supports and long enough to create a slight sag. Glue the edges of the fabric to the top of the two seat support sticks.
Do the same for the backrest, attaching a piece of fabric between the two backrest support sticks. You might need to fold the fabric edges under for a neater look before gluing. Hot glue can be useful here for a quick hold on the fabric.
Your miniature beach chair is complete! These look fantastic grouped together or as part of a summer-themed vignette. This is one of those diy popsicle stick summer crafts that truly impresses.
Project 5: Woven Popsicle Stick Coasters DIY Popsicle Stick Summer Crafts
Protect your tables in style with these easy and colorful woven popsicle stick coasters. This project introduces a simple weaving technique and results in a practical and pretty item.
What You’ll Need: DIY Popsicle Stick Summer Crafts
- Popsicle sticks (about 12-15 per coaster)
- Yarn in various summer colors
- Craft glue
- Scissors
Step 1: Create the Coaster Base (Loom)
Take 5 or 6 popsicle sticks and lay them parallel to each other, with a small, even gap (about 1/4 inch) between each stick.
Take two more popsicle sticks. Apply glue along their length and carefully lay them perpendicularly across a set of ends of the parallel sticks, one at each end. Press firmly and let the glue dry completely. This forms your “loom” or base.
Caption: Step 1: Constructing the ‘loom’ for our woven popsicle stick coasters – a foundational step in this DIY popsicle stick summer craft.
It’s important that these base sticks are securely glued and the parallel sticks are evenly spaced, as this will affect your weaving.
Step 2: Start Weaving
Tie the end of your first color of yarn to one of the outer parallel sticks, near the perpendicular base stick.
Begin weaving the yarn over and under the parallel sticks. So, if you start by going over the first stick, go under the second, over the third, and so on, until you reach the other side.
Pull the yarn taut (but not too tight, or it will warp the sticks) and loop it around the last stick. Then, weave back in the opposite direction. If you went over-under on the way across, you’ll go under-over on the way back, ensuring the yarn locks in place.
Step 3: Continue Weaving and Change Colors
Continue weaving back and forth, pushing each row of yarn down snugly against the previous one.
When you want to change colors, simply cut the first yarn (leaving a small tail to tuck in later) and tie on the new color, then continue weaving. You can create stripes, blocks of color, or even try simple patterns.
This process is very meditative and a great way to practice “Easy popsicle stick projects” with a bit of a twist. Keep your tension consistent for an even look.
Step 4: Finish Your Coaster
Continue weaving until you reach the other end of your parallel sticks (near the second perpendicular base stick).
Tie off the yarn securely to one of the outer sticks. Trim any loose ends of yarn and tuck them into the woven part on the underside of the coaster. You can add a tiny dab of glue to secure the knots if you wish.
Your woven popsicle stick coaster is ready! Make a set in coordinating colors for a lovely handmade touch to your summer entertaining. These are a great example of practical diy popsicle stick summer crafts.
Project 6: Popsicle Stick Bird Feeder DIY Popsicle Stick Summer Crafts
Invite feathered friends to your garden with a simple DIY popsicle stick bird feeder. This is a fantastic project to do with kids, as it combines crafting with a bit of nature study.
What You’ll Need: DIY Popsicle Stick Summer Crafts
- Popsicle sticks (approximately 50-60)
- Wood glue or strong waterproof craft glue
- Twine or string for hanging
- Birdseed
- Optional: Non-toxic paint or sealer (if you want to decorate it and make it more weather-resistant)
Step 1: Build the Base
Start by creating a square base. Lay two popsicle sticks parallel to each other. Then glue two more sticks on top, perpendicularly, at the ends, to form a square. This is similar to the picture frame base.
Now, fill in this square by gluing more popsicle sticks side-by-side onto the first two parallel sticks, creating a solid platform. This will be the floor of your bird feeder where the seeds will sit.
Caption: Step 1: Laying the foundation for our popsicle stick bird feeder, a rewarding DIY popsicle stick summer craft.
Ensure this base is sturdy and well-glued, as it needs to hold the weight of the birdseed and any visiting birds.
Step 2: Construct the Walls
Now, start building up the walls of the feeder. Apply glue to the ends of two popsicle sticks and place them along two opposite sides of the base.
Then, apply glue to the ends of two more popsicle sticks and place them on the other two opposite sides, overlapping the ends of the first two sticks. This is like building with Lincoln Logs.
Continue layering the sticks in this alternating fashion, building up the walls to your desired height – usually about 4-5 layers high is good to create a shallow tray for the seeds.
Step 3: Add Perches and Hanging String
For perches, you can glue a popsicle stick protruding from each side of the feeder, a couple of layers down from the top. This gives birds a place to land.
To hang your bird feeder, cut four equal lengths of twine or strong string. Tie one end of each piece of twine securely to each of the four corners of the bird feeder, perhaps looping it under one of the top layers of sticks before the glue fully sets for extra security. Then, gather the four strands together at the top and tie them in a strong knot, creating a loop for hanging.
Step 4: Fill and Hang
If you chose to paint or seal your bird feeder, do this now and let it dry completely according to the product instructions. Using a non-toxic, bird-safe sealer will help it last longer outdoors.
Once everything is dry and secure, fill your feeder with birdseed and hang it from a tree branch or hook in your garden. Then, sit back and watch for your new feathered visitors! This is one of the most rewarding diy popsicle stick summer crafts.
Project 7: Funky Popsicle Stick Bracelets DIY Popsicle Stick Summer Crafts
Let’s wrap up our project list with something wearable: funky popsicle stick bracelets! This project is a bit like magic, as it involves shaping the wood.
What You’ll Need: DIY Popsicle Stick Summer Crafts
- Jumbo popsicle sticks (the wider ones work best)
- A pot of boiling water (adult supervision absolutely required)
- Tongs
- A glass or jar with a diameter similar to your wrist
- Rubber bands
- Paints, markers, washi tape, yarn, glitter, etc., for decoration
Step 1: Boil the Popsicle Sticks
This is the crucial step that makes the wood pliable. Bring a pot of water to a boil. Place the jumbo popsicle sticks into the boiling water. Let them boil for about 15-30 minutes. The longer they boil, the more flexible they will become.
Caption: Step 1: Boiling jumbo popsicle sticks to make them flexible for our DIY bracelets – a cool science trick in our DIY popsicle stick summer crafts!
Safety First! This step MUST be done by an adult or under close adult supervision due to the boiling water. Use tongs to handle the hot sticks.
Step 2: Shape the Sticks
Once the sticks are sufficiently softened, carefully remove one from the hot water using tongs. It will be very flexible.
Quickly, while it’s still hot and pliable, bend the stick gently around a glass or jar that has a diameter slightly larger than your wrist (to allow for some spring-back).
Secure the bent popsicle stick to the glass using rubber bands to hold its curved shape. Be careful not to bend it too sharply or quickly, as it might still snap.
Step 3: Let Them Dry
Leave the popsicle sticks secured around the glasses/jars to dry completely. This can take 24-48 hours. They need to be bone dry to hold their new curved shape.
Once dry, carefully remove the rubber bands. The popsicle stick should now be a curved bracelet blank!
Step 4: Decorate Your Bracelets
Now for the really fun part: decorating your bracelets! Since the wood is now curved, it’s ready for its makeover.
You can paint them with acrylics, draw designs with permanent markers or paint pens, wrap them with colorful yarn or embroidery floss, cover them with washi tape, or embellish them with glitter and gems.
Let your creativity shine! These “Easy popsicle stick projects” can be customized to match any outfit or style. For more inspiration on decorating and crafting, checking out resources like HGTV’s handmade ideas can spark even more ideas.
These bracelets are a unique and stylish accessory, and a great conversation starter. Who knew humble popsicle sticks could be so fashionable?
Your Amazing Popsicle Stick Creations! DIY Popsicle Stick Summer Crafts
And there you have it – seven fantastic diy popsicle stick summer crafts to keep you and your family busy and creative all summer long! From decorative sunbursts to wearable art, the possibilities with simple popsicle sticks are truly endless.
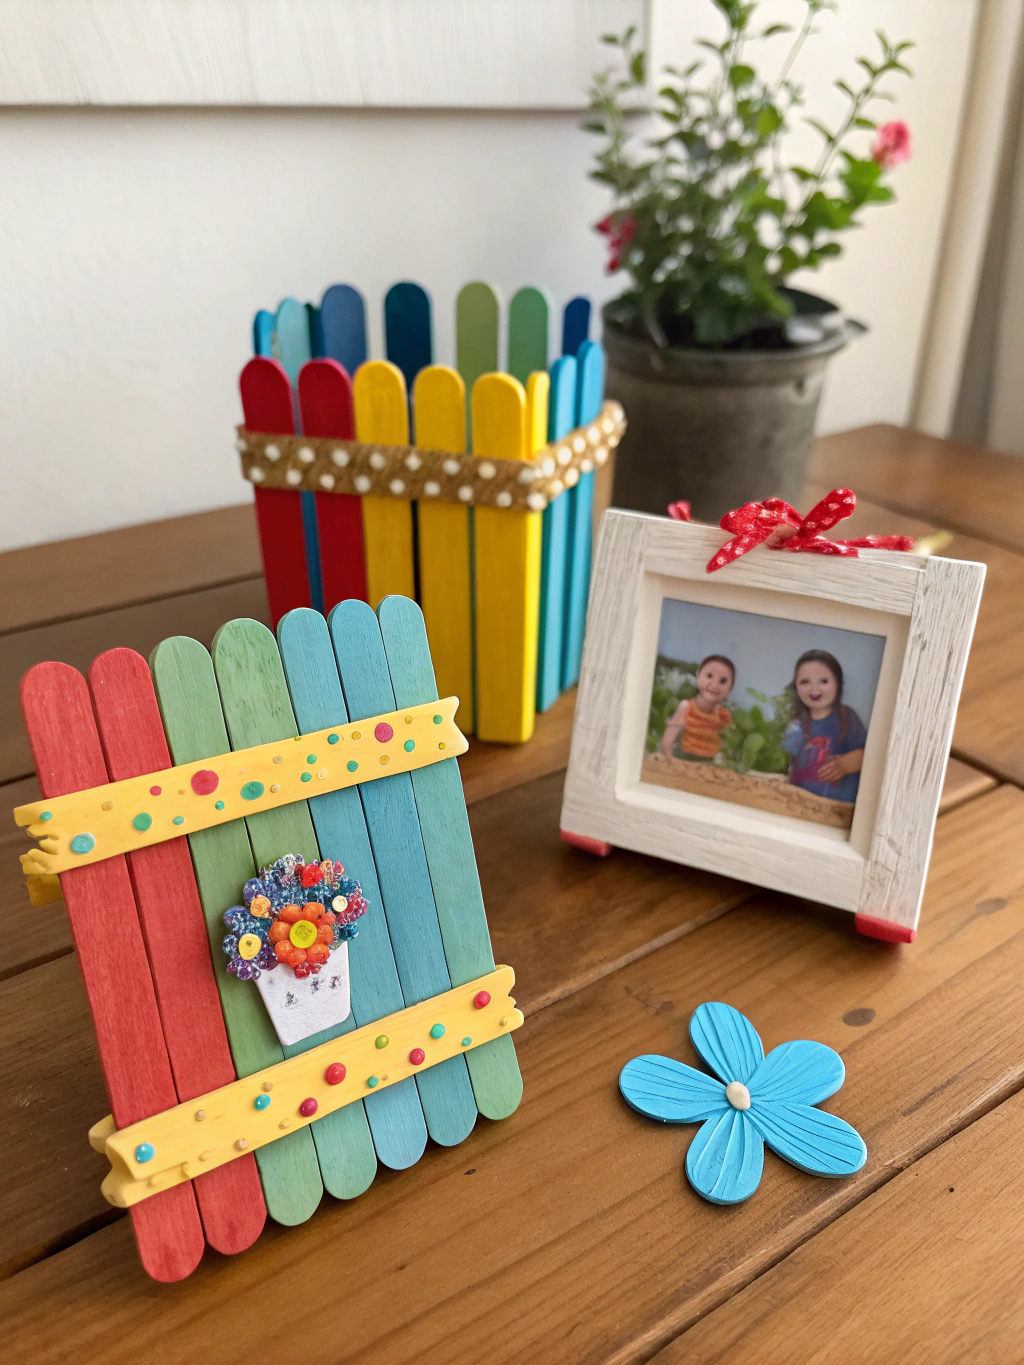
Caption: Your finished collection of DIY popsicle stick summer crafts! Aren’t they fantastic?
The real joy of these projects is not just the final product, but the process of making them. It’s about slowing down, using your hands, and transforming simple materials into something beautiful and meaningful. Whether you tackled one project or all seven, we hope you had a blast.
We’d absolutely LOVE to see what you’ve created! Share photos of your finished popsicle stick masterpieces in the comments below, or tag us on social media. Got any extra tips or variations on these projects? Share those too! Your creativity inspires our community. For more holiday DIYs and crafting tutorials, be sure to check out our other diy popsicle stick summer crafts and guides.
Pro Tips & FAQs for Popsicle Stick Crafting DIY Popsicle Stick Summer Crafts
To help you get the best results with your diy popsicle stick summer crafts, here are a few extra tips and answers to common questions:
Q1: What’s the best glue for popsicle stick crafts?
A: For most projects, a good quality wood glue or a strong white craft glue (like Aleene’s Tacky Glue) is excellent. They provide a strong, durable bond. A hot glue gun is great for quick adhesion and for attaching embellishments, but the bond might not be as strong over time as wood glue, and it requires caution, especially with kids. For projects exposed to moisture (like the bird feeder), consider a waterproof wood glue or sealer.
Q2: How can I cut popsicle sticks safely and easily?
A: For cutting standard popsicle sticks, strong craft scissors or utility scissors can work, but they might crush the wood slightly. For cleaner cuts, especially on multiple sticks or jumbo sticks, craft clippers, small wire cutters, or even a fine-toothed craft saw (like a jeweler’s saw or coping saw) are better. Always cut on a protected surface and, if kids are involved, this step should be done by an adult. Soaking the part of the stick you want to cut in hot water for a few minutes can also make it easier to cut without splintering.
Q3: Any tips for painting popsicle sticks without making a mess?
A: Yes! Firstly, always cover your work surface. For painting individual sticks, you can lay them flat on newspaper. To paint all sides without waiting for one side to dry, you can try sticking one end of the popsicle stick into a piece of styrofoam or floral foam, allowing you to paint all around it and let it air dry upright. Using acrylic paints gives good coverage, often in just one or two coats. Washable paints are best for very young children. Paint pens are also great for adding details after a base coat.
Q4: Where can I find inspiration for more “Easy popsicle stick projects”?
A: Inspiration is everywhere! Besides blogs like this one, Pinterest is a goldmine for visual ideas – just search for “popsicle stick crafts” or “craft stick projects.” Craft books for kids often feature popsicle stick ideas. Don’t forget to look at everyday objects too – how could you recreate a miniature version with popsicle sticks? Websites like HGTV for “DIY summer crafts for kids, Easy popsicle stick projects, How to make popsicle stick crafts,” often feature clever handmade ideas that can be adapted.
Q5: How can I make my popsicle stick crafts last longer, especially if they’ll be handled a lot or placed outdoors?
A: For added durability, especially for items like the bird feeder or coasters, applying a clear sealant is a great idea. An acrylic spray sealer (matte or gloss, depending on your preference) can protect the paint and wood from moisture and wear. Ensure you use a non-toxic, child-safe, or bird-safe sealer if appropriate for the project’s use. Using good quality glue and ensuring all joints are secure is also key to longevity.
We hope this comprehensive guide has sparked your imagination and equipped you with everything you need to embark on your own diy popsicle stick summer crafts adventure. Happy crafting!
What are you waiting for? Grab those popsicle sticks and get creative! Don’t forget to share your amazing projects in the comments below. If you loved this tutorial, please consider sharing it with your fellow DIY enthusiasts on Pinterest or Facebook, and sign up for our newsletter for more crafty ideas delivered straight to your inbox!

