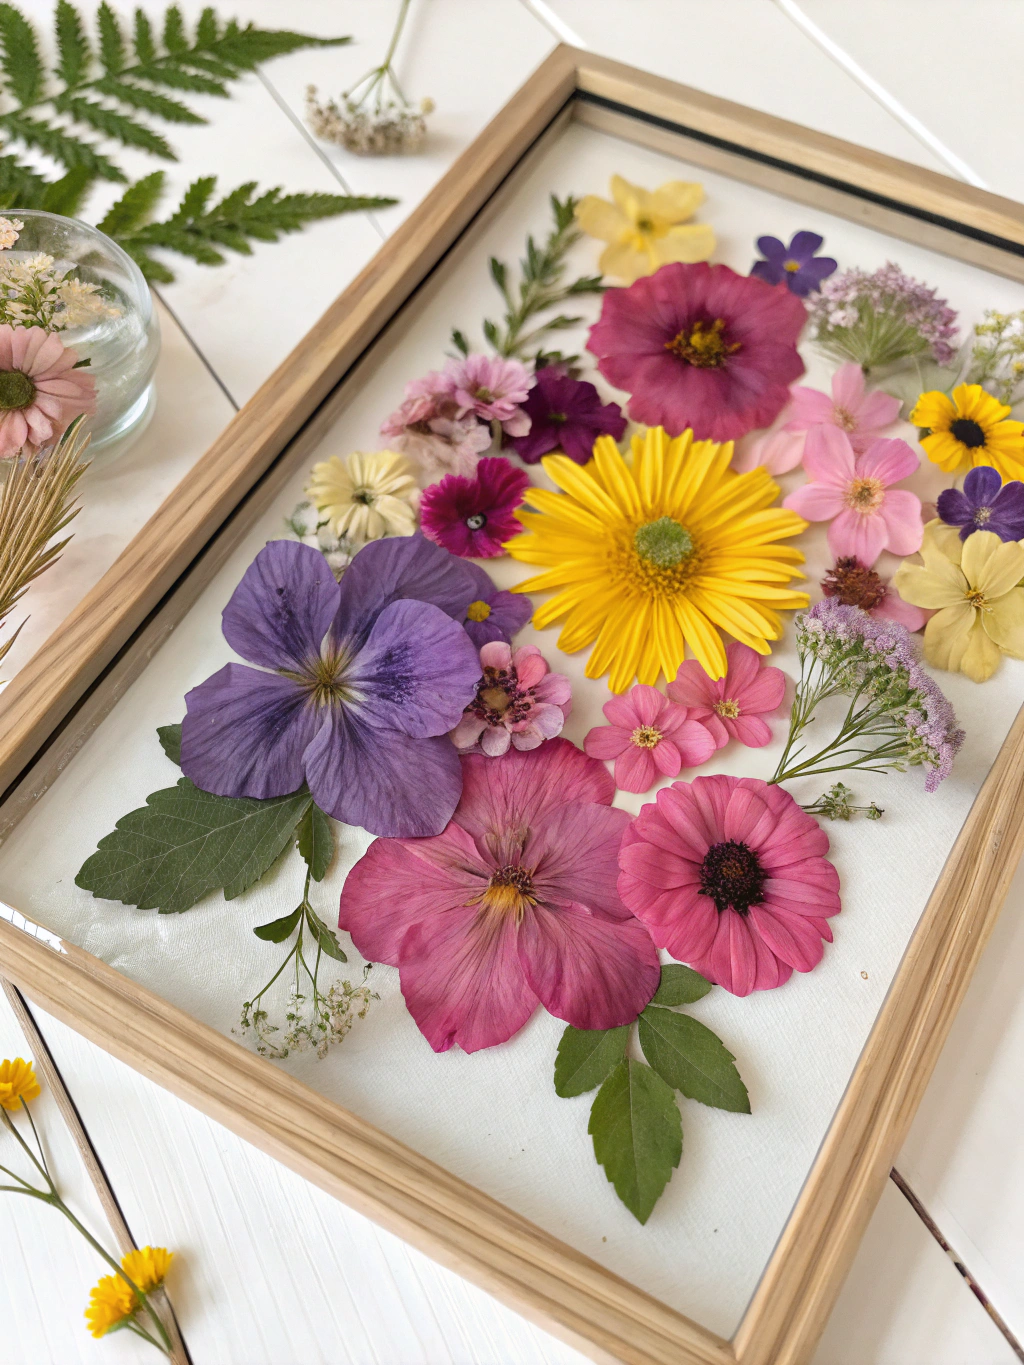
*Caption: Capture the fleeting beauty of summer with your very own DIY pressed flower art.*
Introduction: Unlock Summer’s Beauty with DIY Pressed Flower Art
Are you looking for a way to bring the vibrant colours and delicate beauty of summer into your home all year round? If you’ve ever sighed as your favourite garden blooms fade, then you’ll adore creating your own diy pressed flower art summer masterpieces! This craft is not just a delightful way to preserve nature’s artistry; it’s also incredibly therapeutic and results in stunning, unique home decor.
Forget expensive store-bought art – with a few simple supplies and a little patience, you can transform those sunny memories into tangible keepsakes. In this guide, we’ll walk you through everything you need to know, from pressing your first petal to crafting five breathtaking pieces that will brighten any space. Get ready to unleash your inner artist and make this summer unforgettable!
Table of Contents
What You’ll Need for Your DIY Pressed Flower Art Summer Adventures
Before you can start creating your beautiful pressed flower projects, you’ll need to gather a few essentials. Most of these are likely things you already have around the house or can easily acquire. Having everything ready will make your crafting process smooth and enjoyable!
*Caption: Gather these simple supplies to begin your DIY pressed flower art summer journey.*
Here’s a list of what you’ll generally need for pressing flowers and for the various projects:
For Pressing Flowers: DIY Pressed Flower Art Summer
- Fresh Flowers and Foliage: Choose blooms that are fresh, dry (no morning dew!), and preferably not too bulky. Think pansies, violets, cosmos, verbena, ferns, and individual petals from larger flowers.
- Flower Press (DIY or Store-Bought):
- DIY Option: Two flat, heavy books, cardboard sheets, and blotting paper (or plain, non-textured paper towels/coffee filters).
- Store-Bought Option: A dedicated flower press.
- Scissors or Pruning Shears: For snipping flowers.
- Tweezers: For handling delicate pressed flowers.
For Specific Art Projects (we’ll cover these more in each project): DIY Pressed Flower Art Summer
- Picture Frames: Especially floating frames or shadow boxes.
- Clear Craft Glue or Mod Podge: Acid-free is best to prevent discoloration.
- Cardstock or Watercolour Paper: For backgrounds or cards.
- Resin Kit (Epoxy Resin and Hardener): For projects like coasters or jewelry.
- Silicone Molds: If making resin items.
- Clear Phone Case: For a personalized touch.
- Laminator and Laminating Pouches (Optional): For bookmarks or durable art.
- Twine or Ribbon: For garlands.
- Parchment Paper or Wax Paper: To protect surfaces.
Having these items on hand will set you up for success as you delve into the wonderful world of diy pressed flower art summer.
The Foundation: How to DIY Pressed Flower Art Summer Flowers
Before we jump into creating specific art pieces, let’s master the art of pressing flowers. This crucial first step is what will ensure your blooms retain their color and shape, providing you with beautiful materials for your DIY projects.
Step 1: Gathering Your Summer Blooms / DIY Pressed Flower Art Summer
The best time to collect flowers for pressing is on a dry day, ideally mid-morning after any dew has evaporated. Look for flowers that are in their prime – not too old and not just budding.
Think about the “Pressed flower art ideas, DIY pressed flower home decor, How to create DIY pressed flower art,” you might want to explore later; this can guide your flower choices. Flat-faced flowers like violets, pansies, cosmos, and verbena press beautifully. You can also press individual petals from thicker flowers like roses or tulips. Don’t forget interesting leaves and ferns too!
Always ask for permission if picking flowers from a garden that isn’t yours. Handle them gently to avoid bruising the petals.
Step 2: Preparing Your Flowers for Pressing / DIY Pressed Flower Art Summer
Once you’ve gathered your botanical treasures, it’s time to prepare them. Remove any unwanted leaves or damaged petals. If a flower is particularly thick, you might consider carefully cutting it in half lengthwise with a sharp craft knife, or pressing individual petals.
The goal is to reduce bulk, which helps the flower dry more effectively and lie flat. This preparation is key to achieving professional-looking results in your diy pressed flower art summer pieces.
Gently wipe off any tiny insects or specks of dirt. Ensure the flowers are completely dry; any moisture can lead to mold during the pressing process.
Step 3: The Pressing Process (Using a Book or Flower Press) / DIY Pressed Flower Art Summer
This is where the magic begins! You have a couple of primary methods for pressing flowers:
Using Heavy Books: / DIY Pressed Flower Art Summer
- Open a heavy book (like a phone directory or textbook) towards the middle.
- Line a page with a sheet of blotting paper or a couple of layers of plain paper towel/coffee filter. This absorbs moisture.
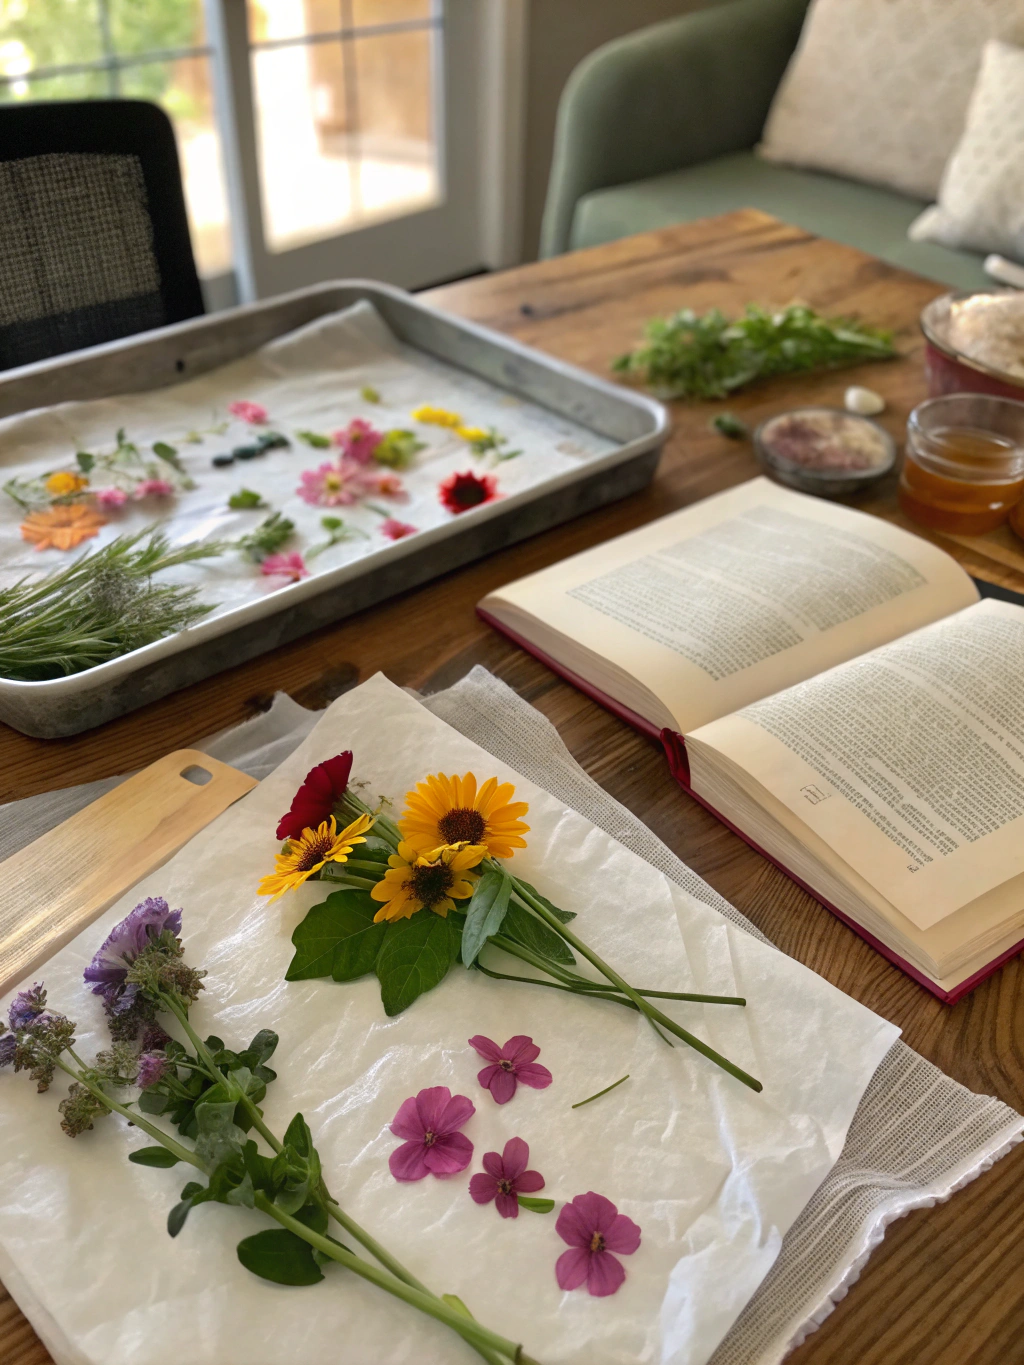
- Carefully arrange your flowers on the paper, ensuring they don’t overlap unless you want them pressed together. Face them downwards if you want to see their faces.
- Cover the flowers with another sheet of blotting paper.
- Close the book gently but firmly.
- Stack additional heavy books or weights on top.
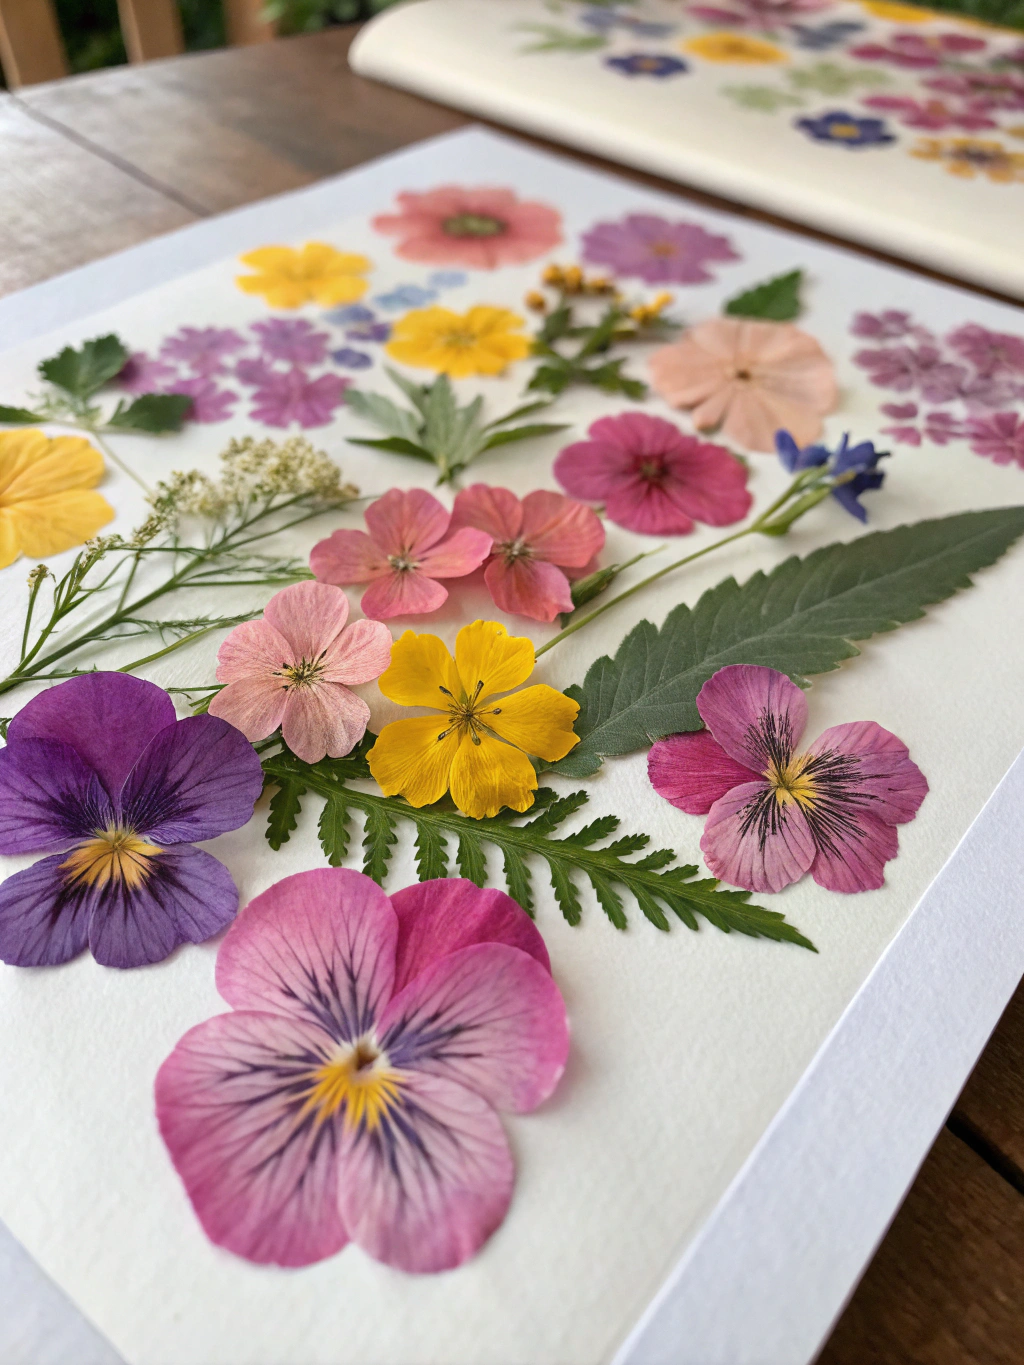
*Caption: Step 3: Carefully arrange your summer blooms between sheets of blotting paper inside a heavy book for pressing.*
Using a Flower Press: / DIY Pressed Flower Art Summer
- Unscrew your flower press. It typically consists of two wooden boards, layers of cardboard, and blotting paper.
- Layer it just like the book method: cardboard, blotting paper, flowers, blotting paper, cardboard. You can create multiple layers.
- Once all your layers are assembled, place the top wooden board and tighten the screws or straps evenly. Don’t overtighten initially, as you can damage the flowers. Tighten a bit more after a day or two.
Whichever method you choose, the key is even pressure and good moisture absorption. This step is fundamental to any “How to create DIY pressed flower art” tutorial.
Step 4: Patience is Key – The Waiting Game / DIY Pressed Flower Art Summer
Now comes the hardest part for any enthusiastic DIYer: waiting! Your flowers will need about 2 to 4 weeks to press and dry completely. The time can vary depending on the thickness of the flowers and the humidity.
It’s tempting to peek, but try to resist for at least the first week to avoid disturbing the flowers. After a week, you can carefully check them. If the paper is very damp, you can replace it with fresh, dry paper.
Once the flowers feel papery, dry, and slightly brittle, they are ready! Handle them with extreme care, preferably using tweezers, as they will be very delicate. Store your pressed flowers flat in a dry, dark place (like an airtight container or between pages of a book) until you’re ready to use them in your diy pressed flower art summer projects.
5 Stunning DIY Pressed Flower Art Summer Projects to Try
With your beautifully pressed flowers ready, it’s time to get creative! Here are five stunning diy pressed flower art summer projects that are perfect for showcasing their delicate beauty and adding a touch of summer to your home.
Project 1 : Enchanting Pressed Flower Floating Frames / DIY Pressed Flower Art Summer
Floating frames are a wonderfully modern way to display pressed flowers, making them appear as if they’re suspended in mid-air. This “DIY pressed flower home decor” project is relatively simple but looks incredibly elegant.
What You’ll Need:
- Pressed Flowers and Foliage
- Floating Frame: These usually consist of two panes of glass that fit into a frame.
- Glass Cleaner and Soft Cloth
- Tweezers
- Optional: Clear Craft Glue (use sparingly, only if needed)
Instructions: / DIY Pressed Flower Art Summer
- Prepare Your Frame: Carefully disassemble your floating frame and clean both panes of glass thoroughly with glass cleaner. Any smudges or dust will be very noticeable. Make sure the glass is completely dry.
- Plan Your Design: Before placing flowers, lay one pane of glass on a white piece of paper (this helps you see your design). Arrange your pressed flowers on the glass using tweezers. Play around with different layouts – a minimalist single stem, a scattered wildflower meadow, or a geometric pattern. Consider color combinations and textures. This is where your “Pressed flower art ideas” come to life!
- Securing (Optional): Most flowers will stay in place once sandwiched between the glass. However, if you have tiny or particularly delicate pieces that might shift, you can apply a minuscule dot of clear craft glue to the back of the flower and gently press it onto the glass. Use glue very sparingly; too much will be visible. Let any glue dry completely.
- Assemble the Frame: Once you’re happy with your arrangement, carefully place the second pane of glass on top. Align the edges perfectly. Gently pick up the sandwiched panes and slide them into the frame. Secure the frame according to its specific mechanism (clips, backing, etc.).
- Display Your Art: Find a lovely spot for your new creation. Floating frames look particularly beautiful on a windowsill where light can shine through, or against a light-colored wall.
Why It Matters: This project truly highlights the individual beauty of each pressed flower. The transparency creates a light, airy feel perfect for summer.
Common Pitfalls: Overlapping flowers too much can look messy. Fingerprints on the glass are a common issue, so handle with care or wear cotton gloves. Ensure flowers are completely dry, as any moisture trapped between the glass can lead to mold.
This project is a fantastic entry point into diy pressed flower art summer, offering instant gratification and a beautiful result.
Project 2 : Bohemian Pressed Flower Resin Coasters / DIY Pressed Flower Art Summer
Create functional art with these stunning pressed flower resin coasters. They make beautiful gifts or a chic addition to your own coffee table. Working with resin might seem intimidating, but with a few precautions, it’s a rewarding process.
What You’ll Need:
- Pressed Flowers
- Epoxy Resin Kit (Resin and Hardener): Choose a clear, UV-resistant casting resin.
- Silicone Coaster Molds: Round or square, whatever your preference.
- Mixing Cups (Disposable Plastic or Silicone)
- Stirring Sticks (Wooden Craft Sticks or Silicone Stirrers)
- Tweezers
- Gloves (Nitrile)
- Safety Glasses
- Heat Gun or Kitchen Torch (Optional): For removing bubbles.
- Parchment Paper or Plastic Sheeting: To protect your work surface.
- Optional: Gold Leaf Flakes or Mica Powder for extra sparkle.
Instructions:
- Prepare Your Workspace & Molds: Work in a well-ventilated area. Cover your workspace with parchment paper. Ensure your silicone molds are clean and completely dry.
- Arrange Flowers: Carefully place your pressed flowers face down into the molds using tweezers. Remember that the bottom of the mold will be the top of your coaster. If using, sprinkle in gold leaf flakes or a tiny bit of mica powder.
- Mix the Resin: Put on your gloves and safety glasses. Carefully measure your resin and hardener according to the manufacturer’s instructions (usually a 1:1 ratio, but always check). Pour them into a mixing cup. Stir slowly and thoroughly for 3-5 minutes, scraping the sides and bottom of the cup to ensure it’s fully combined. Stirring too fast can introduce excess bubbles.
- First Pour (Optional but Recommended for Thicker Flowers): If you want your flowers perfectly suspended, you can do a very thin initial pour of resin into the molds, just enough to cover the bottom. Let this cure for a few hours until tacky. Then, place your flowers on this tacky layer. This prevents them from floating to the top.
- Main Pour: Slowly pour the mixed resin into your molds over the flowers. Fill to the desired thickness, usually just below the rim of the mold.
- Remove Bubbles: After pouring, you’ll likely see some air bubbles. Let the resin sit for 5-10 minutes, allowing some bubbles to rise naturally. Then, you can quickly pass a heat gun (on low) or a kitchen torch flame a few inches above the surface to pop remaining bubbles. Don’t overheat the resin. Alternatively, you can gently exhale warm air over the surface through a straw.
- Cure: Cover the molds with a box or container to protect them from dust. Let them cure undisturbed for 24-72 hours, depending on your resin and room temperature. The resin packaging will specify the cure time.
- Demold: Once fully cured, gently flex the silicone molds to release your beautiful pressed flower coasters. They might have a slightly sharp edge on the bottom, which you can sand smooth with fine-grit sandpaper if desired.
Why It Matters: Resin encases the flowers perfectly, preserving them in a durable, waterproof, and glass-like finish. This project creates a lasting piece of “DIY pressed flower home decor.”
Common Pitfalls: Incorrect resin-to-hardener ratio can result in sticky, uncured resin. Too many bubbles can mar the finish. Flowers not being completely dry can cause cloudiness or bubbles around them in the resin. Always work in a well-ventilated area and wear protective gear when using resin.
These coasters are a fantastic way to showcase your diy pressed flower art summer skills and make for impressive, handcrafted gifts. For more advanced resin techniques and “Pressed flower art ideas, DIY pressed flower home decor, How to create DIY pressed flower art,” exploring dedicated resin craft sites can be very helpful.
Project 3 : Delicate Pressed Flower Phone Case / DIY Pressed Flower Art Summer
Carry a piece of summer with you everywhere by creating a custom pressed flower phone case. This is a super popular and relatively easy diy pressed flower art summer project that adds a personal, botanical touch to your tech.
What You’ll Need:
- Pressed Flowers and Small Leaves
- Clear Phone Case: Make sure it’s clean and fits your phone model perfectly.
- Clear Craft Glue or Decoupage Medium (like Mod Podge): Choose one that dries clear and is durable. An acid-free glue is preferable.
- Tweezers
- Small Brush: For applying glue/Mod Podge.
- Parchment Paper or a Non-Stick Craft Mat
- Optional: Clear Sealer Spray or a Thin Layer of Resin for extra durability.
Instructions:
- Prepare Your Case: Clean your clear phone case thoroughly with rubbing alcohol to remove any oils or dirt. Let it dry completely.
- Plan Your Design: Lay your phone case on a piece of white paper. Arrange your selected pressed flowers on the outside back of the case using tweezers. Try different compositions until you find one you love. Take a photo of your final design so you can recreate it. This is a great way to play with different “Pressed flower art ideas”.
- Apply Flowers: Working one flower at a time, apply a thin, even layer of clear craft glue or Mod Podge to the back of the flower using your small brush. Carefully place it onto the phone case in your desired position, pressing gently. Alternatively, you can apply a thin layer of glue to the area on the case where the flower will go, then place the flower on top. Tweezers are your best friend here for precise placement.
- Continue Layering: Add all your flowers and leaves according to your design. You can overlap petals slightly for a more dimensional look. Be mindful of the camera cutout and any buttons.
- Seal Your Design (First Coat): Once all flowers are glued down and the initial glue is dry (check specific glue drying times), apply a thin, even coat of Mod Podge or clear craft glue over the entire design. Brush gently from the center outwards to avoid dislodging the delicate petals. This coat helps to seal the flowers and adhere them more securely. Let this coat dry completely (usually a few hours, or as per product instructions).
- Add More Coats (Optional but Recommended): For better durability, apply one or two more thin coats of Mod Podge, allowing each coat to dry fully in between. This builds up a protective layer.
- Final Sealing (Optional, for Maximum Durability):
- Sealer Spray: Once the Mod Podge is fully cured (usually 24 hours), you can apply a clear acrylic sealer spray for extra protection against wear and tear. Do this in a well-ventilated area.
- Resin: For a super durable, glossy, professional finish, you can apply a very thin layer of clear casting resin over the flowers (similar to the coaster method, but much thinner, and you’d do this with the case lying flat, ensuring resin doesn’t go over the edges). This is more advanced but yields stunning results. If using resin, ensure your initial glue/Mod Podge layers are completely cured.
Why It Matters: This project personalizes an everyday item, making it unique and beautiful. It’s a constant reminder of summer’s beauty.
Common Pitfalls: Using too much glue can cause it to seep out and look messy. Flowers not being completely flat can snag or peel off. If not sealed properly, flowers can get damaged with use. Ensure any glue used is truly clear-drying.
A pressed flower phone case is a lovely conversation starter and a practical piece of diy pressed flower art summer.
Project 4 : Whimsical Pressed Flower Greeting Cards / DIY Pressed Flower Art Summer
Handmade cards add a personal touch that store-bought ones can’t replicate. Adorning cards with pressed flowers elevates them to tiny works of art, perfect for birthdays, thank you notes, or just because during the summer months.
What You’ll Need:
- Pressed Flowers and Leaves
- Blank Cards and Envelopes: Cardstock or watercolour paper works well.
- Clear Craft Glue or PVA Glue: Acid-free is best.
- Tweezers
- Fine-Tip Marker or Pen (Optional): For adding messages or details.
- Parchment Paper
- Optional: Decorative Washi Tape, coloured pencils, or watercolour paints.
Instructions:
- Choose Your Card Base: Select blank cards in colours that will complement your pressed flowers. Light, neutral colours often work best to let the flowers shine.
- Plan Your Floral Design: Lay out your card. Using tweezers, arrange your pressed flowers on the front of the card. Experiment with different layouts. Consider a single focal flower, a small bouquet, a border, or a scattered pattern. This is a great opportunity to explore various “Pressed flower art ideas”.
- Glue the Flowers: Once you’re happy with the arrangement, carefully lift each flower/leaf one by one. Apply a very small amount of clear craft glue to the back of the flower using a fine-tipped applicator, a toothpick, or a tiny brush. Gently press it onto the card.
- Press Gently: After gluing, you can place a piece of parchment paper over the design and lightly press it with a flat object (like a book) for a few minutes to ensure good adhesion. Be careful not to smudge any glue.
- Add Details (Optional): Once the glue is dry, you can add hand-lettered messages, draw stems or borders with a fine-tip marker, or even add subtle watercolour washes around your flowers. Washi tape can also be used to create pretty borders or accents.
- Protect Your Creation: If mailing, it’s a good idea to place a piece of thin card or tissue paper inside the envelope over the flowers to protect them during transit. For very delicate designs, consider using a padded envelope.
Why It Matters: Handmade cards are heartfelt. Adding real pressed flowers, products of your diy pressed flower art summer efforts, makes them even more special and memorable.
Common Pitfalls: Using too much glue is the most common issue, leading to visible residue or wrinkled paper. Flowers not being completely dry can also cause issues. Ensure your hands are clean to avoid smudging the cards.
These pressed flower cards are not just greetings; they are miniature pieces of art that recipients will cherish. It’s a wonderful way to share the beauty of your summer garden.
Project 5 : Stunning Pressed Flower Wall Hanging or Garland / DIY Pressed Flower Art Summer
Create a beautiful, bohemian-inspired wall hanging or a delicate garland using your pressed flowers. This “DIY pressed flower home decor” project can be adapted to any size and style, bringing a touch of nature’s whimsy indoors.
What You’ll Need:
- An Abundance of Pressed Flowers and Leaves
- For a Wall Hanging:
- Clear Acrylic Sheets (two, same size) OR Two Panes of Glass from an old frame OR Laminating Pouches and Laminator
- Strong Double-Sided Tape or Clear Craft Glue (if not using lamination)
- Twine or Pretty Ribbon for hanging loop
- Drill with small bit (if using acrylic/glass and needing to make holes for hanging)
- OR a Wooden Dowel/Branch and fine string/thread
- For a Garland:
- Cardstock (cut into desired shapes like circles, hearts, tags) OR Laminating Pouches
- Clear Craft Glue or Mod Podge
- Hole Punch
- Twine, Fishing Line, or Delicate Ribbon
- Tweezers
- Scissors
Instructions for a Laminated Garland/Wall Hanging Elements:
- Design Segments: Arrange pressed flowers on one side of an open laminating pouch. You can create individual small compositions that will become segments of your garland or elements of a larger wall hanging.
- Laminate: Carefully close the pouch and run it through your laminator according to its instructions. This seals the flowers beautifully.
- Cut Shapes: Once cooled, cut out your laminated flower designs into desired shapes (circles, squares, organic shapes for a wall hanging, or individual leaf/flower shapes for a garland). Leave a small sealed edge around each flower.
- Assemble Garland: Punch a hole at the top (or top and bottom if stringing vertically) of each laminated shape. Thread your twine or ribbon through the holes, spacing them as desired. Knot to secure.
- Assemble Wall Hanging (using laminated elements): You can attach these laminated shapes to a piece of driftwood or a wooden dowel using fine thread or fishing line, varying the lengths for a cascading effect. Alternatively, arrange larger laminated pieces on a wall.
Instructions for a Floating Glass/Acrylic Wall Hanging:
- Prepare Surface: Clean your two acrylic sheets or glass panes (similar to the floating frame project).
- Arrange Flowers: Lay one sheet down and arrange your pressed flowers on it. For a larger piece, you might want a more spaced-out, airy design.
- Secure:
- Glue Method: Sparingly apply tiny dots of clear glue to hold flowers. Place the second sheet on top, aligning perfectly. Clamp the edges (gently, with soft cloths to protect) while glue fully dries if needed.
- Tape Method: Use very strong, clear double-sided tape around the very edges between the two sheets to seal them together.
- Add Hanger: If using acrylic, you can carefully drill two small holes at the top and thread twine through. For glass, it’s safer to use a frame that supports it or purpose-built frame clips that create a hanging point.
Why It Matters: This project allows for larger-scale creativity and can be a real statement piece. Garlands add a whimsical touch to windows, mantels, or party decorations, while wall hangings become focal points. It’s a versatile approach to “How to create DIY pressed flower art.”
Common Pitfalls: For garlands, if elements are too heavy or not balanced, they won’t hang well. For glass/acrylic hangings, ensuring no dust or fingerprints get trapped is crucial. Lamination can sometimes slightly alter flower colours due to heat, so test with a less precious flower first.
This type of diy pressed flower art summer project allows for a lot of freedom and can be adapted to match any decor style, from rustic to modern.
Your Beautifully Pressed Summer Memories / DIY Pressed Flower Art Summer
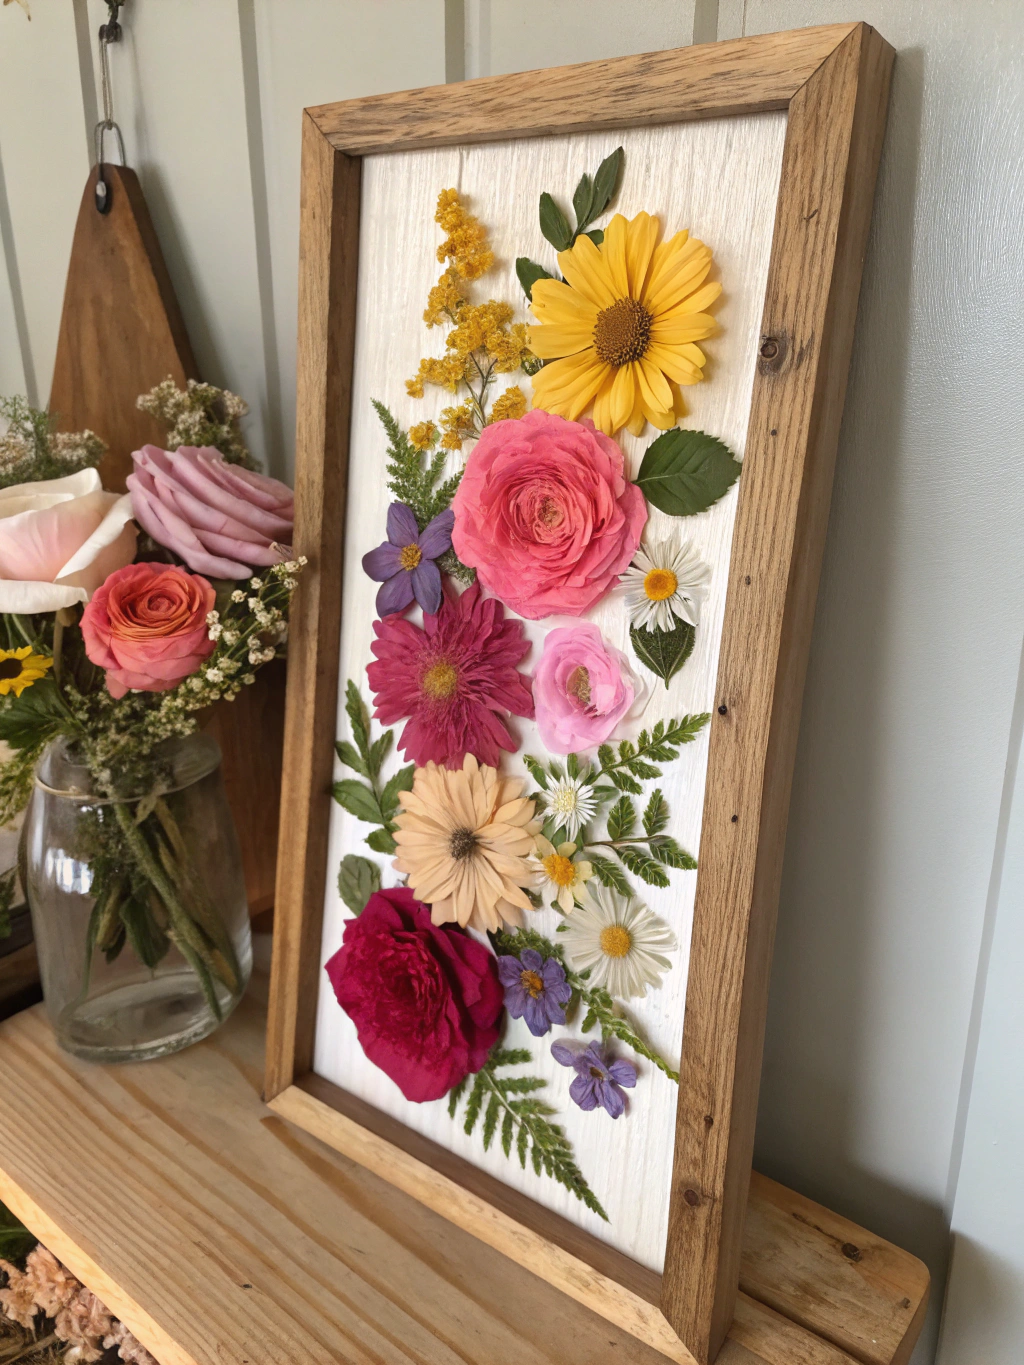
*Caption: Behold your handcrafted collection of DIY pressed flower art, capturing the essence of summer!*
And there you have it! From patiently pressing those delicate summer blooms to crafting five distinct and beautiful pieces, you’ve now unlocked a wonderful way to preserve nature’s artistry. Whether it’s the elegant floating frame, the chic resin coasters, your personalized phone case, heartfelt greeting cards, or a whimsical wall hanging, each creation holds a little piece of summer’s magic.
These projects are just the beginning. The world of diy pressed flower art summer is vast and full of possibilities. We hope these ideas have inspired you to start your own pressed flower journey. Imagine the joy of gifting a handmade treasure or seeing your own botanical creations brighten your home day after day!
We’d absolutely love to see what you create! Share your pressed flower masterpieces in the comments below, or tag us on social media. What are your favourite flowers to press for summer projects? Do you have any special tips or tricks? Let’s get the conversation blooming!
Pro Tips and FAQs for Your DIY Pressed Flower Art Summer Masterpieces / DIY Pressed Flower Art Summer
To help you get the best results and troubleshoot any potential issues with your diy pressed flower art summer projects, here are some pro tips and frequently asked questions:
(Collapsible Section 1 – Click to Expand)
Q1: How do I prevent my pressed flowers from fading over time?
- A: While some fading is natural, you can minimize it.
- Dry Thoroughly: Ensure flowers are completely dry before sealing them in any project. Moisture is the enemy.
- Avoid Direct Sunlight: UV rays are the primary cause of fading. Display your art away from direct, prolonged sunlight.
- Use UV-Resistant Materials: When using resin or sealer sprays, opt for UV-resistant varieties. Some picture frames also come with UV-protective glass.
- Store Properly: Store unused pressed flowers in a cool, dark, dry place.
(Collapsible Section 2 – Click to Expand)
Q2: What are the best types of flowers to press for vibrant “DIY pressed flower home decor”?
- A: Generally, flowers that are naturally flat and not too thick work best.
- Great Choices: Pansies, violets, larkspur, cosmos, verbena, delphiniums, single-petal roses, hydrangeas (individual florets), ferns, Queen Anne’s Lace, and most wildflowers.
- Challenging Choices: Very bulky flowers like full roses or peonies are hard to press whole (press individual petals instead). Succulents or very watery flowers also don’t press well.
- Color Retention: Blue, purple, and red flowers often retain their color well. Whites can sometimes brown, and yellows can fade, but results vary. Experimentation is key!
(Collapsible Section 3 – Click to Expand)
Q3: My pressed flowers look a bit dull. How can I enhance their color or appearance for “Pressed flower art ideas”?
- A: Once pressed, the colour is mostly set. However:
- Layering: Sometimes, layering similar coloured flowers or petals can give a richer appearance.
- Background Choice: The background you place flowers on significantly impacts their look. A contrasting background can make colours pop.
- Resin: Encasing flowers in resin often enhances their translucency and can make colours appear more vibrant.
- Pre-Treatment (Advanced): Some professional floral artists use special silica gel drying methods or pre-treatments to preserve colour, but this is more advanced than simple pressing. For most diy pressed flower art summer projects, natural pressed beauty is part of the charm.
(Collapsible Section 4 – Click to Expand)
Q4: Can I use a microwave flower press for quicker results?
- A: Yes, microwave flower presses are available and can significantly speed up the drying process, often taking minutes instead of weeks. They typically involve pressing flowers between ceramic tiles and special fabric pads, then microwaving in short bursts.
- Pros: Much faster, can help retain color better for some species.
- Cons: Requires more attention during the process (risk of scorching if microwaved too long). May not be suitable for all flower types. The results can sometimes be a bit different texturally than traditionally pressed flowers.
- It’s a great option if you’re impatient or need pressed flowers quickly for your “How to create DIY pressed flower art” projects.
(Collapsible Section 5 – Click to Expand)
Q5: My glue is visible on my finished pressed flower art piece. How can I avoid this?
- A: This is a common concern!
- Use Sparingly: Apply the thinnest possible layer of glue. A tiny dot is often enough.
- Apply to the Flower, Not the Surface: It’s often easier to control the amount by applying glue to the back of the pressed flower (using a toothpick or fine brush) rather than directly onto your project surface.
- Choose Clear-Drying Glue: Ensure your glue specifies “dries clear.” Acid-free varieties are also best for preventing yellowing over time.
- Matte Finish: If using a decoupage medium like Mod Podge, choose a matte finish if you want the glue to be less conspicuous. Glossy finishes can sometimes highlight imperfections.
- Clean Up Excess Quickly: If any glue seeps out, try to gently wipe it away with a slightly damp Q-tip before it dries (test in an inconspicuous area first).
We hope this comprehensive guide empowers you to create stunning diy pressed flower art summer pieces that you’ll cherish for years to come. Don’t forget to explore more creative inspiration for “Pressed flower art ideas, DIY pressed flower home decor, How to create DIY pressed flower art,” and keep experimenting with different blooms and techniques.
Feeling inspired?
- Share your creations in the comments below! We’d love to see your summer masterpieces.
- Sign up for our newsletter for more DIY tips, tricks, and seasonal project ideas delivered straight to your inbox.
- Follow us on social media for daily inspiration and to connect with our vibrant DIY community!
Happy Crafting!
“`

