Ever stare at a blank, boring wall in your home and just… sigh? You know it has potential, but a full-scale renovation feels overwhelming and expensive. If you’re dreaming of adding character, texture, and a touch of that coveted modern farmhouse charm without hiring a contractor, then this DIY shiplap wall project is about to become your new best friend. It’s a transformative project that looks incredibly high-end but is surprisingly achievable for even the most novice DIYer.
Forget what you think you know about complex woodworking. We’re going to break down how to create a stunning shiplap accent wall into nine simple, manageable steps. This guide is your complete roadmap, from navigating the lumber aisle to making the final, satisfying brushstroke. So, roll up your sleeves, put on your favorite playlist, and let’s turn that bland wall into a spectacular focal point that will have everyone asking, “You did that yourself ?”
Table of Contents

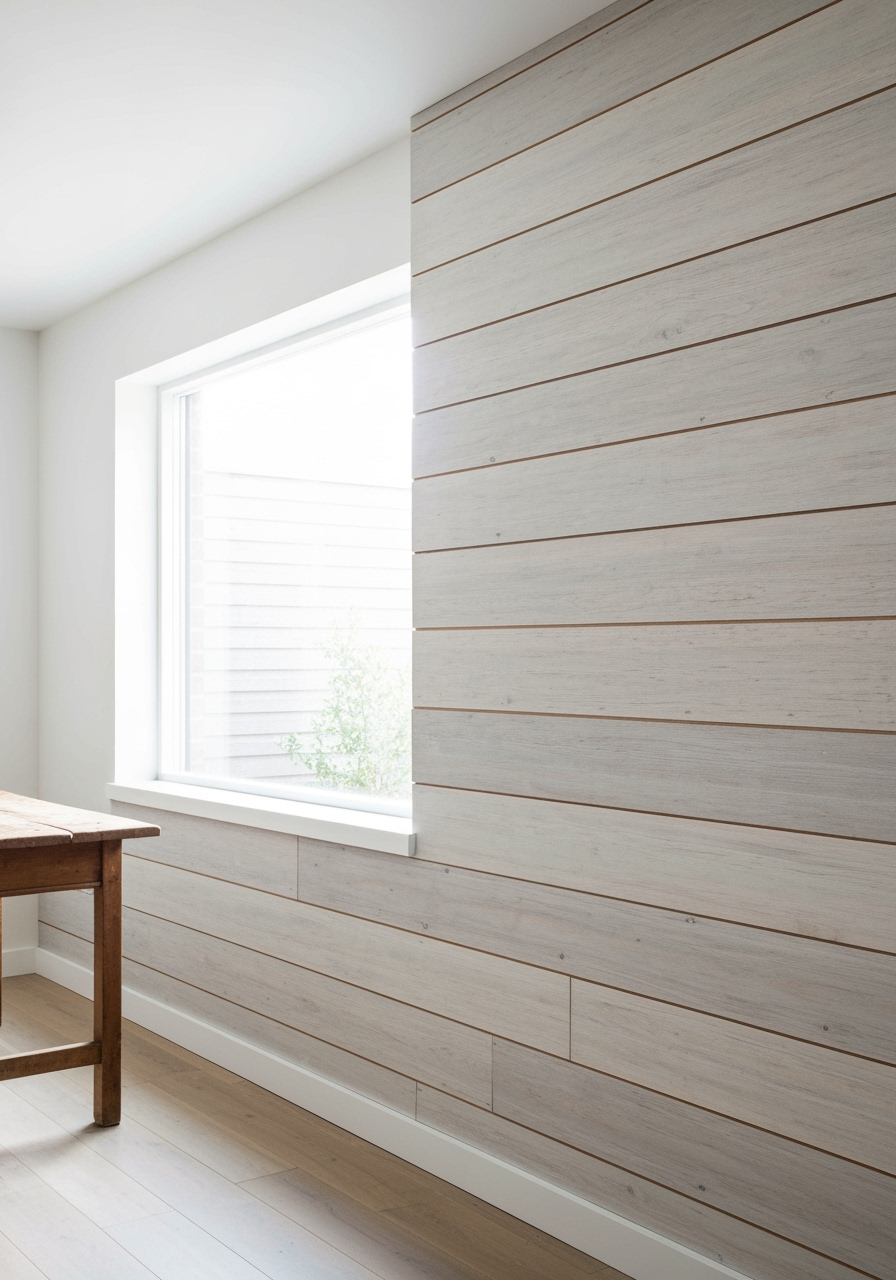
alt=”A stunning living room showcases the final result of a DIY shiplap wall project.”
First Things First: What Exactly Is Shiplap? DIY shiplap wall project
Before we dive in, let’s talk about what makes shiplap, well, shiplap. Historically, it was used to create a watertight seal on the exterior of ships and barns. The magic is in the edge of each board, which has a special notch called a “rabbet.” This rabbet on one board overlaps the board next to it, creating that tell-tale gap and a strong, interlocking fit.
Today, its rustic, clean-lined look has made it a darling of interior design. It adds visual interest and a sense of history to a room without being overwhelming. You can find it in a few different forms:
- Traditional Shiplap: Usually made of pine or cedar with the classic rabbet joint.
- MDF Shiplap: A budget-friendly, smooth-surfaced option that’s easy to paint. It’s perfect for interior accent walls.
- Nickel Gap Boards: These boards often have a tongue-and-groove profile but are milled to create a consistent gap (the width of a nickel) when installed. This is the look most people associate with modern shiplap.
For this tutorial, we’ll focus on using pre-primed MDF or nickel gap boards, as they are the most beginner-friendly and provide a flawless finish.
Planning Your Perfect Shiplap Wall DIY shiplap wall project
A little planning goes a long way in ensuring your project is a success. Rushing in can lead to frustration and wasted materials.
1. Choose Your Wall:
The best candidate for a shiplap accent wall is one that you want to draw attention to. Think about the wall behind your bed, the main wall in your living room where the TV is mounted, or a feature wall in your dining room. Consider a wall with minimal obstructions (like too many windows or doors) for your first project.
2. Horizontal or Vertical? The Great Debate.
- Horizontal: This is the classic orientation. It makes a room feel wider and more expansive. It’s the most common choice and what we’ll be demonstrating in this guide.
- Vertical: Installing shiplap vertically can make a room with a low ceiling feel much taller and more grand. It’s a modern twist on the classic look and is great for entryways or powder rooms. The installation process is nearly identical, except your boards run up and down.
3. Calculating How Much Shiplap You Need:
Time for some simple math. Don’t worry, there won’t be a test!
- Step A: Grab your measuring tape. Measure the height and width of your wall in feet.
- Step B: Multiply the height by the width to get the total square footage. (Example: 8 ft tall x 12 ft wide = 96 square feet).
- Step C: Add 10-15% to your total square footage. This is your “waste factor” and accounts for inevitable mis-cuts or mistakes. It’s a non-negotiable step! (Example: 96 sq ft x 1.15 = 110.4 sq ft).
- Step D: Check the packaging on your shiplap boards. It will tell you how many square feet a single package or board covers. Buy enough to cover your total calculated square footage (in our example, 110.4 sq ft). It’s always better to have a little extra than to have to make a last-minute trip to the store.
What You’ll Need for Your DIY Shiplap Wall Project DIY shiplap wall project
Gathering all your tools and materials before you start is the secret to a smooth, stress-free DIY day. There’s nothing worse than getting into a groove only to realize you’re missing a critical item.

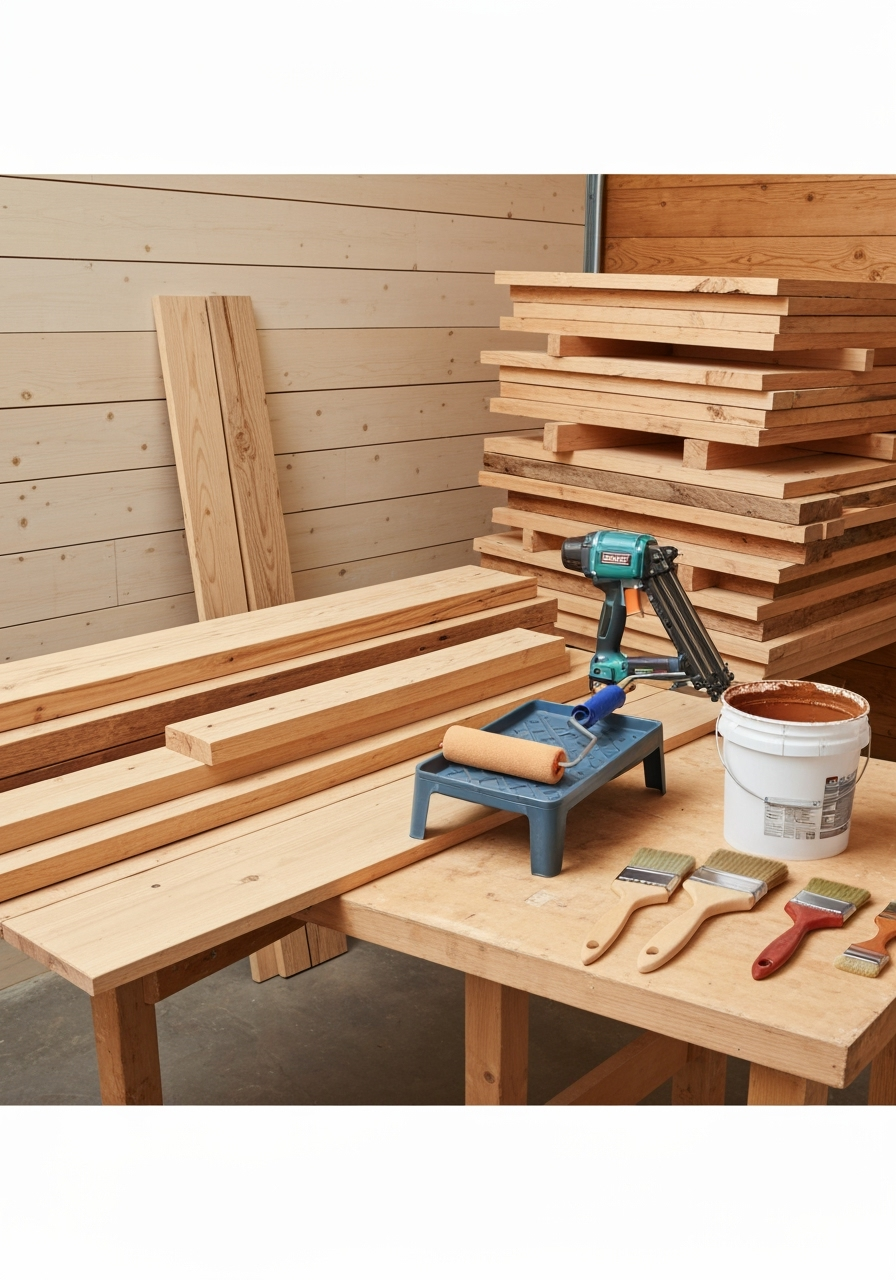
Materials:
- Shiplap Boards: Enough to cover your wall, plus 10-15% extra. We recommend pre-primed MDF or pine boards for ease.
- Quality Paint: One gallon of interior paint in your desired color and sheen (eggshell or satin are great for durability and a slight luster).
- Primer: If your boards aren’t pre-primed, you’ll need a good quality wood primer.
- Construction Adhesive: A couple of tubes for your caulking gun will help ensure the boards are securely bonded to the wall.
- 2-inch Brad Nails: These small nails are perfect for securing the boards without leaving large, obvious holes.
- Wood Filler: For filling in nail holes before the final coat of paint.
- Paintable Caulk: The key to a professional, seamless finish where the wall meets the corners and ceiling.
- Painter’s Tape: To protect your ceiling and adjacent walls.
Tools: for DIY shiplap wall project
- Miter Saw: This is the hero tool of the project. It will give you perfectly straight and angled cuts with ease. A 10-inch or 12-inch saw is ideal.
- Brad Nailer (and Air Compressor or Battery): This will make the installation process ten times faster and easier than using a hammer. Trust us, it’s a worthy investment for any DIYer.
- 4-Foot Level: Do not attempt this project without a long level. It is absolutely essential for making sure your first board, and every board after, is perfectly straight.
- Stud Finder: This little gadget is non-negotiable for finding the wooden studs behind your drywall to nail into.
- Measuring Tape & Pencil: The classic duo. Measure twice, cut once!
- Jigsaw: Essential for cutting around outlets, light switches, or windows.
- Caulking Gun: For applying construction adhesive and caulk.
- Safety Glasses & Dust Mask: Protect your eyes from debris and your lungs from sawdust.
Step-by-Step Guide: How to Build a Shiplap Wall DIY shiplap wall project
Alright, you’ve done your planning and gathered your supplies. Now comes the fun part! Follow these nine steps for a flawless installation.
Step 1: Prepare Your Wall and Mark Your Studs DIY shiplap wall project
You wouldn’t build a house on a shaky foundation, and you shouldn’t install shiplap on an unprepared wall. This initial step is the most critical for a professional result.

First, clear the room of any furniture that might get in the way. Lay down a drop cloth to protect your floors. Next, carefully remove all outlet covers, switch plates, and any existing baseboards or trim from the wall using a pry bar. To avoid damaging the drywall, place a thin piece of scrap wood behind the pry bar as you work.
Now, for the most important part: locating and marking your studs. Grab your stud finder and slide it horizontally across the wall. When it beeps or lights up, you’ve found a stud. Use your pencil to make a mark. Find both edges of the stud and mark the center. Do this all the way across the wall. Then, use your long level as a straight edge to draw a faint vertical line from floor to ceiling along the center of each stud. This gives you a clear roadmap for where to nail your boards, ensuring they are securely fastened to the framework of your house, not just the drywall.
Step 2: Paint the Wall (The Pro Shadow-Gap Secret) DIY shiplap wall project
This might seem like a strange step. Why paint a wall you’re about to cover up? Here’s the secret: the small gaps between your shiplap boards can reveal glimpses of the wall behind them. If your wall is a different color (like builder’s beige) and your shiplap is white, those gaps will be glaringly obvious and look amateurish.
To create a professional “shadow gap” effect, paint the entire wall the same color as your shiplap boards. Or, for an even more dramatic effect, paint it a dark color like black or charcoal gray. This makes the gaps recede visually and adds depth to the final look. You don’t need perfect coverage; one quick coat is usually sufficient.
Step 3: Prime and Paint Your Shiplap Boards DIY shiplap wall project
Here’s another pro tip that will save you a massive headache: paint your boards before you install them. Trying to get a paintbrush into those tiny gaps once the boards are on the wall is tedious and messy. It’s far easier to set up a painting station in your garage or on a drop cloth.
If your boards aren’t pre-primed, apply one coat of primer and let it dry completely. Lightly sand with 220-grit sandpaper for a super-smooth surface. Then, using a small roller and a brush, apply two coats of your final paint color, letting each coat dry according to the can’s instructions. Make sure to get some paint on the top “tongue” and bottom groove of each board.
Step 4: Measure and Cut Your First Board DIY shiplap wall project
The first board is the foundation for the entire wall. It absolutely, positively must be level. Do not, under any circumstances, assume your floor or ceiling is level—they almost never are!
Decide where you want your first board to start. Most people start at the bottom and work their way up. Measure the full width of your wall and cut your first shiplap board to that length using your miter saw. Take the board to the wall and place it where it will go. Now, place your 4-foot level on top of the board. Adjust the board until the bubble is perfectly centered. Once it is, use your pencil to trace a light, perfectly level line along the top of the board. This is your guide.
Step 5: Install the First Board
With your level line drawn, you’re ready to lock in that crucial first piece. Run a bead of construction adhesive in a wavy “S” pattern on the back of the board. This provides incredible holding power between the studs.
Carefully press the board onto the wall, aligning its top edge with the pencil line you drew. Now, grab your brad nailer. The secret to a clean look is to hide the nails. Drive 2-inch brad nails through the top “tongue” or flange of the shiplap at a 45-degree angle, directly into each of the stud lines you marked earlier. The next board will cover these nails completely. You may need to add a few nails through the face of the board for extra security, but you can fill these later.
Step 6: Stack ‘Em Up and Stagger the Seams
Now you get to see your wall come to life! The next board should slide right into place, its bottom groove fitting snugly over the tongue of the first board. This self-spacing feature is what makes installation so satisfying. Use a coin like a nickel or a penny as a spacer between the ends of the boards if your wall is wider than a single board length to ensure a consistent gap.
Crucial Tip: To avoid a strange, grid-like pattern, you need to stagger your seams. Never start a new row with a board cut to the same length as the one below it. A good rule of thumb is to use the off-cut from the end of your first row to start your second row (if it’s longer than a foot). This creates a more natural, random pattern, much like a hardwood floor. Continue this process up the wall, always checking for level every 3-4 rows just to be safe.
Step 7: Cutting Around Outlets and Obstacles
Inevitably, you’ll run into an outlet, light switch, or window. Don’t panic! This is where your jigsaw becomes your best friend.
Hold the shiplap board up to the wall in its exact position, making sure it’s level. Use your pencil to trace the outline of the obstacle directly onto the board. For an electrical box, mark all four corners. Take the board to your workstation, drill a starting hole in a corner of your marked area, and then use your jigsaw to carefully cut along the lines. Always cut slightly inside your lines; you can trim more if needed, but you can’t add wood back.
Safety Note: You will likely need to use an “outlet box extender.” This is a simple plastic ring that brings your outlet flush with the new surface of the shiplap, which is a requirement of the electrical code.
Step 8: Tackling the Final Board
The last board at the top of the wall will almost certainly need to be cut lengthwise (or “ripped”) to fit. This is the trickiest cut of the project.
Measure the height of the remaining gap between the top of your last full board and the ceiling. Here’s a tip: measure this gap on the left side, in the middle, and on the right side, as ceilings are often not perfectly level. Use these measurements to mark a cut line on your final board. Use a table saw or a circular saw with a guide to rip the board to the required width.
Snugly fit it into place and secure it by face-nailing it into the studs, as trim will likely cover these nails. For more in-depth guidance, there are many resources that provide excellent DIY shiplap wall project tips, Installing shiplap for beginners, How to build a shiplap wall,.
Step 9: The Magic of Finishing Touches
You’re so close! This final step is what separates a “DIY” look from a “professionally finished” look. It’s all in the details.
Take a small dab of wood filler on your finger and fill every single nail hole you can see. Once the filler is dry, gently sand it smooth with 220-grit sandpaper. Now, grab your caulk gun. Run a thin, continuous bead of paintable caulk in all the corners where the shiplap meets the adjacent walls, where it meets the ceiling, and along any trim. Wet your finger and run it along the bead to smooth it out. This creates a seamless, built-in look.
Finally, do your paint touch-ups. Carefully paint over the filled nail holes and the dried caulk lines. Reinstall your baseboards, outlet covers, and switch plates. Now, step back and prepare to be amazed.
The Big Reveal: Your Gorgeous New Shiplap Wall!
You did it! Take a moment to step back and admire your handiwork. That once-blank wall is now a stunning feature that adds incredible dimension, personality, and value to your home. You’ve transformed the entire feel of the room with your own two hands. It’s a testament to what a little planning and a weekend of effort can accomplish.

alt=”The stunning final result of a completed DIY shiplap wall project, styled beautifully.”
This DIY shiplap wall project is just the beginning of your home transformation journey. Now that you’ve mastered this, the possibilities are endless.
Pro Tips & FAQs for Your DIY Shiplap Wall Project DIY shiplap wall project
You’ve got questions, we’ve got answers. Here are some common queries that come up during a shiplap installation.
How do you build a shiplap wall around windows or doors?
The process is very similar to cutting around outlets. You’ll use your jigsaw to make precise cuts. For windows, you may need to install trim or “picture frame” the window with shiplap pieces for a clean look. Measure carefully and cut the boards to butt up directly against the window casing. Caulk the seam between the shiplap and the casing for a perfect finish.
What’s the best material for a DIY shiplap wall project in a bathroom?
Standard MDF or pine is not ideal for high-moisture environments like a full bathroom with a shower, as they can warp or grow mold. For bathrooms, you should use either PVC shiplap, which is completely waterproof, or a moisture-resistant wood like cedar that has been thoroughly sealed on all six sides (front, back, and all edges) with a high-quality exterior-grade primer and paint.
Can I install shiplap vertically?
Absolutely! The process is almost identical. You’ll still mark your studs, but since most studs run vertically, you may not hit a stud with every nail. This is where construction adhesive is extra important. Your first and last vertical boards should be secured into a stud if possible. The aesthetic is fantastic for making ceilings feel higher.
How much does a DIY shiplap wall project typically cost?
The cost can vary significantly based on materials. Generally, you can expect to pay anywhere from $2.50 to $7.00+ per square foot. MDF shiplap is the most budget-friendly option. Solid wood like pre-finished pine or poplar will be on the higher end. For a typical 100-square-foot accent wall, your materials could range from $250 to $700.
Do I have to remove the baseboards for installing shiplap for beginners?
While you *can* install shiplap by butting it up against the top of your existing baseboard, it’s not recommended for the most professional finish. Removing the baseboard and reinstalling it on top of the shiplap at the end creates a cleaner, more integrated look. If your baseboards are thin, the shiplap will create a “ledge” that looks awkward and collects dust. Removing and reinstalling is the better way to go. If you absolutely can’t, you can add a small piece of quarter-round trim to the top of the baseboard to hide the gap.
We would be absolutely thrilled to see your completed shiplap walls! If you tackle this project, please share your results in the comments below or tag us on social media.
What was the most challenging part for you? Do you have any additional tips to share with other beginners? Let’s build a community of empowered DIYers together! For more weekend project inspiration, be sure to subscribe to our newsletter. DIY shiplap wall project


