Introduction
Are you a sentimental parent with boxes overflowing with adorable, outgrown baby clothes? It’s a common dilemma for many of us DIY enthusiasts! Those tiny onesies, soft sleepers, and cute t-shirts hold so many precious memories, and the thought of simply giving them away or letting them gather dust can be heart-wrenching. But what if I told you there’s a beautiful, practical, and heartwarming way to keep those memories alive? That’s right, we’re talking about creating a repurpose baby clothes quilt!
This project is more than just a craft; it’s a way to weave love, memories, and a touch of your baby’s early days into a tangible keepsake you can cherish for years to come. Forget complicated patterns or needing to be a seasoned quilter – we’re diving into five creative ideas that are perfect for all skill levels, transforming those cherished garments into a stunning and meaningful heirloom.
Table of Contents
What You’ll Need for Repurpose Baby Clothes Quilt
Before we embark on this heartwarming journey of creating your repurpose baby clothes quilt, let’s gather our supplies. Having everything ready will make the process smoother and much more enjoyable. Think of it as preparing your artist’s palette before creating a masterpiece!
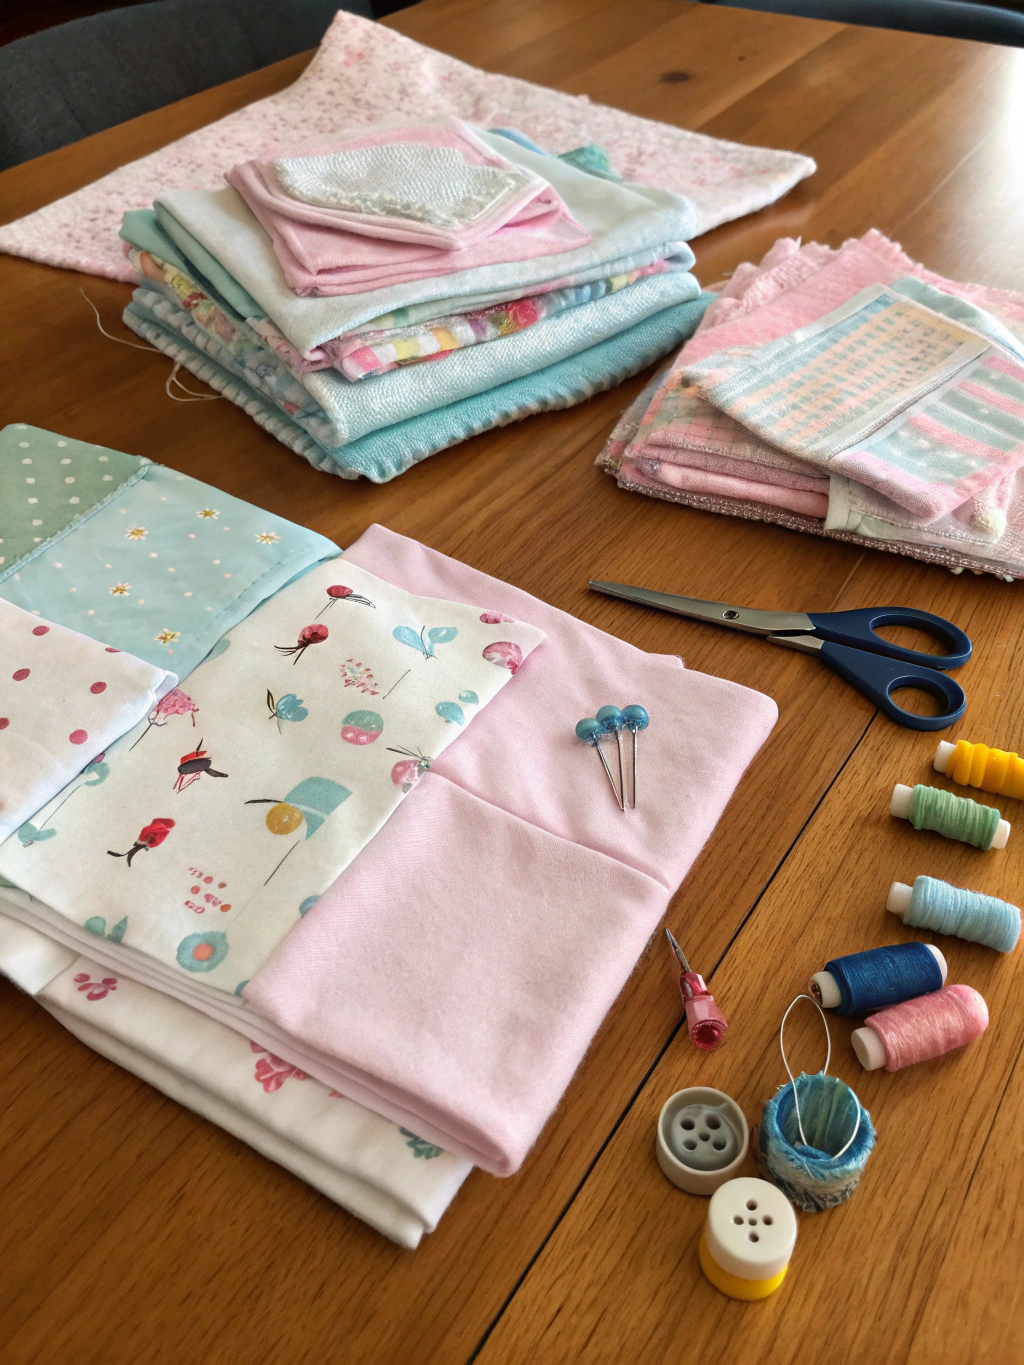
Caption: Gather these essential tools and materials to start your repurpose baby clothes quilt. Organization is key to a fun DIY experience!
Here’s a list of what you’ll typically need. Don’t worry if you don’t have everything; many items can be substituted or are optional depending on the specific quilt idea you choose.
- Baby Clothes: The stars of the show! Aim for a good variety of colors, textures, and sentimental pieces.
- Sharp Fabric Scissors or a Rotary Cutter and Mat: Essential for clean, precise cuts. A rotary cutter is a game-changer for speed and accuracy, especially for larger projects.
- Ruler or Quilting Ruler: For measuring and ensuring straight lines.
- Sewing Machine: While some small projects can be hand-sewn, a sewing machine will make larger quilts much more manageable. Make sure it’s in good working order and you have appropriate needles for different fabric types.
- Thread: Choose a good quality, all-purpose polyester thread. Neutral colors like white, cream, or grey work well, or you can match your fabric.
- Pins or Fabric Clips: To hold your fabric pieces together while sewing.
- Iron and Ironing Board: Crucial for pressing seams and ensuring your quilt blocks lay flat.
- Fusible Interfacing (Lightweight): Highly recommended, especially for stretchy knit fabrics like those often used in baby clothes (e.g., onesies). This stabilizes the fabric, making it easier to cut and sew.
- Quilt Batting: The soft, fluffy layer in the middle of your quilt. Comes in various materials (cotton, polyester, bamboo) and lofts (thickness).
- Backing Fabric: A larger piece of fabric for the back of your quilt. Cotton is a popular choice.
- Optional: Seam ripper (for those inevitable “oops” moments!), fabric pen or chalk for marking, thimble if hand-sewing binding.
Having these items on hand will set you up for success as you begin to repurpose baby clothes quilt. For more inspiration on upcycling projects, you might find some “Upcycled baby clothes quilt, DIY quilt from baby clothes, How to make a baby clothes quilt,” ideas.
Understanding the Basics: Preparing Your Baby Clothes
Before diving into the five creative ideas, let’s cover some fundamental steps for preparing your baby clothes. This groundwork is crucial for a successful repurpose baby clothes quilt, regardless of the specific design you choose.
- Wash and Dry: Start with freshly laundered and thoroughly dried baby clothes. This removes any lingering baby food stains (we’ve all been there!) or dust and ensures your finished quilt is clean and fresh. Avoid using fabric softener, as it can sometimes make fabric harder to work with or interfere with interfacing adhesion.
- Sort and Select: Lay out all your chosen garments. This is a wonderful, albeit sometimes emotional, trip down memory lane! Consider colors, patterns, textures, and most importantly, the sentimental value of each piece. Group them by fabric type if possible (knits with knits, wovens with wovens) as this can affect how they behave when sewn.
- Deconstruct: Carefully cut the usable fabric from each garment. For onesies, you’ll typically cut away the snaps, neckline, and arm/leg cuffs. For t-shirts, cut along the seams to get flat pieces. Focus on salvaging the largest, most interesting parts of the clothing, especially those with cute graphics or embroidery.
- Stabilize (If Necessary): This is a key step for stretchy fabrics. Iron lightweight fusible interfacing onto the wrong side of your knit fabric pieces. Follow the manufacturer’s instructions for the interfacing. This will prevent the fabric from stretching and distorting as you cut and sew, making your life much easier and your quilt much neater.
- Cut into Uniform Shapes: For most quilt patterns, you’ll need to cut your fabric into consistent shapes, usually squares or rectangles. Decide on a size that works well with the graphics and details on the clothes. Using a quilting ruler and rotary cutter will give you the most accurate results. Create a template from cardboard if you’re using scissors.
Taking the time to prepare your materials properly will pay dividends in the quality and longevity of your repurpose baby clothes quilt.
5 Creative Keepsake Ideas to Repurpose Baby Clothes Quilt Repurpose Baby Clothes Quilt
Now for the fun part! Here are five creative ideas to transform those precious baby clothes into a beautiful and lasting keepsake quilt. Each idea offers a different style and level of complexity, so choose the one that best suits your skills and vision.
Idea 1: The Classic Patchwork Square Quilt Repurpose Baby Clothes Quilt
This is perhaps the most traditional and straightforward approach to making a repurpose baby clothes quilt. It’s perfect for beginners and beautifully showcases individual pieces of clothing.
Concept: Create a quilt top by sewing together squares of fabric cut from different baby clothes. The simplicity of the design allows the patterns and colors of the clothes to take center stage.
Why it’s Great:
- Beginner-Friendly: Requires basic straight-line sewing.
- Showcases Variety: Each square can highlight a different outfit or detail.
- Customizable Size: Easily adjust the quilt size by adding or removing squares.
Step 1: Cutting Your Squares to Repurpose Baby Clothes Quilt
After preparing and stabilizing your baby clothes (as described in “Understanding the Basics”), the first step is to cut your fabric into uniform squares. Decide on a standard size for your squares – common sizes range from 4×4 inches to 6×6 inches, but you can go larger if you have bigger fabric pieces or want a quilt with fewer, larger blocks. Using a rotary cutter, mat, and quilting ruler will ensure your squares are perfectly even.
Alt Text: Step 1 of repurpose baby clothes quilt: Cutting uniform squares from baby clothes using a rotary cutter and mat.
Carefully cut out your squares, trying to center any interesting graphics or details from the clothes. Precision here is key, as even small inaccuracies can add up and make your quilt look askew. Make more squares than you think you’ll need, as this gives you flexibility in the layout phase.
Step 2: Arranging Your Squares (The Layout)
This is where your repurpose baby clothes quilt starts to take shape! Lay out your cut squares on a large flat surface, like a clean floor or a large table. Play around with the arrangement until you achieve a look you love. Consider balancing colors, patterns, and light/dark fabrics.
Take a photo of your preferred layout with your phone. This will be an invaluable reference when you start sewing the squares together. It’s easy to forget the exact order once you pick them up!
Step 3: Sewing Squares into Rows
Now, it’s time to start sewing. You’ll sew your squares together in rows first. Take the first two squares in your first row, place them right sides together, and pin along one edge. Sew them together using a consistent seam allowance (typically 1/4 inch for quilting).
Continue adding squares to the row in this manner until the row is complete. Press your seams open or to one side using your iron. Pressing is crucial for a flat, professional-looking quilt. Repeat this process for all your rows.
Step 4: Sewing Rows Together
Once all your rows are sewn and pressed, it’s time to sew the rows together to form the quilt top. Take your first two rows, place them right sides together, carefully aligning the seams between the squares. Pin extensively, especially at the seam intersections, to prevent shifting.
Sew the rows together with your standard seam allowance. Press the long seam open or to one side. Continue adding rows one by one until your entire quilt top is assembled. Give the whole quilt top a final press. You’ve now created the heart of your repurpose baby clothes quilt!
Idea 2: The “I Spy” Quilt Repurpose Baby Clothes Quilt
An “I Spy” quilt is a playful and interactive take on the repurpose baby clothes quilt. Each square features a distinct image or motif from the baby clothes, turning the quilt into a fun game.
Concept: Similar to the patchwork square quilt, but each square is carefully chosen to feature a recognizable object, animal, or pattern (e.g., a duck, a star, a car). This encourages interaction and storytelling.
Why it’s Great:
- Interactive and Educational: Great for toddlers and young children to play “I spy with my little eye…”
- Memory Jogger: Each image can spark a specific memory associated with that outfit.
- Visually Engaging: The variety of distinct images makes it captivating.
Step 1: Fussy Cutting Your Motifs
The key to a successful “I Spy” repurpose baby clothes quilt is “fussy cutting.” This means carefully cutting around specific motifs on the baby clothes rather than just cutting random squares. You might use a clear template (a piece of clear plastic cut to your desired square size) to help you center the motif perfectly before cutting.
This step requires a bit more patience and planning than a simple patchwork, as you’ll be trying to isolate individual images. Ensure you have enough unique motifs for the desired size of your quilt.
Step 2: Layout for Variety and Fun
Arranging an “I Spy” quilt is all about visual interest and playfulness. Spread out your fussy-cut squares and try to distribute the different types of images (animals, objects, patterns) evenly across the quilt. Avoid placing too many similar items close together.
Think about how a child would interact with the quilt. Are there good “I Spy” targets in every section? This is a great time to get a second opinion, perhaps even from an older child if you have one!
Step 3: Sewing and Assembling
The sewing process for an “I Spy” quilt is identical to the classic patchwork square quilt (Steps 3 and 4 from Idea 1). Sew your fussy-cut squares into rows, then sew the rows together to form the quilt top.
Pay close attention to your seam allowances to ensure your motifs remain centered and aren’t accidentally cut off. Pressing your seams carefully will help the quilt lay flat and showcase your “I Spy” elements beautifully.
Idea 3: The Onesie Bodysuit Quilt Repurpose Baby Clothes Quilt
Baby onesies are iconic, and this quilt idea makes the most of their unique shape and adorable graphics.
Concept: Instead of cutting onesies into simple squares, you cut out the main bodysuit shape (or a simplified version of it) and appliqué these onto larger background squares or directly onto a quilt top.
Why it’s Great:
- Preserves Garment Shape: Recognizably keeps the “onesie” look.
- Highlights Graphics: Perfect for onesies with large central designs or cute sayings.
- Unique Texture: The appliquéd onesies add a dimensional element.
Step 1: Preparing and Cutting Onesies
First, wash and press your onesies. If they are stretchy knit fabric, apply lightweight fusible interfacing to the back to stabilize them. This is crucial for appliqué, as it prevents the edges from curling and stretching.
Carefully cut out the main body of each onesie, trimming away snaps, necklines, and sleeve/leg openings. You can aim to keep the classic onesie shape or simplify it into a more rectangular or squared-off version while still retaining its recognizable form.
Step 2: Appliquéing the Onesies
There are several ways to appliqué the onesie shapes:
- Raw Edge Appliqué: Pin the onesie shape onto a background fabric square (or directly onto your quilt top fabric). Stitch close to the edge of the onesie, about 1/8 inch in. The edges will fray slightly over time, giving a charming, rustic look.
- Turned Edge Appliqué: Fold the raw edges of the onesie shape under by about 1/4 inch and press. Then, hand-stitch or machine-stitch the onesie onto the background fabric. This gives a cleaner, more finished look.
- Fusible Web Appliqué: Iron a fusible web product (like Heat’n Bond Lite) onto the back of your onesie shapes. Peel off the paper backing, position the onesie on your background fabric, and iron to fuse it in place. Then, secure the edges with a decorative machine stitch (like a satin stitch or zigzag stitch).
Choose the appliqué method that best suits your skill level and desired aesthetic for your <a href=”https=”Step 3: Assembling the Quilt Top
If you appliquéd your onesies onto individual background squares, you’ll now sew these squares together just like in the classic patchwork quilt method. If you appliquéd them directly onto a larger piece of fabric that forms your quilt top, this step is already done! Consider adding sashing (strips of fabric between the blocks) to frame each appliquéd onesie and give the quilt a more structured look. This idea is excellent for using up smaller scraps or for incorporating a wide variety of fabrics in a dynamic way. Concept: Cut baby clothes into strips of varying widths and lengths, then sew these strips together to create “strip-pieced” blocks or an entire quilt top. Why it’s Great: After preparing your baby clothes, cut them into strips. The width of the strips can be consistent (e.g., all 2.5 inches wide) for a more uniform look, or varied for a “crazy quilt” effect. The length of the strips will depend on the fabric pieces you have. A rotary cutter, mat, and ruler are very helpful here for cutting long, straight strips. Don’t worry too much about making all strips the same length initially; you can trim them later. Take two strips, place them right sides together along a long edge, and sew them with a 1/4 inch seam allowance. Press the seam open or to one side. Continue adding strips in this manner until you have a “strip set” that is the desired width or length for your quilt block or section. You can create multiple strip sets and then sew these sets together. Alternatively, you can sew strips directly to each other to form the entire quilt top without distinct blocks. This method is sometimes called “quilt-as-you-go” if you include the batting and backing at this stage. Once your strip sets or strip-pieced fabric is large enough, you’ll need to trim it to the final size for your quilt blocks or the overall quilt top. Use your quilting ruler to ensure your edges are straight and your corners are square. This step is important for making sure your repurpose baby clothes quilt assembles neatly. Adding sashing (fabric strips between blocks) and cornerstones (small squares at the intersections of sashing) can elevate a simple patchwork quilt and give it a more polished, traditional look. Concept: Create your main quilt blocks (e.g., patchwork squares from Idea 1, “I Spy” blocks from Idea 2, or appliquéd onesies from Idea 3). Then, frame these blocks with strips of a contrasting or coordinating fabric (sashing). Small squares of fabric (cornerstones) are placed where the sashing strips intersect. Why it’s Great: First, make your primary quilt blocks using any of the methods described earlier. Ensure all your blocks are a uniform size. Decide on the width for your sashing strips (e.g., 2 inches finished width, meaning you’d cut 2.5-inch strips to account for seam allowances). Cut enough sashing strips to go between all your blocks horizontally and vertically. For cornerstones, cut small squares of fabric. The unfinished size of your cornerstone squares should be the same as the unfinished width of your sashing strips (e.g., 2.5 x 2.5 inches for 2.5-inch sashing strips). You’ll typically sew sashing to the sides of your blocks first to create rows. This method creates a beautiful grid that highlights each precious square of your repurpose baby clothes quilt. Once your quilt top is complete, you’re on the home stretch! The final steps involve “quilting” (stitching the three layers together), binding the edges, and adding any personal touches. These finishing steps are what transform your collection of fabric pieces into a cozy, cherished quilt. There are many excellent tutorials online for quilting and binding techniques if you need more detailed visual guides. And there you have it! After careful cutting, thoughtful arrangement, and loving stitches, your repurpose baby clothes quilt is complete. It’s more than just a blanket; it’s a tapestry of tiny moments, a warm hug from the past, and a beautiful testament to your baby’s precious early years. Imagine snuggling under this quilt with your little one (or not-so-little-one anymore!), pointing out the fabric from their first coming-home outfit, the sleeper they wore constantly, or the t-shirt from a favorite outing. Each square, each strip, each appliquéd onesie tells a story. This is a DIY project that truly keeps on giving, warming not just bodies, but hearts too. For more tips on how to tackle such projects, consider exploring “Upcycled baby clothes quilt, DIY quilt from baby clothes, How to make a baby clothes quilt,” resources. We’d absolutely love to see your creations! Share photos of your <a href=”https=”Pro Tips / FAQs for Your Repurpose Baby Clothes Quilt
Here are some extra tips and frequently asked questions to help you on your quilting journey: When making a repurpose baby clothes quilt, you’ll likely encounter various fabrics (knits, cotton, flannel). The best way to ensure they sew together nicely is to use lightweight fusible interfacing on the back of all knit or very stretchy fabrics. This stabilizes them and makes them behave more like woven cotton. Also, use a universal or ballpoint needle suitable for most fabric types, and test your stitch length on scraps. This depends on the size of the quilt and the size of the clothes/usable fabric pieces. For a small lap quilt (e.g., 36×48 inches) using 5-inch squares, you’d need around 60-70 squares. A onesie might yield 1-2 usable squares, while a larger sleeper could yield more. It’s always better to have more clothes than you think you’ll need to allow for variety and choice. Start collecting early! Absolutely! The classic patchwork square quilt (Idea 1) is very beginner-friendly as it primarily involves cutting squares and sewing straight lines. Start with a smaller project, take your time, and don’t be afraid to use your seam ripper – it’s a quilter’s best friend! There are countless “DIY quilt from baby clothes” tutorials aimed at beginners. Most baby clothes quilts can be machine washed on a gentle cycle with cold water and a mild detergent. If you have delicate appliqués or hand quilting, you might prefer to hand wash or use a mesh laundry bag. Tumble dry on low heat or air dry flat. Pre-washing all clothes before quilting helps prevent uneven shrinkage later. The possibilities are endless! You could make a “crazy quilt” with irregularly shaped pieces, incorporate embroidered names or dates, create quilt blocks in specific shapes (like hearts or stars from the clothes), or even make a t-shirt quilt style if you have many baby t-shirts. Check out resources like “Upcycled baby clothes quilt, DIY quilt from baby clothes, How to make a baby clothes quilt,” for a plethora of creative upcycling ideas. We hope these creative ideas and tips have inspired you to embark on your own repurpose baby clothes quilt project. It’s a truly rewarding way to preserve precious memories and create a unique family heirloom. Ready to dive deeper into the world of upcycling and DIY crafts? Explore more projects on our site! And don’t forget to sign up for our newsletter for more creative ideas, tips, and tutorials delivered straight to your inbox. Happy quilting!Idea 4: The Memory Lane Strip Quilt Repurpose Baby Clothes Quilt
Step 1: Cutting Fabric Strips
Step 2: Sewing Strips Together (Strip Piecing)
Step 3: Trimming and Squaring Up
Idea 5: The Quilt with Sashing and Cornerstones Repurpose Baby Clothes Quilt
Step 1: Create Your Main Blocks
Step 2: Cutting Sashing and Cornerstones
Step 3: Assembling with Sashing and Cornerstones
Quilting, Binding, and Finishing Touches Repurpose Baby Clothes Quilt
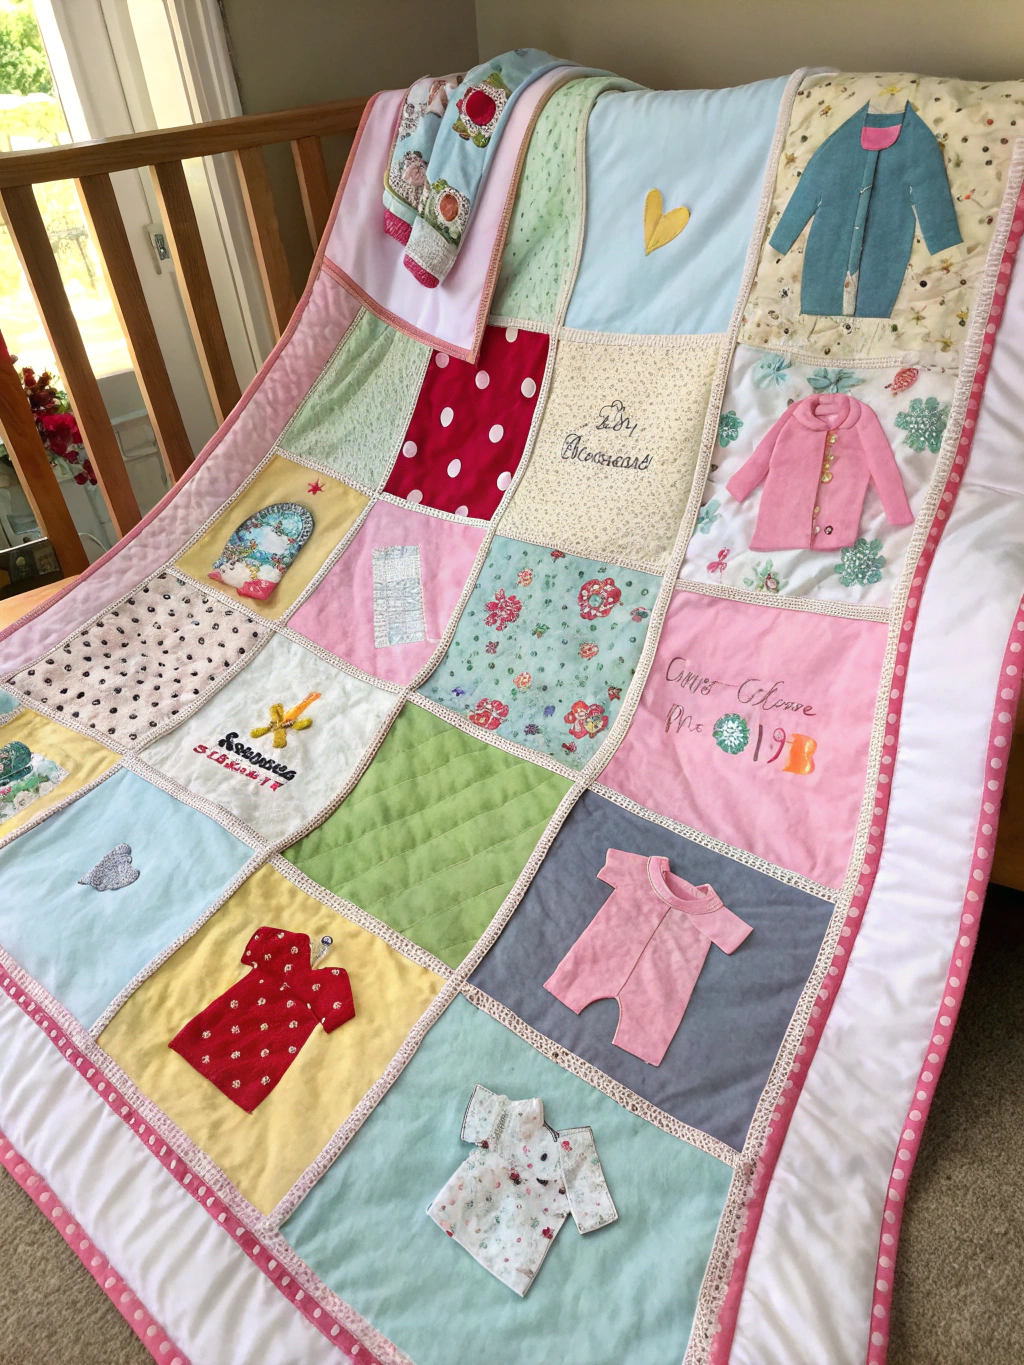
The Final Result: A Treasure Trove of Memories Repurpose Baby Clothes Quilt
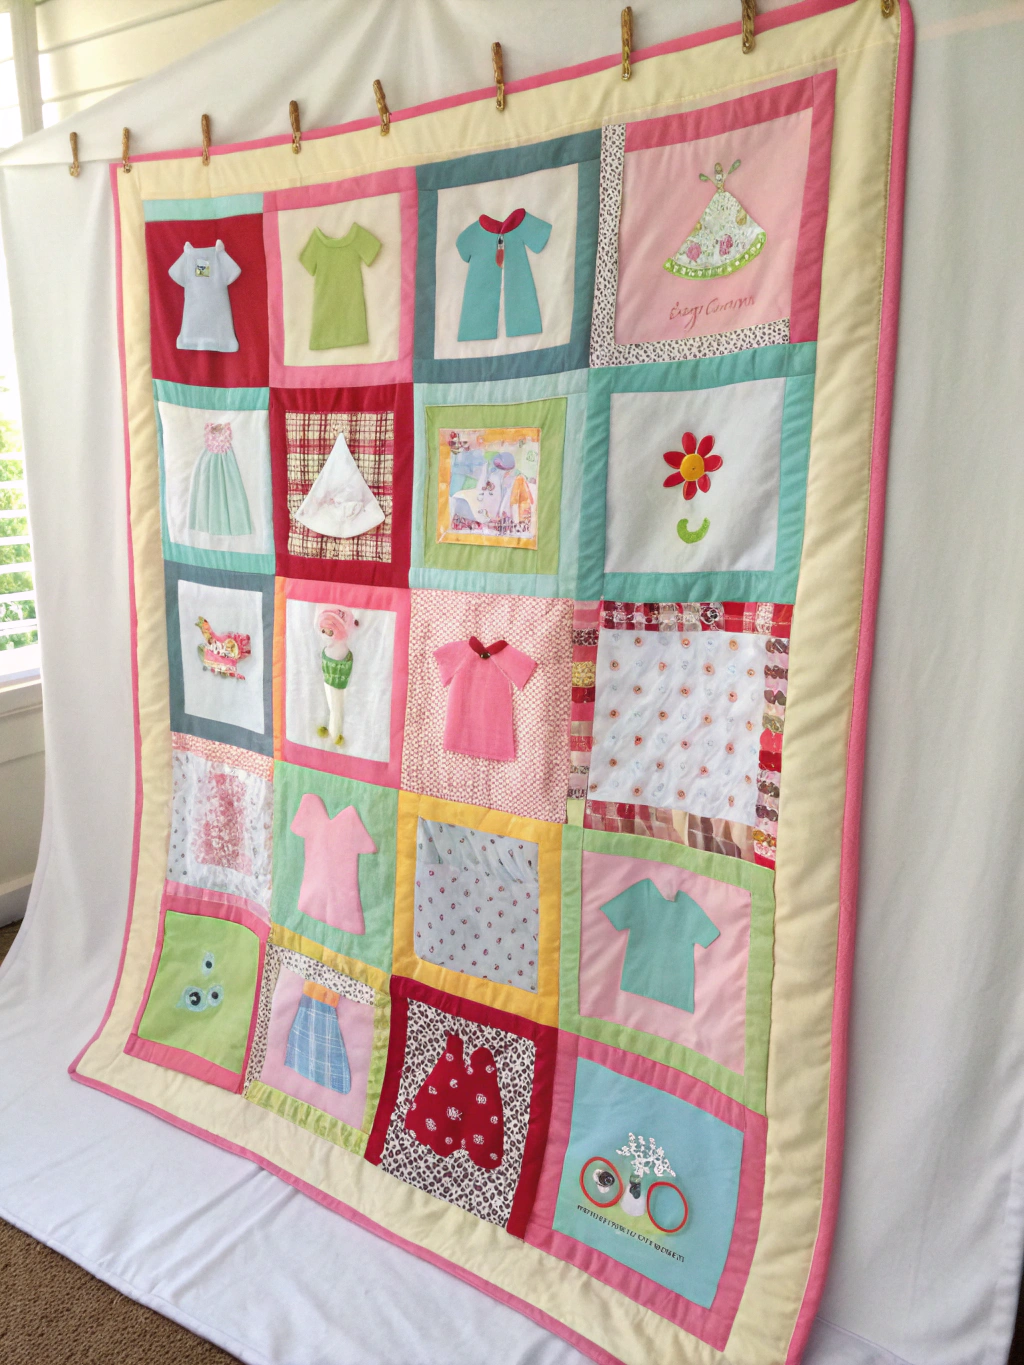
Caption: The beautiful final result: a repurpose baby clothes quilt filled with love and memories, ready to be cherished for years to come.Q1: What’s the best way to deal with different fabric types in one quilt?
Q2: How many baby clothes do I need for a quilt?
Q3: Can I make a repurpose baby clothes quilt if I’m a beginner sewist?
Q4: How do I wash a finished baby clothes quilt?
Q5: What are some other “Upcycled baby clothes quilt” ideas beyond the ones listed?

