Introduction
Hey there, fellow DIY enthusiasts! Do you have a growing pile of old sweaters gathering dust in your closet – those cozy knits that hold sentimental value but have seen better days? You’re not alone! Many of us struggle with the dilemma of what to do with beloved garments that are no longer wearable. But before you even think about tossing them, let me tell you: repurposing old sweaters is a fantastic way to breathe new life into them and unleash your creativity.
This guide is packed with inspiring ideas and easy-to-follow steps to transform those forgotten woolies into something truly special. We’ll explore some truly creative ways to upcycle sweaters, turning potential waste into treasured new items. Learning how to repurpose old sweaters isn’t just about crafting; it’s about sustainable living and making something uniquely yours! Get ready to discover your next favorite DIY project.
Table of Contents
What You’ll Need to Repurposing Old Sweaters
Before we dive into the fun part, let’s gather our supplies. Having everything ready beforehand makes the repurposing old sweaters process smoother and much more enjoyable. You probably have most of these items already lying around your craft room!
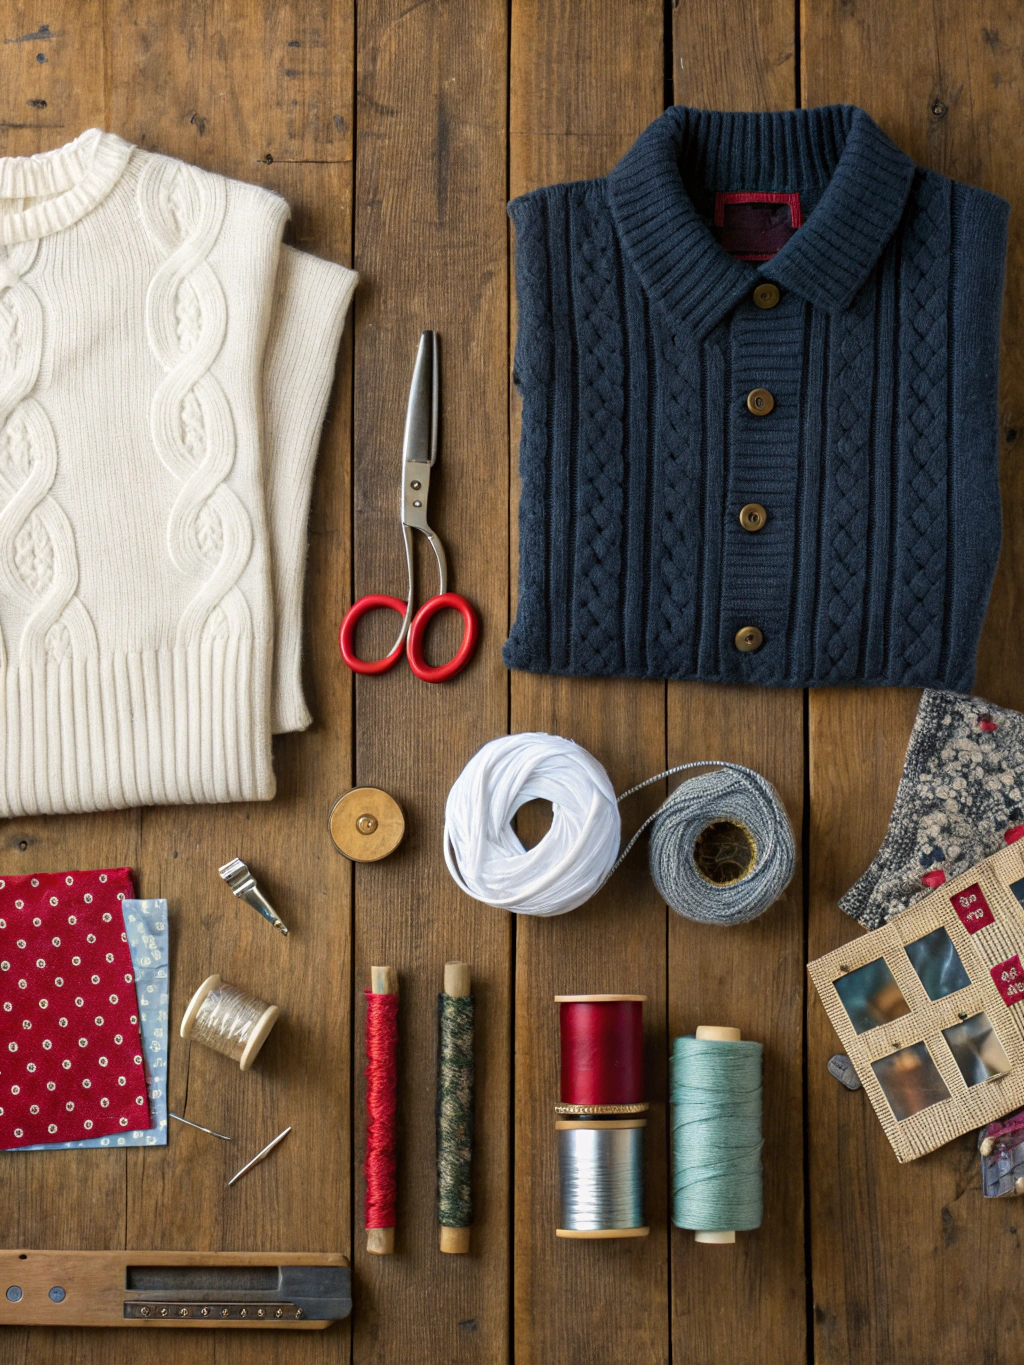
Caption: Gather your tools! Having the right supplies on hand makes your sweater upcycling project a breeze.
Here’s a general list of what you might need, though specific projects may require a few extras:
- Old Sweaters: The stars of the show! Wool, cashmere, cotton, or blends – any type can work, though some are easier to felt or sew than others.
- Sharp Fabric Scissors: Crucial for clean cuts.
- Sewing Machine (optional but helpful): Speeds up larger projects.
- Needle and Thread: For hand-sewing details or repairs. Choose thread that matches or contrasts with your sweater.
- Measuring Tape or Ruler: Accuracy is key!
- Fabric Chalk or Marking Pen: To draw your patterns.
- Pins: To hold fabric pieces together before sewing.
- Iron and Ironing Board: For pressing seams and (if felting) for some techniques.
- Embellishments (optional): Buttons, ribbons, embroidery floss, beads – let your creativity shine!
- Stuffing (for pillows or toys): Polyester fiberfill or even scraps from other old sweaters.
- Hot Glue Gun (for no-sew options): A quick alternative for certain projects.
Now that we’re all set, let’s get to the exciting part – the DIY ideas!
7 Creative DIY Ideas for Repurposing Old Sweaters
Get ready to transform those holey, shrunken, or simply outdated sweaters into fabulous new creations! We’re going beyond just cutting armholes for your dog (though that’s a classic for a reason!). These ideas range from super simple no-sew projects to ones that require a little bit of stitching.
Idea 1: Cozy Sweater Mittens Repurposing Old Sweaters
There’s nothing quite like the warmth of wool on a chilly day, and what better way to keep your hands toasty than with mittens made from a beloved old sweater? This is a fantastic beginner project for repurposing old sweaters.
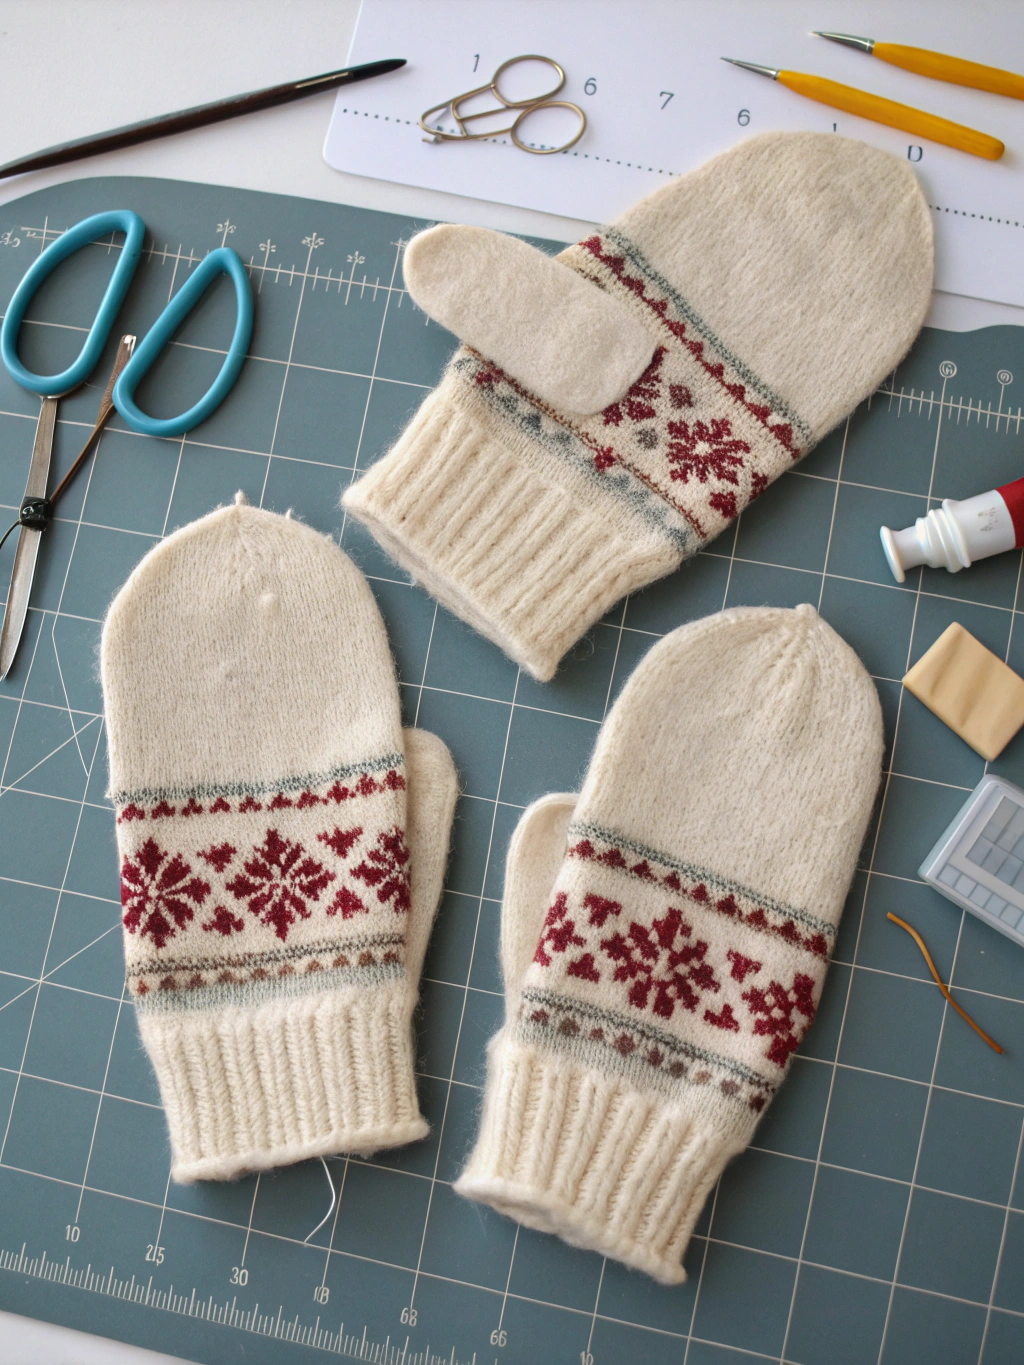
Caption: Step 1: Carefully lay out your sweater and trace your mitten shape before cutting. This is a key step in repurposing old sweaters into mittens.
Step 1: Prepare Your Sweater and Pattern
First, wash and, if it’s a wool sweater you want to felt slightly for more durability, dry your sweater. Lay the sweater flat. You can use an existing pair of mittens as a template or draw a mitten shape freehand directly onto the sweater using fabric chalk. Make sure to leave about a ½ inch seam allowance around your trace line. The cuff of the sweater can often be used as the cuff of your mittens, which is a neat trick!
This initial step is crucial because a well-prepared pattern ensures your mittens will fit comfortably. If you’re new to how to repurpose old sweaters, taking your time here will pay off. A common pitfall is making the mittens too small, so err on the side of slightly larger – you can always take them in.
Step 2: Cut and Pin
Carefully cut out your mitten shapes. You’ll need four identical pieces (two for each hand, mirroring each other). If your sweater has a distinct pattern or texture, think about how you want it to appear on your finished mittens.
Once cut, pin two mitten pieces together, right sides facing inward. Ensure the edges line up neatly. This step prevents the fabric from shifting while you sew, which is especially important with stretchy knit fabrics commonly found when repurposing old sweaters.
Step 3: Sew Your Mittens
Now, it’s time to sew! You can use a sewing machine with a stretch stitch or a zigzag stitch, or you can hand-sew using a backstitch for durability. Sew along the pinned edges, leaving the bottom opening (the cuff) unstitched.
Take your time, especially around the curves of the thumb. A common mistake here is sewing too close to the edge, which can cause the knit to unravel. Reinforce the area where the thumb meets the hand for extra strength, as this spot gets a lot of wear. For more advanced sewing techniques for different fabrics, many “Repurposing old sweaters, Creative ways to upcycle sweaters, How to repurpose old sweaters” guides offer visual aids.
Step 4: Turn and Finish
Once sewn, carefully snip any curves and turn your mittens right-side out. Admire your handiwork! You can leave them as is, or add embellishments like buttons, embroidery, or even a fleece lining for extra warmth.
These cozy mittens are a testament to how creative ways to upcycle sweaters can lead to practical and charming new items. They also make wonderful, heartfelt gifts!
Idea 2: Chic Sweater Pillow Covers Repurposing Old Sweaters
Transform a chunky knit or a soft cashmere sweater into a luxurious pillow cover. This is a relatively simple project that adds a touch of cozy elegance to any room. Repurposing old sweaters into home décor is incredibly satisfying.
(Imagine a step-by-step image here similar to the mitten one, but showing a sweater being measured for a pillow.)
Caption: Measuring your sweater against a pillow form is the first step to creating a chic new cover.
Step 1: Measure and Cut
Choose a sweater that is large enough to cover your desired pillow form. Lay the sweater flat and place your pillow form on top. If your sweater has a nice bottom band, try to incorporate that as one edge of your pillow cover – it saves you a sewing step and looks great! Cut two squares or rectangles of sweater fabric that are about 1 inch larger than your pillow form on all sides (this accounts for seam allowance).
Accuracy in measurement is key here. If the pieces are too small, the cover will be too tight and may stretch the knit unattractively or even rip. This is a common challenge when figuring out how to repurpose old sweaters into fitted items.
Step 2: Pin and Sew (Envelope or Zipper Closure)
There are a couple of ways to approach the closure. For an easy envelope closure, cut one of your fabric pieces about 4-5 inches longer. Fold this extra length over to create a flap. Then, layer your pieces: place the unflapped piece right side up, then place the flapped piece right side down on top of it, with the flap folded towards the inside. Pin around the three non-flap edges.
Alternatively, for a zipper closure (a bit more advanced but gives a very professional finish), you’d insert a zipper along one edge before sewing the other three sides. Pin the two main pieces right sides together. Sew around three sides, leaving one side open for inserting the pillow.
Step 3: Insert Pillow and Finish
If you made an envelope closure, simply turn the cover right-side out and stuff your pillow form inside. The flap will keep it secure. If you sewed three sides for a zipper or hand-sewn closure, turn it right-side out, insert the pillow, and then either sew the final seam closed by hand using a blind stitch or insert your zipper according to its instructions.
These sweater pillows are a fantastic example of creative ways to upcycle sweaters that add instant hygge to your home. They’re soft, stylish, and full of character.
Idea 3: Adorable Sweater Pet Bed Repurposing Old Sweaters
Your furry friend deserves a cozy spot too! Repurposing old sweaters into a pet bed is a heartwarming project. Choose a larger, softer sweater for this.
(Imagine a step-by-step image here showing a sweater being stuffed for a pet bed.)
Caption: Stuffing an old sweater to create a comfy new bed for your furry companion.
Step 1: Prepare the Sweater Body
Turn the sweater inside out. Sew the neckline closed. If it’s a V-neck or wide neck, you might need to gather it a bit or sew a straight line across. Then, sew the armholes closed from the inside along the seam where the sleeve meets the body. This creates the main “pouch” for your pet bed.
A common mistake is not reinforcing these seams enough, especially if you have a playful pet! Double stitching is a good idea. Understanding how to repurpose old sweaters for durability is key for pet items.
Step 2: Stuff the Body and Sleeves
Turn the sweater right-side out. Stuff the body of the sweater with polyester fiberfill, old rags, or even scraps from other deconstructed sweaters until it’s plump and comfy. Now, stuff the sleeves. You want the sleeves to be firm enough to form a supportive border.
Don’t overstuff, or it might become too hard. The goal is cozy, not concrete! This step highlights how versatile repurposing old sweaters can be – even the scraps have a purpose.
Step 3: Assemble the Bed
Lay the stuffed sweater body flat. Arrange the stuffed sleeves around the body to form a circular or oval bolster. You can either hand-sew the sleeves to the body from the outside, tucking the cuff ends under, or for a more integrated look, tuck the raw end of the sleeve slightly inside the body opening before sewing the main body opening shut with the sleeves partially enclosed.
Alternatively, you can sew the cuffs of the sleeves together to form a ring, and then attach this ring around the stuffed body. Many “Repurposing old sweaters, Creative ways to upcycle sweaters, How to repurpose old sweaters” tutorials showcase different assembly methods depending on the sweater style.
Your pet will love their new, scent-of-you bed! This is one of the most rewarding creative ways to upcycle sweaters.
Idea 4: Stylish Sweater Boot Cuffs Repurposing Old Sweaters
Add a touch of warmth and style to your boots with easy-to-make sweater boot cuffs. This is a super quick project, perfect for using up the sleeves of sweaters you’ve used for other projects. Talk about efficient repurposing old sweaters!
(Imagine a step-by-step image: a pair of sweater sleeves cut and ready to be finished as boot cuffs.)
Caption: Sweater sleeves are easily transformed into stylish boot cuffs, a quick win in repurposing old sweaters.
Step 1: Cut the Sleeves
Take the sleeves from an old sweater. Decide how tall you want your boot cuffs to be – typically 6-8 inches is a good height. Cut the sleeves to your desired length, measuring from the cuff edge upwards.
Ensure your cuts are straight. Using the existing ribbed cuff of the sweater sleeve is ideal as it provides a finished edge. If the sleeve is very wide, you might need to take it in a bit to fit snugly around your calf.
Step 2: Finish the Raw Edge (If Necessary)
If you cut a part of the sleeve that isn’t the finished cuff, you’ll need to finish the raw edge to prevent unraveling. You can simply fold the raw edge over twice (about ¼ inch each time) and sew it down with a straight stitch or a zigzag stitch on your machine, or by hand.
For a no-sew option on some tightly knit sweaters, fabric glue can work, but sewing is more durable. This step showcases how even small scraps from repurposing old sweaters can become fashionable accessories.
Step 3: Add Embellishments (Optional)
Slide them onto your legs, with the top peeking out of your boots. For extra flair, sew on some cute buttons, lace, or a bit of ribbon along the top edge. This is where you can really personalize them!
These boot cuffs are a simple yet effective example of creative ways to upcycle sweaters and add a custom touch to your wardrobe.
Idea 5: Warm Sweater Headbands or Ear Warmers Repurposing Old Sweaters
Keep your ears warm in style with a DIY sweater headband. This is another great use for sweater sleeves or leftover fabric pieces from larger repurposing old sweaters projects. Cable knit sweaters look particularly lovely for this.
(Imagine a step-by-step image: a strip of sweater fabric being sewn into a loop for a headband.)
Caption: Crafting a cozy headband from a strip of an old sweater – another great way of repurposing old sweaters.
Step 1: Measure and Cut Your Fabric
Measure the circumference of your head where the headband will sit. Cut a strip of sweater fabric that is about 1-2 inches shorter than your head measurement (to allow for stretch) and twice the desired width of your headband, plus a ½ inch seam allowance. For example, for a 4-inch wide headband and a 20-inch head circumference, you might cut a piece 19 inches long and 8.5 inches wide.
If your sweater fabric is very stretchy, you might need to make it even shorter. Getting the fit right is important; too loose and it won’t stay on, too tight and it’ll be uncomfortable. Fine-tuning is part of mastering how to repurpose old sweaters.
Step 2: Sew the Headband
Fold the fabric strip in half lengthwise, right sides together. Sew along the long raw edge, creating a tube. Use a stretch stitch if you have one.
Be careful not to stretch the fabric too much as you sew, or it might pucker. This is a common pitfall when working with knits.
Step 3: Finish the Headband
Turn the tube right-side out. Now, you have a couple of options to finish it into a loop. You can simply overlap the raw ends by about ½ inch and sew them together securely. For a cleaner finish, tuck the raw edge of one end inside the other, and then topstitch or hand-sew closed.
Alternatively, to create a twisted or knotted look, before sewing the ends together, give the tube a half-twist. When you join the ends, this will create a stylish twist at the front. These headbands are proof that even small pieces from repurposing old sweaters can become cherished items.
Idea 6: Felted Wool Coasters or Trivets Repurposing Old Sweaters
If you have wool sweaters (100% wool, not superwash), you can felt them! Felting shrinks and thickens the wool, making it dense and perfect for coasters or trivets that protect your surfaces from heat and moisture. This is a unique method in the world of repurposing old sweaters.
(Imagine a step-by-step image: pieces of felted wool sweater being cut into coaster shapes.)
Caption: Cutting circles from a felted wool sweater to make durable coasters – a practical repurposing old sweaters idea.
Step 1: Felt Your Wool Sweater
To felt a wool sweater, wash it in hot water with a bit of detergent and then dry it on high heat in the dryer. The agitation, heat, and soap cause the wool fibers to interlock and shrink. You might need to repeat this process a couple of times to get the desired density. The sweater will look much smaller and feel thicker, almost like felt fabric.
Not all wool sweaters will felt equally well. Some are treated to resist shrinking (superwash wool). It’s a bit of an experiment, which is part of the fun of how to repurpose old sweaters!
Step 2: Cut Your Shapes
Once your sweater is fully felted, the fabric won’t unravel when cut. This is the magic of felting! You can now cut out shapes for your coasters (circles, squares, hexagons) or larger shapes for trivets. Use a rotary cutter and mat for very clean edges if you have them, or sharp scissors.
Because felted wool is dense, you can even stack and sew a few layers together for extra thick trivets. This adds another dimension to creative ways to upcycle sweaters.
Step 3: Embellish (Optional)
Your felted wool coasters and trivets are functional as is, but you can add decorative stitching, embroidery, or even applique other felted sweater scraps on top for a pop of color or design.
These are incredibly durable and make wonderful, eco-friendly gifts. It’s a fantastic use for sweaters that might otherwise be unwearable.
Idea 7: Sweater Sleeve Coffee Cup Cozies Repurposing Old Sweaters
Keep your coffee warm and your hands comfortable with a super simple DIY coffee cup cozy made from a sweater sleeve. This is an excellent no-sew or minimal-sew project, perfect for beginners interested in repurposing old sweaters.
(Imagine a step-by-step image: a sweater sleeve cut and fitted around a coffee cup.)
Caption: A sweater sleeve easily becomes a coffee cup cozy, a simple yet effective repurposing old sweaters project.
Step 1: Cut the Sleeve
Take a sweater sleeve, preferably one with a ribbed cuff. Measure the height of your favorite reusable coffee cup (the part you want to cover). Cut a section of the sleeve to this height, using the ribbed cuff as one finished edge.
The natural stretch of the sweater knit will help it grip the cup. If the sleeve is too wide for your cup, you might need to take it in slightly.
Step 2: Secure (If Needed)
Often, if you use the ribbed cuff part of the sleeve, it’s stretchy enough to fit snugly on the cup without any sewing. Just slip it on! If the cut edge seems like it might unravel or if the sleeve is a bit loose, you can fold the raw edge under by about ¼ inch and secure it with a few hand stitches or even fabric glue for a no-sew option.
This highlights the simplicity and accessibility of how to repurpose old sweaters. Sometimes the easiest projects are the most used!
Step 3: Personalize
Add a cute button, a small felt applique (perhaps from another felted sweater project!), or a bit of embroidery to personalize your coffee cozy. These make great small gifts or stocking stuffers.
This project is a prime example of how creative ways to upcycle sweaters can be both practical and quick, reducing waste one coffee cup at a time!
Final Result: Your Upcycled Sweater Masterpieces!
Caption: Ta-da! A beautiful array of new treasures, all thanks to the magic of repurposing old sweaters. From cozy mittens to chic home decor, the possibilities are endless.
And there you have it! Seven creative and fun ways to give your old sweaters a new lease on life. By repurposing old sweaters, you’ve not only decluttered your closet but also created unique, handmade items filled with personality and memories. Whether you’ve stitched up a pair of warm mittens, a cozy pillow, or a cute accessory, you’ve participated in a sustainable practice that’s both rewarding and environmentally friendly.
We’d absolutely LOVE to see what you’ve created! Share photos of your upcycled sweater projects in the comments below, or tag us on social media. Do you have other brilliant ideas for repurposing old sweaters? Let us know – your tip might just inspire someone else’s next DIY adventure! For more upcycling inspiration, check out some genius upcycling ideas from other creative minds.
Pro Tips & FAQs for Repurposing Old Sweaters
To help you get the best results and troubleshoot any common issues, here are some pro tips and frequently asked questions about repurposing old sweaters.
Q1: What’s the best type of sweater for repurposing projects?
A: Honestly, almost any sweater can be repurposed! Wool sweaters (especially 100% wool, non-superwash) are fantastic for felting projects, which makes the fabric dense and easy to cut without unraveling. Cotton and acrylic sweaters are great for sewing projects like pillows, mittens, or bags as they are generally easy to work with. Cashmere or other soft knits make luxurious small items like baby hats or linings.
Consider the project: a chunky cable knit is great for a pillow, while a thinner knit might be better for a lightweight scarf or headband. The key is to match the sweater’s properties (thickness, stretch, fiber content) to your intended project. Exploring different “Repurposing old sweaters, Creative ways to upcycle sweaters, How to repurpose old sweaters” can give you ideas based on sweater type.
Q2: How do I stop knit fabric from unraveling when I cut it?
A: This is a common concern when learning **how to repurpose old sweaters**. Here are a few tricks:
- Felting: If it’s a 100% wool sweater (non-superwash), felting it (washing in hot water and drying on high heat) will make the fibers bind together, and you can cut it without it unraveling.
- Serger/Overlocker: If you have one, serging the edges is the best way to prevent unraveling on most knits.
- Zigzag Stitch: On a regular sewing machine, a small, dense zigzag stitch along the cut edge before or immediately after cutting can help seal it.
- Seam Allowance: Always include a good seam allowance (at least ½ inch). When you sew your seam, the stitching itself will help secure the knit.
- Fray Check: For small areas or delicate knits, a liquid seam sealant like Fray Check can be applied to the raw edges.
- Interface It: For some projects, fusing a lightweight interfacing to the back of the sweater piece before cutting can stabilize it.
Q3: Can I do these sweater upcycling projects if I don’t have a sewing machine?
A: Absolutely! While a sewing machine can speed things up, many **creative ways to upcycle sweaters** can be done entirely by hand. A simple backstitch is very strong and suitable for most seams. For some projects, like certain types of cozies or no-fuss boot cuffs, you might even get away with fabric glue or clever folding and tying. Felting projects also require no sewing to prepare the fabric. Don’t let the lack of a machine deter you from **[repurposing old sweaters](https://www.fixdiy.site/upcycling-crafts/)** – hand sewing can be very therapeutic!
Q4: What are some no-sew ideas for repurposing old sweaters?
A: If sewing isn’t your thing, there are still plenty of **creative ways to upcycle sweaters**!
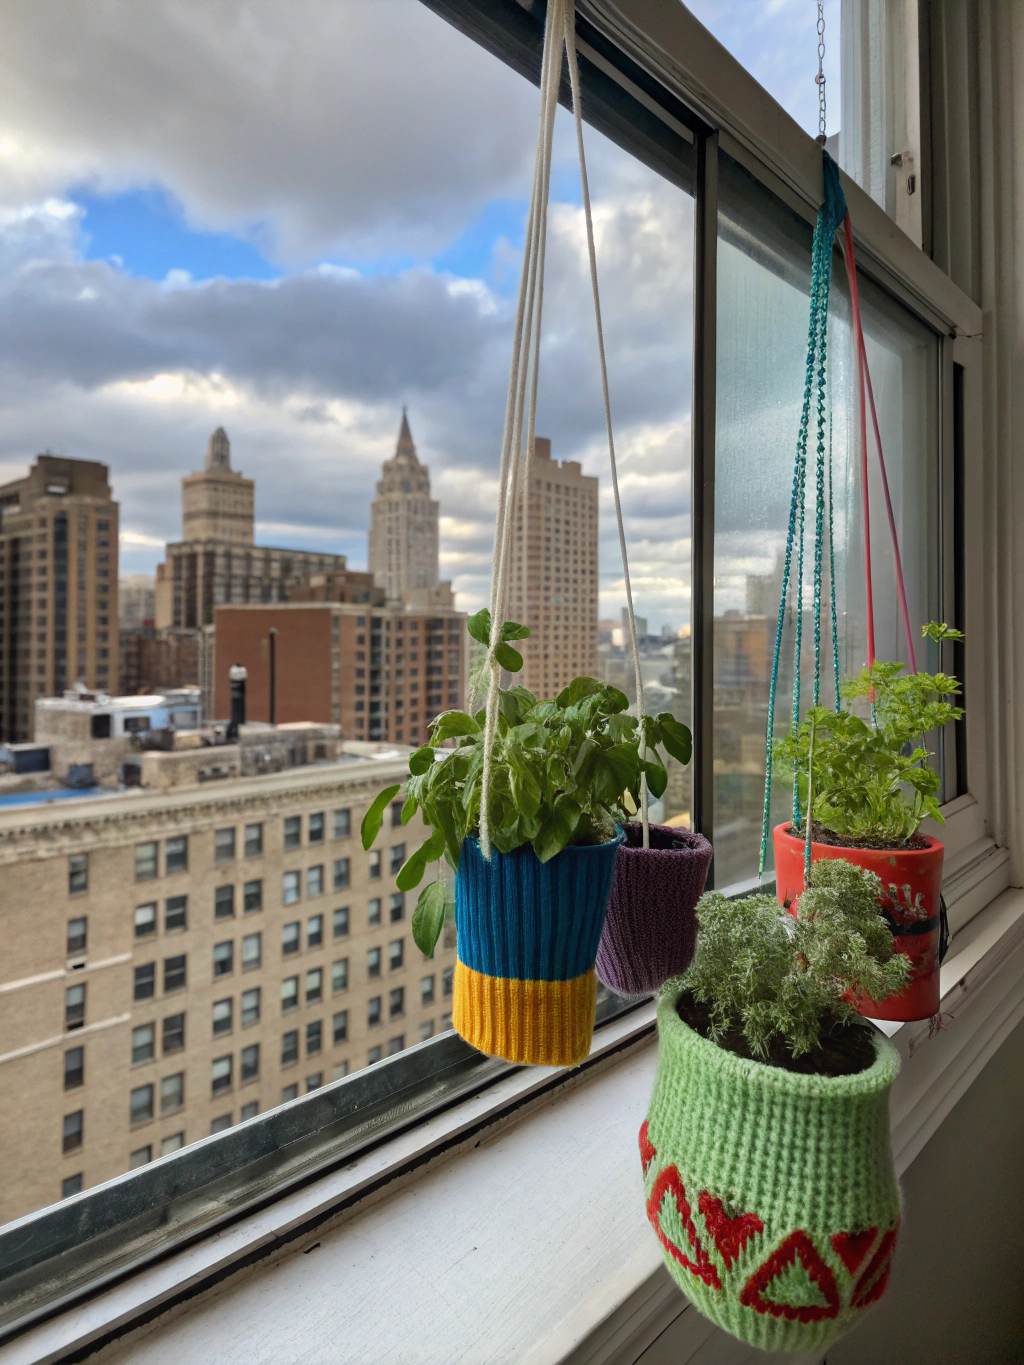
- Sweater Vases/Pot Covers: Simply cut the body or a sleeve of a sweater and slip it over a plain vase or plant pot for an instant cozy upgrade. Secure with twine or ribbon if needed.
- Gift Wrap: Use squares of sweater fabric, especially festive ones, to wrap small gifts. Tie with ribbon or yarn.
- Felted Dryer Balls: If you felt a wool sweater, cut it into strips, roll them tightly into balls, and then felt them again inside pantyhose. These are great natural fabric softeners.
- Cleaning Rags: The simplest form of repurposing! Old cotton sweaters make excellent dust rags.
- No-Sew Pet Toys: Cut strips from a sturdy sweater and braid them tightly for a tug toy. (Ensure no loose parts that could be swallowed).
For more inspiration on projects that require minimal to no sewing, many craft sites offer tips on “Repurposing old sweaters, Creative ways to upcycle sweaters, How to repurpose old sweaters” that focus on simplicity.
Q5: How should I care for items I’ve made from repurposed sweaters?
A: Care instructions will depend on the original sweater’s fiber content and the nature of the new item.
- Wool Items (especially felted): Generally, hand wash in cool water with a gentle wool wash and lay flat to dry. Avoid agitation or high heat, which can cause further shrinking or damage.
- Cotton/Acrylic Items: These can often be machine washed on a gentle cycle with cool or warm water and tumbled dry on low, or laid flat to dry.
- Delicate Items (cashmere, embellished pieces): Hand wash carefully in cool water with a mild detergent and lay flat to dry.
- Pillows/Stuffed Items: If the cover is removable, wash it according to the sweater’s original fiber. If not, spot clean as needed. Some sturdy, machine-sewn stuffed items might tolerate a gentle machine wash, but air drying is usually best.
When in doubt, err on the side of gentler care (hand washing and air drying) to preserve your handmade treasures from your **[repurposing old sweaters](https://www.fixdiy.site/upcycling-crafts/)** projects.
We hope these tips and answers help you on your sweater upcycling journey! Remember, repurposing old sweaters is all about creativity, sustainability, and having fun. Don’t be afraid to experiment and make each project your own.
Happy Crafting!
Loved these ideas? Don’t keep them to yourself!
- Share this post with your fellow DIY-loving friends on Pinterest, Facebook, or your favorite social platform!
- Leave a comment below with your favorite idea or a project you’ve successfully completed!
- Sign up for our newsletter for more DIY tips, upcycling projects, and home improvement inspiration delivered straight to your inbox!

