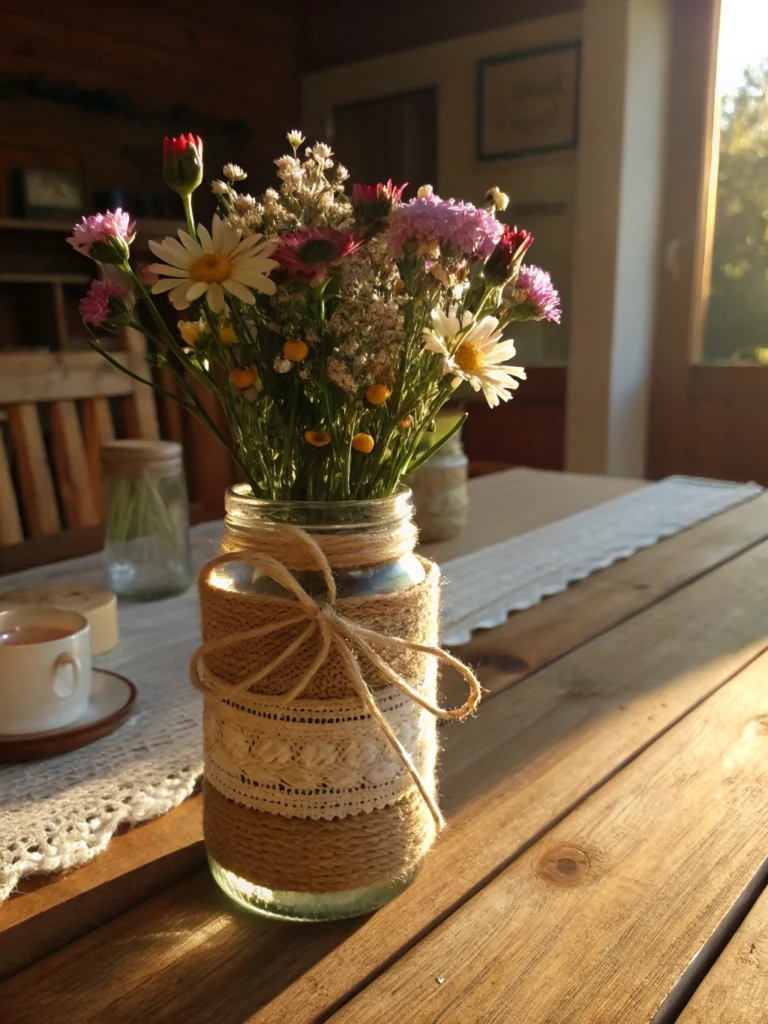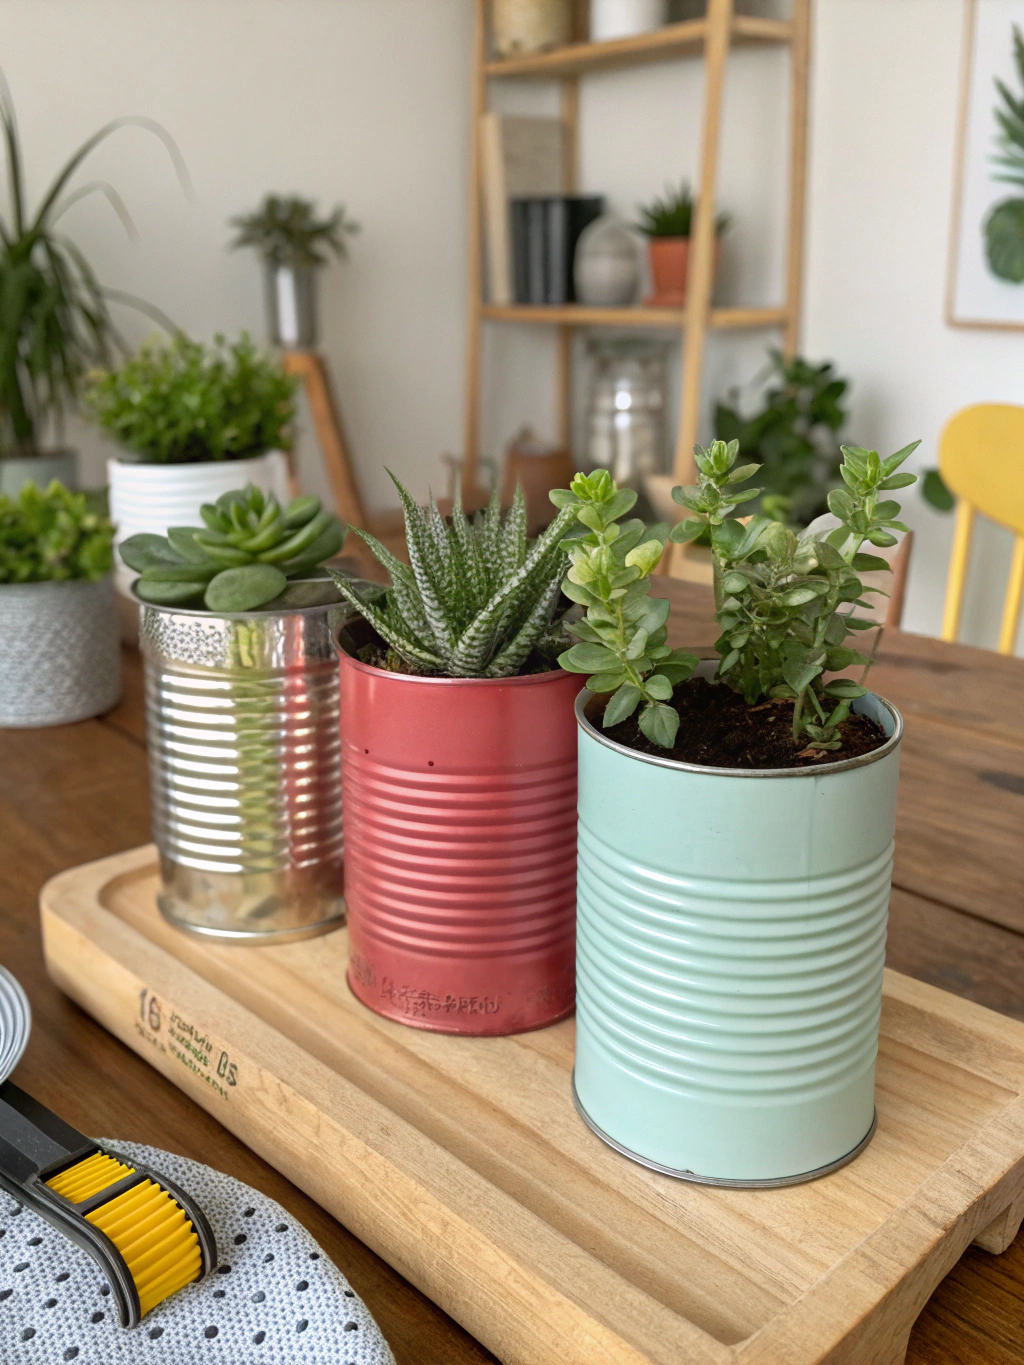
*Caption: Get inspired by these stunning examples of tin can upcycling ideas – turning everyday waste into treasure!*
Introduction
Are you staring at a growing pile of empty tin cans, wondering if they’re destined for the recycling bin or something more? Well, you’re in luck! This guide is packed with tin can upcycling ideas that will transform those humble containers into stylish and practical items for your home. It’s a common DIY dilemma: wanting to be eco-friendly and creative but not knowing where to start. We’re here to change that! Discover how to repurpose tin cans at home and unlock a world of creative possibilities, turning potential waste into wonderful new creations. Let’s dive into some fantastic tin can upcycling ideas that are both fun and functional!
Table of Contents
What You’ll Need for Your Tin Can Upcycling Adventures
Before we jump into the “how-to,” let’s gather our supplies. Having everything ready makes the creative process smoother and much more enjoyable. Most of these items you might already have stashed away in your craft drawer or garage!
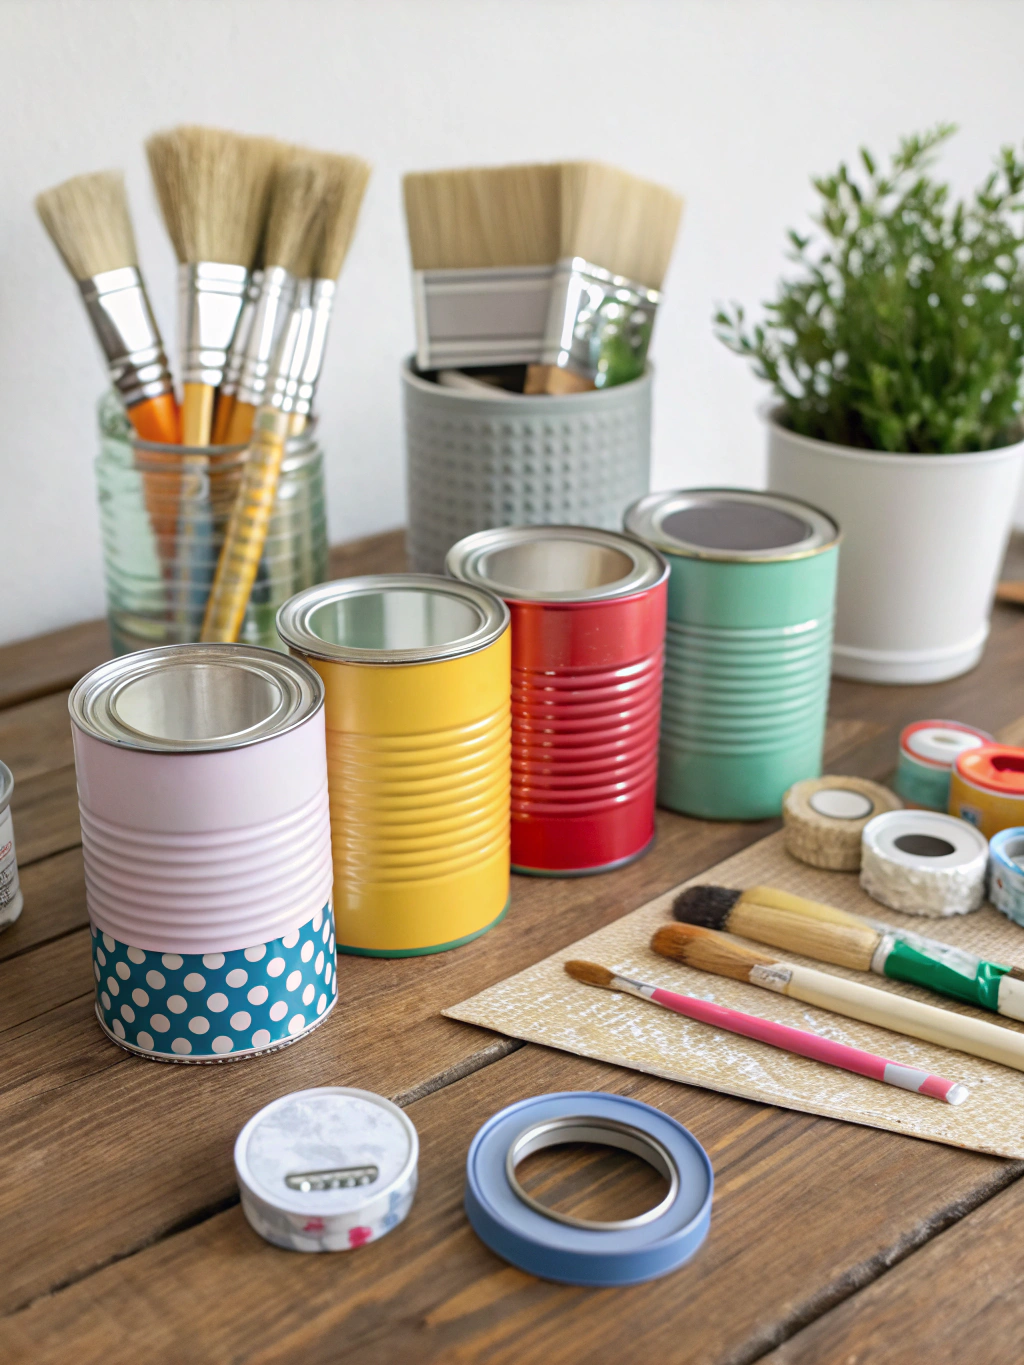
*Caption: Gather these essential tools and materials to kickstart your tin can upcycling projects.*
Here’s a general list of what you’ll need for most tin can upcycling ideas:
- Clean Tin Cans: Any size will do! Ensure they are thoroughly washed and dried, with any sharp edges from the lid carefully filed down or removed. Safety first!
- Can Opener: A good quality can opener that leaves a smooth edge is ideal.
- Sandpaper or Metal File: For smoothing any sharp edges.
- Primer: Specifically for metal surfaces, to help paint adhere better.
- Paints: Acrylic paints, spray paints, or chalk paints work wonderfully. Choose your favorite colors!
- Paintbrushes: Various sizes for different details.
- Hot Glue Gun and Glue Sticks: An essential for attaching decorations.
- Strong Adhesive/Epoxy: For more heavy-duty attachments.
- Scissors and Craft Knife: For cutting fabric, paper, or other decorative materials.
- Ruler or Measuring Tape: For precise measurements.
- Decorative Materials: This is where your creativity shines! Think fabric scraps, patterned paper, scrapbook paper, twine, rope, lace, ribbons, buttons, beads, washi tape, old maps, or even small pebbles or mosaic tiles.
- Protective Gear: Gloves to protect your hands and a mask if you’re spray painting.
- Old Newspapers or a Drop Cloth: To protect your work surface.
- Sealant or Varnish (Optional): To protect your finished project and give it a durable finish.
Now that we have our arsenal of crafty goodness, let’s get to the exciting part: transforming those cans!
7 Creative Tin Can Upcycling Ideas to Inspire You
Here are seven fantastic ways to give your old tin cans a new lease on life. Each idea is versatile, so feel free to adapt them to your personal style and needs.
Idea 1: Chic Desk Organizers / Tin Can Upcycling Ideas
Tired of a cluttered desk? Tin cans are the perfect size for holding pens, pencils, scissors, and other stationery. This is one of the most practical tin can upcycling ideas for any home office or study space.

*Caption: Step 1 in creating chic desk organizers: Start with thoroughly cleaned and dried tin cans, ensuring all labels are removed.*
Step 1: Preparation is Key
First things first, ensure your tin cans are sparkling clean and completely dry. Remove any labels – soaking them in warm, soapy water usually does the trick. If there’s any sticky residue left, a bit of rubbing alcohol or goo remover will sort it out. Most importantly, check for any sharp edges around the rim where the lid was removed. Carefully use a metal file or sandpaper to smooth these down. If you have a can opener that creates a smooth edge, even better! This step is crucial for safety, especially if children will be using or around the finished organizers.
Why this matters: A clean, smooth surface ensures your paint and decorations will adhere properly, giving a professional finish. Plus, no one wants a nasty cut from a sharp edge!
Common pitfall: Rushing the cleaning and skipping the edge-smoothing. This can lead to a messy look and potential injury.
Step 2: Prime and Paint
Once your cans are prepped, it’s time for a base coat. Apply a thin, even layer of metal primer. This helps the paint stick much better and prevents rust from eventually showing through, especially if you live in a humid environment. Let the primer dry completely according to the manufacturer’s instructions.
Next, unleash your creativity with paint! Acrylic paints are great for brush-on applications and come in a vast array of colors. Spray paint offers a quick, even coverage – just be sure to do this in a well-ventilated area, preferably outdoors, and wear a mask. You might need two or three thin coats for full, vibrant coverage, allowing each coat to dry thoroughly before applying the next. Consider a matte, gloss, or metallic finish depending on your desired look. For a rustic or farmhouse vibe, chalk paint is an excellent choice.
Why this matters: Priming ensures longevity and a better paint job. Multiple thin coats of paint give a smoother, more professional finish than one thick coat, which can drip or look uneven.
Common pitfall: Applying paint too thickly or not waiting for coats to dry, leading to drips, smudges, and a tacky finish.
Step 3: Decorate and Personalize
This is where the real fun begins! Once your paint is completely dry, you can add all sorts of decorative touches.
- Washi Tape: Apply strips of colorful washi tape horizontally or vertically for instant patterns.
- Fabric Scraps: Cut a piece of fabric to size and use a hot glue gun or strong fabric glue to wrap it around the can. Lace or burlap can add a lovely texture.
- Twine or Rope: Starting from the bottom, tightly wrap twine or rope around the can, securing it with dabs of hot glue as you go. This creates a rustic, nautical, or bohemian look.
- Decoupage: Use Mod Podge and cut-outs from napkins, scrapbook paper, or old maps to create unique designs.
- Stencils: Use stencils and a contrasting paint color to add patterns, letters, or numbers.
- Buttons and Beads: Glue on buttons, beads, or even small flat-backed gems for a bit of sparkle and texture.
Think about the style of your desk and choose decorations that complement it. You can make a matching set or create individual, unique organizers. Some “Creative tin can crafts, DIY tin can upcycling ideas, How to repurpose tin cans at home” involve intricate painting techniques, while others focus on simple, elegant wraps.
Why this matters: Personalization makes the project truly yours and ensures it fits seamlessly into your home decor.
C
*Caption: Step 1 for Herb Planters: Cleaned tin cans ready for transformation, a key first step in many tin can upcycling ideas.*ommon pitfall: Overdoing the decorations. Sometimes, less is more. Also, ensure your glue is strong enough for the materials you’re using.
Idea 2: Charming Herb Planters or Mini Flower Pots Tin Can Upcycling Ideas
Bring a touch of green indoors with adorable tin can planters. They’re perfect for small herbs on your kitchen windowsill or for succulents and small flowering plants. This is a delightful way to “Creative tin can crafts, DIY tin can upcycling ideas, How to repurpose tin cans at home”.
Step 1: Prepare and Punch Drainage Holes
As with the desk organizers, start by thoroughly cleaning your cans and smoothing any sharp edges. For planters, a crucial extra step is to add drainage holes to the bottom of each can. This prevents water from pooling and causing root rot, which is a common plant killer.
Use a hammer and a sturdy nail (or a drill with a metal bit) to carefully punch 3-5 small holes in the bottom of each can. It’s best to do this by placing the can upside down on a piece of scrap wood for support.
Why this matters: Drainage is essential for healthy plant growth. Without it, your lovely herbs or flowers won’t thrive.
Common pitfall: Forgetting drainage holes or making them too small. Also, be careful when hammering or drilling to avoid injury.
Step 2: Paint and Decorate for the Outdoors (or Indoors!)
Prime your cans with a metal primer. If your planters will live outdoors or in a very sunny spot, consider using paints that are weather-resistant or UV-resistant to prevent fading and chipping. Spray paints designed for outdoor use are a good option.
Decorate your planters to match your garden or kitchen decor. You could paint them in bright, cheerful colors, create a terracotta look with textured paint, or wrap them in burlap for a rustic feel. Another fun idea is to use chalkboard paint on a section of the can so you can label your herbs with chalk.
Why this matters: Choosing the right paint and decorations ensures your planters will look good for longer, especially if exposed to the elements.
Common pitfall: Using indoor paint for outdoor planters, which can quickly deteriorate.
Step 3: Planting Your Greens
Once your decorated cans are completely dry (and sealed, if you chose to add a protective topcoat), it’s time to plant!
Add a small layer of gravel or broken terracotta pieces to the bottom of the can before adding soil. This can further improve drainage.
Fill the can with good quality potting mix suitable for the plants you’ve chosen.
Gently place your herb seedling or small plant into the soil, and top up with more soil, patting it down lightly around the base of the plant.
Water your new planter lightly.
Now you have charming, custom-made planters! Group a few together for a lovely display. These make fantastic, affordable gifts too. This is one of the most rewarding tin can upcycling ideas as you get to watch something grow.
Why this matters: Proper planting technique gives your plants the best start in their new home.
Common pitfall: Over-packing the soil or over-watering immediately after planting.
Idea 3: Rustic Twine-Wrapped Vases or Utensil Holders Tin Can Upcycling Ideas
For a touch of farmhouse charm or coastal elegance, twine-wrapped tin cans are incredibly versatile. They can serve as rustic vases for fresh or dried flowers, or as stylish utensil holders in the kitchen.
Step 1: Clean Can and Gather Twine
Start with your clean, smooth-edged tin can. For this project, you’ll primarily need jute twine or sisal rope, and a hot glue gun. The thickness of the twine will determine the final look – thicker twine gives a more rustic, chunky appearance, while thinner twine offers a more refined texture.
Why this matters: A clean can ensures the glue adheres well. The choice of twine sets the aesthetic tone.
Common pitfall: Not having enough twine – it often takes more than you think to cover a can!
Step 2: The Wrapping Technique
Begin at the bottom edge of the can. Apply a small line of hot glue around the base, then press the end of your twine firmly into the glue. Hold it for a few seconds until it sets.
Carefully and TIGHTLY wrap the twine around the can, applying small dabs of hot glue every inch or so as you go, especially at the beginning and end of each row if your can tapers. The key is to keep the rows of twine snug against each other, with no gaps showing the can underneath. Continue wrapping upwards until you reach the top rim.
Why this matters: Tight, even wrapping is crucial for a neat, professional finish. Gaps will spoil the illusion.
Common pitfall: Wrapping too loosely, allowing the can to show through, or using too much glue, which can seep out and look messy. Patience is key here!
Step 3: Finishing Touches and Embellishments
Once you reach the top, cut the twine and secure the end firmly with a good dab of hot glue, tucking the end neatly.
Now you can add embellishments if you wish. A simple lace ribbon tied around the middle, a few dried flowers tucked into the twine, or a small wooden tag painted with a word like “Flowers” or “Utensils” can add a lovely personal touch. For kitchen utensil holders, ensure any embellishments are easy to clean or removable.
These twine-wrapped cans look fantastic grouped in different sizes. This project beautifully demonstrates “Creative tin can crafts, DIY tin can upcycling ideas, How to repurpose tin cans at home” using simple materials.
Why this matters: Embellishments elevate the simple twine wrap into something more unique and decorative.
Common pitfall: Choosing embellishments that overpower the rustic charm of the twine or are not practical for the intended use (e.g., delicate fabric on a kitchen utensil holder).
Idea 4: Creative Candle Holders or Luminaries Tin Can Upcycling Ideas
Tin cans can be transformed into beautiful candle holders or luminaries, casting intricate patterns of light. These are perfect for adding a cozy ambiance to your evenings, both indoors and out.
Step 1: Design and Punch Your Pattern Tin Can Upcycling Ideas
After cleaning your can and smoothing the edges, decide on a design you want to punch into the can. Simple geometric shapes, stars, hearts, or even abstract dot patterns work well. You can draw your design directly onto the can with a permanent marker, or print a pattern, tape it to the can, and use it as a guide.
To make punching easier and prevent the can from denting, fill it with water and freeze it solid. The ice inside will provide support. Alternatively, you can pack it tightly with wet sand.
Once frozen (or sand-packed), place the can on a towel (to catch drips and prevent slipping) and use a hammer and nails of various sizes (or an awl) to punch out your design along the marked lines.
Why this matters: The ice or sand provides internal resistance, allowing for cleaner punches without deforming the can.
Common pitfall: Trying to punch an empty can, which will likely dent and crush. Also, not planning the design beforehand can lead to haphazard results.
Step 2: Paint and Finish Tin Can Upcycling Ideas
Once you’ve punched your design, let the ice melt and dry the can thoroughly. If you used sand, empty it out and clean the can.
Now, you can paint your luminary. Darker colors on the outside, like black, navy, or deep metallics, often make the light patterns stand out more dramatically. A contrasting color on the inside, like gold or silver, can reflect the candlelight beautifully. Spray paint works well for an even finish.
Allow the paint to dry completely. You might consider a heat-resistant paint if you plan to use real candles frequently, although LED tea lights are a safer option, especially for intricate designs or if children are around.
Why this matters: The color choice significantly impacts the final effect of the luminaries. A good paint job enhances the design.
Common pitfall: Paint clogging the punched holes. Use thin coats and, if necessary, clear any blocked holes with a pin or toothpick before the paint fully cures.
Step 3: Illuminate! Tin Can Upcycling Ideas
Place a tea light (real flame or LED) or a small votive candle inside your finished luminary. If using a real flame, ensure the luminary is placed on a heat-resistant surface and never leave it unattended.
For a hanging luminary, you can punch two holes near the top rim on opposite sides and attach a wire handle. Group several luminaries together for a stunning display. These tin can upcycling ideas are especially magical for outdoor gatherings.
Why this matters: Proper illumination brings your design to life. Safety is paramount with real flames.
Common pitfall: Using a candle that is too large for the can, posing a fire risk or not allowing enough oxygen for the flame.
Idea 5: Quirky Wind Chimes Tin Can Upcycling Ideas
Add a touch of whimsical sound and color to your garden or porch with tin can wind chimes. This project allows for a lot of creativity in terms of what you use for the chimes and how you decorate the cans.
Step 1: Prepare Cans and Chime Elements Tin Can Upcycling Ideas
You’ll need several tin cans of various sizes for this project – a larger one for the top “hanger” and smaller ones (or can lids) for the chimes. Clean them all thoroughly.
For the chime elements, you can use flattened tin can lids (be very careful with sharp edges – file them smooth!), old keys, beads, small pieces of driftwood, old silverware (spoons and forks make lovely sounds), or even specifically cut metal pieces. Gather these items.
You’ll also need strong nylon cord or fishing line, a drill with a small bit (or a nail and hammer) to make holes for hanging.
Why this matters: The variety of materials used for chimes will create different sounds and visual appeal.
Common pitfall: Using materials for chimes that are too heavy for the string or the top can to support.
Step 2: Decorate and Assemble the Top Tin Can Upcycling Ideas
Decorate your largest tin can, which will be the top part of your wind chime, from which everything else hangs. You can paint it brightly, wrap it in waterproof fabric, or create a mosaic design with small tiles or glass beads.
Drill or punch 4-6 evenly spaced holes around the bottom rim of this top can. Also, drill or punch one or two holes in the center of the can’s base (which is now the top) for hanging the entire wind chime.
Why this matters: The top can is the visual anchor; its decoration sets the tone. Evenly spaced holes ensure the chimes hang balanced.
Common pitfall: Not making the hanging mechanism for the entire wind chime strong enough.
Step 3: String and Attach Chimes Tin Can Upcycling Ideas
Cut lengths of your nylon cord or fishing line. The lengths can vary to create a staggered effect.
For each chime element (smaller cans, lids, keys, etc.), drill a small hole in it if it doesn’t already have one. Thread a piece of cord through the hole and tie a secure knot. You can add beads to the cord above the chime element for extra decoration and weight.
Thread the other end of each cord up through one of the holes you made in the rim of the top can and tie it securely on the inside. Ensure the knots are big enough so they don’t slip back through the holes.
For a central “clapper” that will strike the chimes, hang a slightly heavier element (like a larger bead or a small wooden piece) from the center of the top can, adjusting its length so it can touch the surrounding chimes.
Finally, create a strong loop using cord through the holes at the very top of the main can for hanging your wind chime.
These unique wind chimes are a testament to how resourceful “Creative tin can crafts, DIY tin can upcycling ideas, How to repurpose tin cans at home” can be.
Why this matters: Secure knots and balanced hanging are essential for a functional and durable wind chime. The clapper is key to the sound.
Common pitfall: Chimes being too close together (tangling) or too far apart (not striking each other). Knots coming undone over time.
Idea 6: Handy Kitchen Utensil Caddy Tin Can Upcycling Ideas
Organize your kitchen tools or create a portable caddy for cutlery and napkins for outdoor dining. This is a very practical application of tin can upcycling ideas.
Step 1: Select and Prepare Cans Tin Can Upcycling Ideas
Choose 3-4 tin cans of similar size, or a mix of sizes if you prefer. Taller cans work well for utensils like spatulas and wooden spoons, while shorter, wider cans can hold napkins or condiment packets. Clean them thoroughly and ensure all edges are smooth.
Why this matters: Uniformity in can preparation ensures a cohesive final product.
Common pitfall: Using cans that are too short for tall utensils, making the caddy unstable.
Step 2: Decorate Your Cans Tin Can Upcycling Ideas
Prime and paint your cans. You could paint them all the same color for a sleek look, or use different coordinating colors or patterns. Consider using stencils to label the cans (e.g., “Forks,” “Spoons,” “Knives”) or paint them with chalkboard paint for customizable labels. As these will be in the kitchen, choose paint and decorations that are easy to wipe clean. A sealant is a good idea for durability.
Why this matters: Kitchen items need to be hygienic and easy to clean. Decorations should withstand occasional splashes or handling.
Common pitfall: Using delicate decorations (like paper) that won’t hold up to kitchen use without a protective sealant.
Step 3: Assemble the Caddy (Optional Attachment) Tin Can Upcycling Ideas
You can use the decorated cans individually, or you can attach them together to form a caddy.
To attach them, you can:
- Hot Glue: Arrange the cans in your desired configuration (e.g., a row, a triangle, a square) and apply hot glue where the cans touch each other. Hold firmly until the glue sets.
- Screws/Bolts: For a more robust connection, drill small holes through the sides of the cans where they meet and use small nuts and bolts to fasten them together. This is a bit more work but very sturdy.
- Wooden Base: Attach the cans to a small wooden plaque or cutting board using strong adhesive or by screwing them in from the bottom of the wood into the base of the cans (ensure screws are short enough not to protrude inside). You can add a handle to the wooden base for easy carrying.
This kind of project really shows off “how to repurpose tin cans at home” for maximum utility.
Why this matters: How you connect the cans (or if you do) depends on how you plan to use the caddy. A connected caddy is easier to move as one unit.
Common pitfall: Using insufficient glue for a hot glue connection, leading to the caddy falling apart. If using screws, ensuring they don’t create sharp points inside the cans.
Idea 7: Fun Gift Containers or Party Favors Tin Can Upcycling Ideas
Instead of store-bought gift boxes or bags, why not use decorated tin cans? They add a personal, handmade touch and the container itself becomes part of the gift. Ideal for small treats, homemade goodies, or little trinkets.
Step 1: Clean Cans and Consider the Recipient Tin Can Upcycling Ideas
Thoroughly clean your cans and smooth any sharp edges. Think about who the gift is for and the occasion. This will guide your decoration choices. Smaller cans are often best for individual party favors or small gifts.
Why this matters: A clean, safe container is paramount, especially if gifting food items. Tailoring the design to the recipient makes it more special.
Common pitfall: Not removing all residue from the can, which could affect the gift inside.
Step 2: Decorate with a Theme Tin Can Upcycling Ideas
This is where you can get really creative!
- For Kids’ Parties: Paint cans in bright colors and add googly eyes, pipe cleaner antennae, or felt cutouts to turn them into monsters or animals.
- For Weddings or Showers: Use elegant scrapbook paper, lace, and ribbons in the event’s color scheme.
- For Holidays: Decorate with themed paper (Christmas, Easter, Halloween) and embellishments like glitter, small ornaments, or themed cutouts.
- General Gifts: A beautifully painted can, perhaps with a stenciled monogram or a decoupage design, works well.
You can also create custom “lids” using circles of cardstock, fabric-covered cardboard, or even by decorating the original can lid (if it’s the type that can be re-seated, though ensure edges are very smooth).
Why this matters: Themed decoration makes the gift container feel intentional and festive.
Common pitfall: Decorations not being securely attached and falling off before the gift is given.
Step 3: Fill and Present Tin Can Upcycling Ideas
Once your decorated tin can is dry, fill it with your chosen gift. This could be homemade cookies (line the can with wax paper or cellophane), candies, small toys, a rolled-up pair of cozy socks, craft supplies, or a gift card.
You can tie a ribbon around the can, add a gift tag, or even tuck a small flower under the ribbon. These personalized containers are often cherished as much as the gift inside, making your tin can upcycling ideas part of a memorable present.
Why this matters: Thoughtful presentation completes the gift. The container enhances the overall gifting experience.
Common pitfall: Overfilling the can or not lining it appropriately for food items.
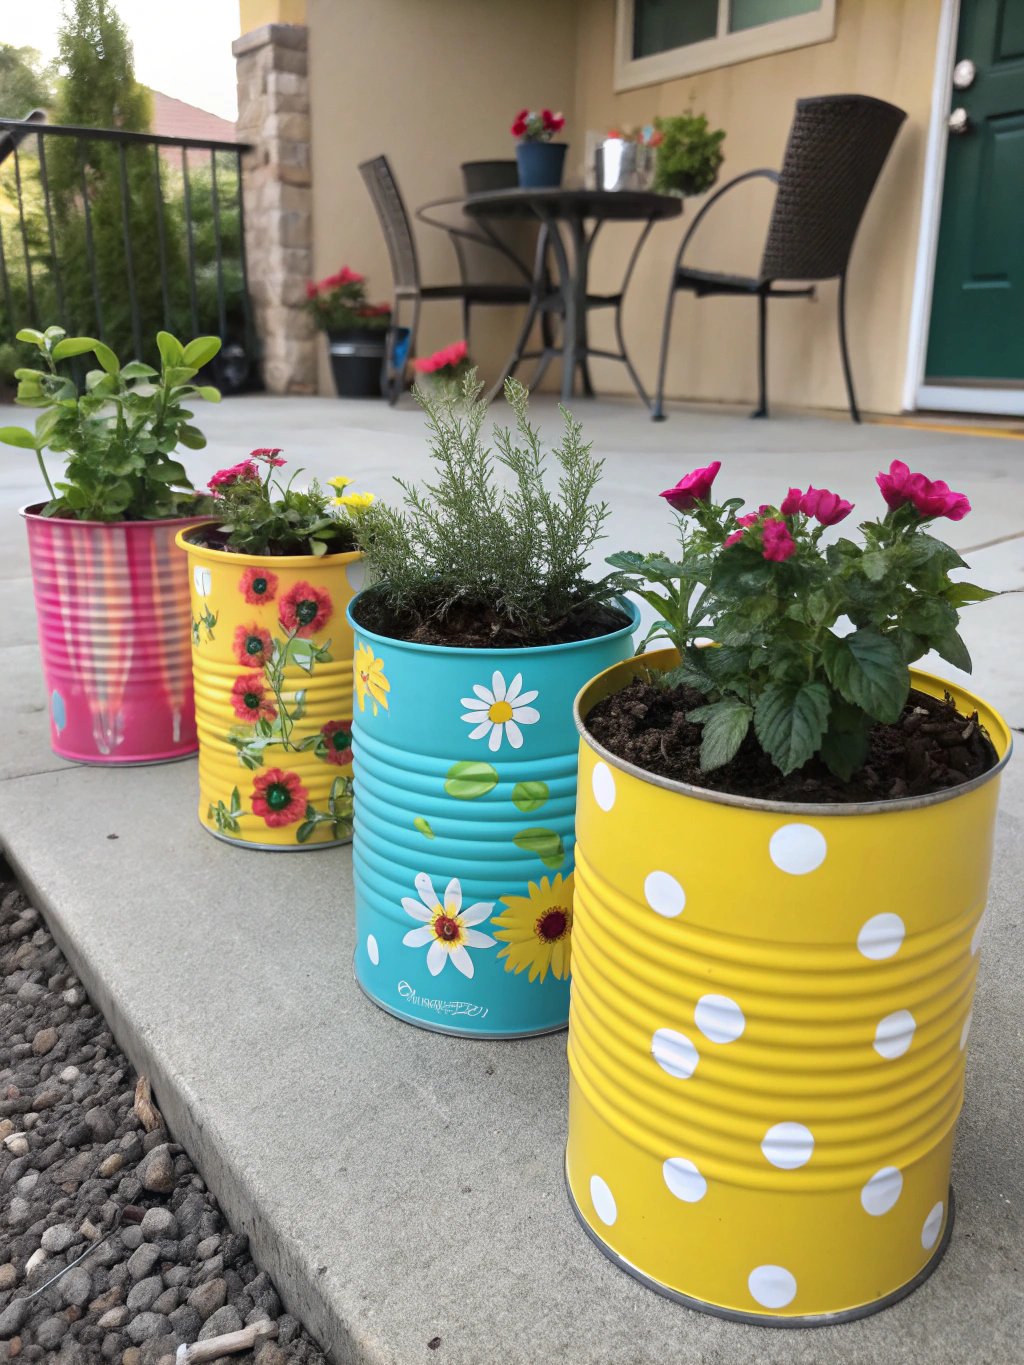
*Caption: The amazing final results of various tin can upcycling ideas – from practical organizers to beautiful decorative pieces.*
Final Result & Share Your Creations! Tin Can Upcycling Ideas
And there you have it! Seven creative and inspiring tin can upcycling ideas to transform humble tin cans into treasures for your home. From practical desk organizers and charming herb planters to whimsical wind chimes and pretty gift containers, the possibilities are truly endless. Each project not only helps reduce waste but also adds a unique, personal touch to your living space.
We’ve seen how with a little bit of imagination and some basic craft supplies, you can give new life to items that might otherwise end up in landfill. The journey of transforming a simple can into something beautiful and functional is incredibly rewarding. Which idea will you try first?
We’d absolutely LOVE to see what you create! Share photos of your finished tin can masterpieces in the comments below, or tag us on social media. Got any other brilliant tin can upcycling ideas or tips? Don’t keep them to yourself – share your wisdom with our DIY community!
Pro Tips & FAQs for Tin Can Upcycling Tin Can Upcycling Ideas
To help you on your tin can crafting journey, here are some extra tips and answers to frequently asked questions:
Q1: How do I safely remove sharp edges from tin cans?
A: Safety first! The best way is to use a can opener that leaves a smooth, rolled edge. If you don’t have one, carefully use a metal file or sturdy sandpaper to smooth down any sharp points on the rim. Always wear protective gloves when doing this. You can also cover the rim with a thick layer of hot glue or wide ribbon if you’re still concerned, though filing is preferable for a clean look.
Q2: What’s the best paint to use for “Creative tin can crafts”?
A: For most indoor tin can upcycling ideas, acrylic craft paints work wonderfully and come in many colors. Always use a metal primer first for best adhesion and to prevent rust. Spray paints (enamel or acrylic) are great for a smooth, even finish – just be sure to use them in a well-ventilated area. For outdoor projects or planters, look for weather-resistant or outdoor-specific paints. Chalk paint also adheres well to metal and gives a lovely matte, vintage finish.
Q3: How can I make my “DIY tin can upcycling ideas” more durable, especially for outdoor use?
A: For added durability, especially for items that will be handled frequently or placed outdoors, apply a clear sealant or varnish after your paint and decorations are completely dry. Choose an outdoor-grade, waterproof sealant for projects like planters or wind chimes. This will protect against moisture, UV rays (fading), and general wear and tear, ensuring your creations last much longer.
Q4: Any tips for removing stubborn labels and adhesive from tin cans?
A: Soaking the cans in hot, soapy water for 15-30 minutes usually helps loosen most paper labels. For stubborn adhesive residue, try rubbing it with cooking oil, peanut butter (the oils break down the adhesive), WD-40, or a commercial goo remover. A plastic scraper or an old credit card can help lift the residue without scratching the can. Always clean the can thoroughly with soap and water afterward to remove any oily residue before priming or painting.
Q5: Where can I find more inspiration for “How to repurpose tin cans at home”?
A: The internet is your best friend! Websites like Pinterest are bursting with visual inspiration. Crafting blogs and DIY forums are also great resources. Don’t forget to check out sites dedicated to upcycling and sustainable crafts such as “Creative tin can crafts, DIY tin can upcycling ideas, How to repurpose tin cans at home” for a wealth of ideas. Even a simple walk through a craft store can spark new concepts for decorating and repurposing.
Happy crafting, everyone! We hope these tin can upcycling ideas have sparked your creativity. Don’t forget to subscribe to our newsletter for more DIY projects, tips, and inspiration delivered straight to your inbox. And if you found this guide helpful, please share it with your fellow DIY enthusiasts!

