Introduction
Are you tired of the endless stream of plastic toys that clutter your home and, let’s be honest, often end up forgotten in a corner? Discovering engaging upcycled kids toys ideas is the perfect solution to not only declutter but also to ignite your child’s imagination while being kind to our planet. Many parents struggle to find creative outlets that are both fun and teach valuable lessons about sustainability.
This guide is packed with inventive ways to transform everyday household items into extraordinary playthings. We’ll explore simple yet brilliant projects that will have your little ones beaming with pride over their “new” treasures, fostering a love for DIY and eco-consciousness from a young age. Get ready to unlock a world of creative possibilities!
Upcycled Kids Toys Ideas
Table of Contents
What You’ll Need for Your Upcycled Kids Toys Ideas
Before we dive into the exciting projects, let’s gather our creative toolkit. The beauty of upcycled kids toys ideas is that you likely already have most of these items lying around your home!
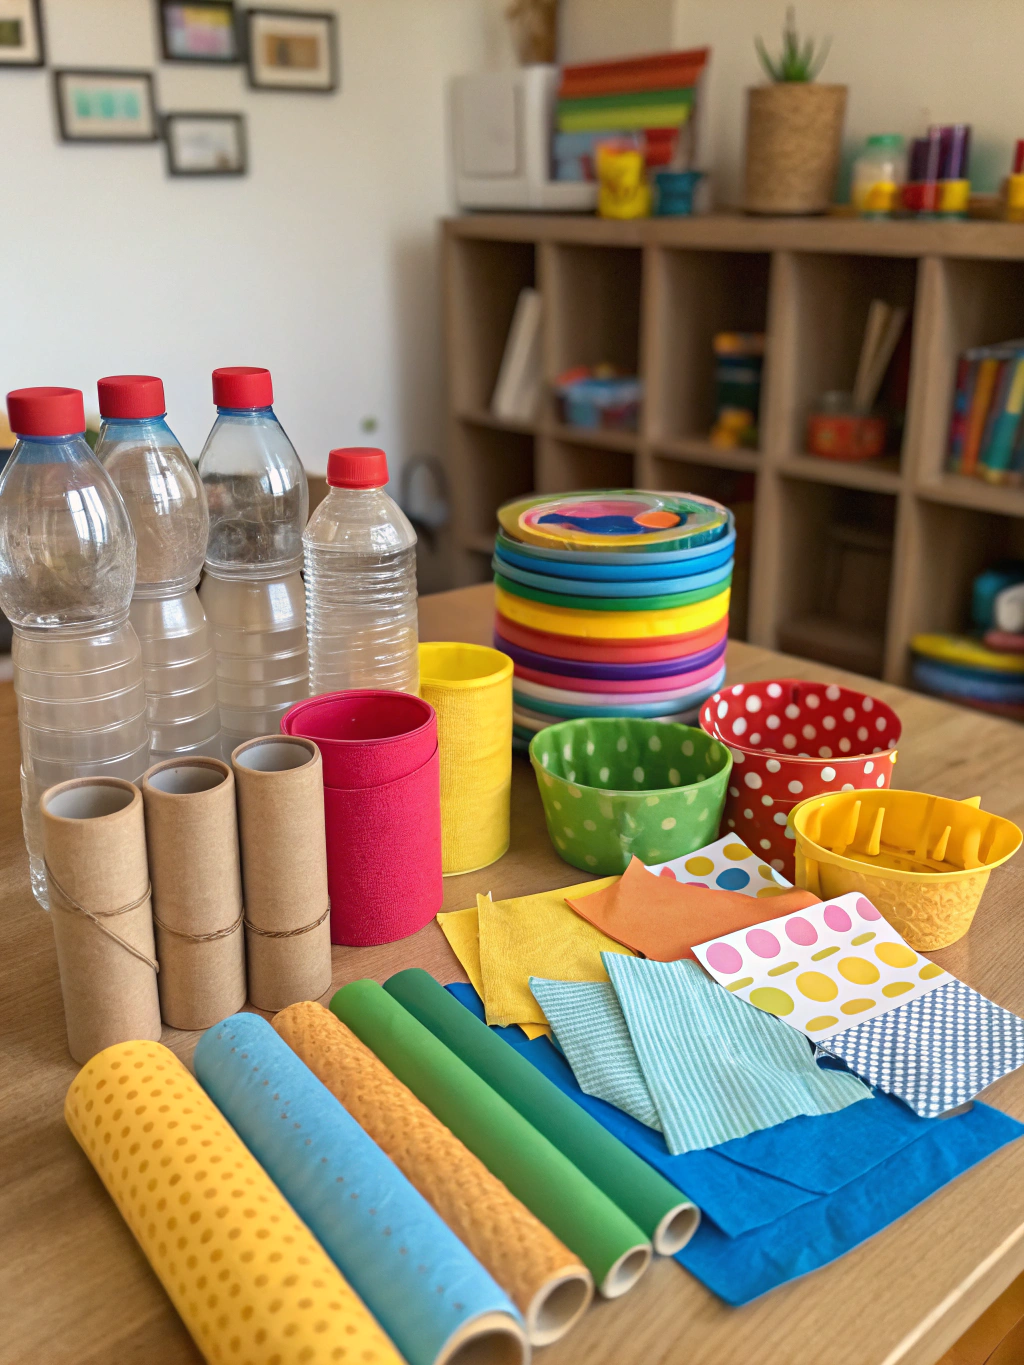
Caption: Gather your recycled treasures – the foundation for incredible upcycled kids toys!
Here’s a general list of materials and tools you might find useful for various projects. Remember, this is just a starting point; feel free to get creative with what you have!
Materials: Upcycled Kids Toys Ideas
- Cardboard boxes (cereal boxes, shoe boxes, shipping boxes – various sizes)
- Plastic bottles and containers (water bottles, milk jugs, yogurt cups – cleaned thoroughly)
- Cardboard tubes (toilet paper rolls, paper towel rolls)
- Old fabric scraps (T-shirts, jeans, felt, socks)
- Bottle caps (plastic and metal)
- Corks
- Newspapers and magazines
- Egg cartons
- Tin cans (cleaned, with smooth edges – adult supervision required for preparation)
- Wooden scraps or old wooden toys
- Buttons, beads, and other small craft embellishments
- Yarn or string
- Paints (non-toxic, child-safe acrylics or tempera paints)
- Markers, crayons, and colored pencils
- Glue (PVA glue, hot glue gun – adult supervision required, glue sticks)
- Tape (masking tape, clear tape, decorative washi tape)
Tools: Upcycled Kids Toys Ideas
- Scissors (child-safe scissors and sharper ones for adult use)
- Craft knife or box cutter (adult use only)
- Ruler or measuring tape
- Paintbrushes (various sizes)
- Hole punch
- Stapler
- Needle and thread (optional, for fabric projects)
- Sandpaper (for smoothing wooden edges)
Having these basics on hand will prepare you for a wide range of upcycled kids toys ideas. Now, let’s get crafting!
7 Creative Upcycled Kids Toys Ideas to Try at Home
Get ready to transform trash into treasure! These seven projects are designed to be fun, engaging, and a fantastic way to explore upcycled kids toys ideas. Remember to always supervise children during crafting, especially when using sharp tools or hot glue.
Project 1: Cardboard Box Castle/Dollhouse Upcycled Kids Toys Ideas
One of the most classic upcycled kids toys ideas is transforming a simple cardboard box into a magical kingdom or a cozy home for dolls and action figures. This project is incredibly versatile and can be adapted to any size box you have available.
Step 1: Gather Your Royal Construction Materials Upcycled Kids Toys Ideas
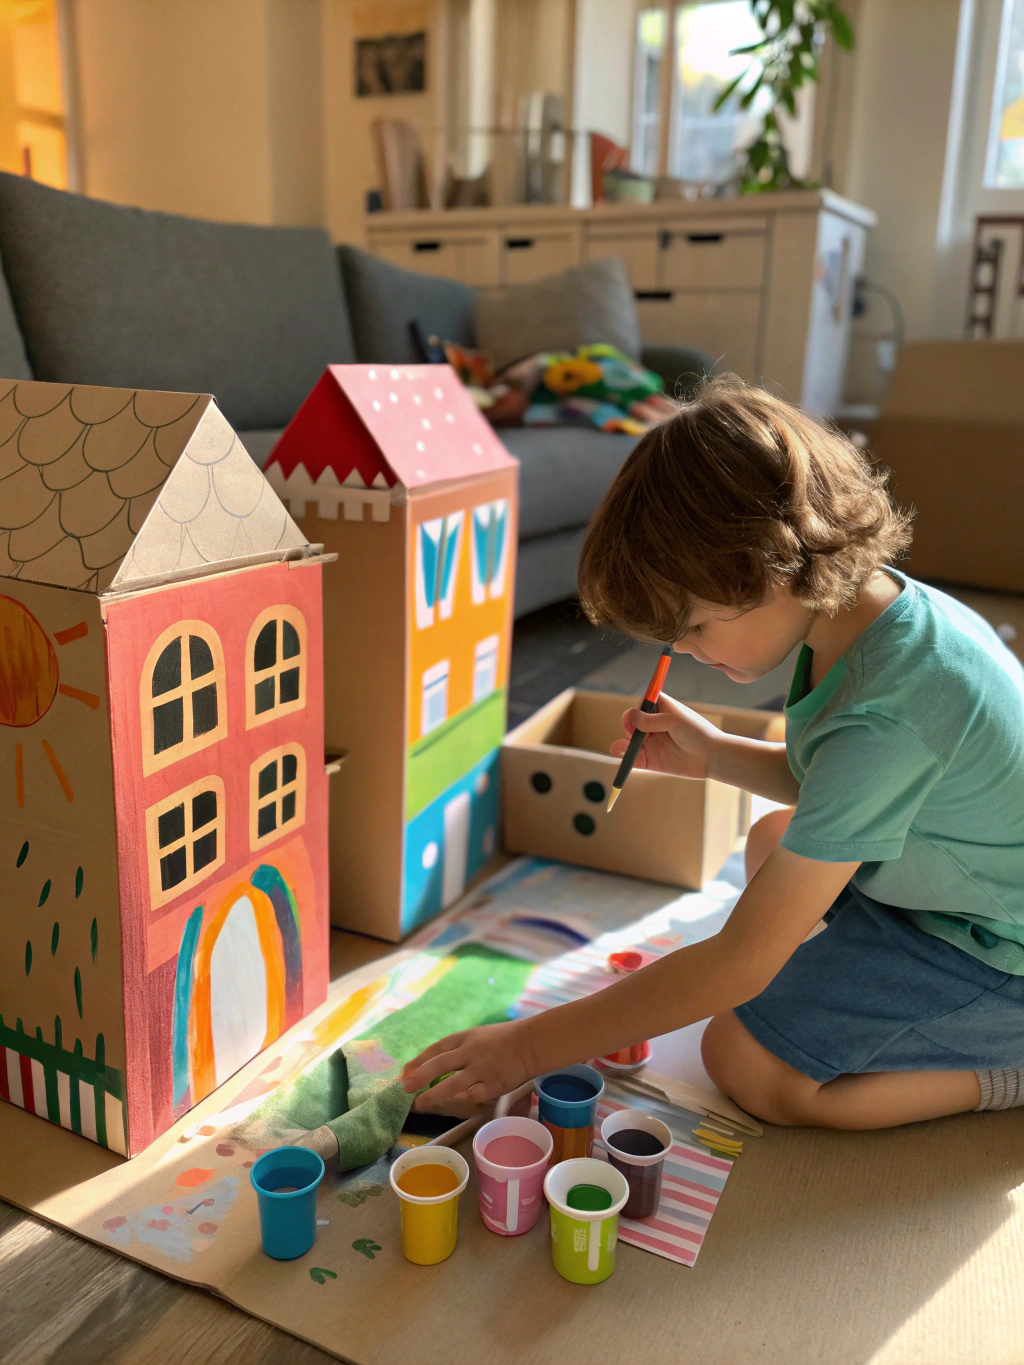
Alt text: Step 1 for upcycled kids toys ideas – gathering a cardboard box and art supplies for a castle.
First, select a sturdy cardboard box. A large appliance box can become a life-sized playhouse, while smaller shoe boxes are perfect for individual doll rooms. You’ll also need scissors or a box cutter (for adult use), markers, paints, and any decorative bits like fabric scraps for curtains or glitter for a touch of magic.
It’s important to choose a box that’s clean and free from any staples or sharp edges. If you’re combining multiple boxes, plan how they’ll fit together before you start cutting. This planning phase is crucial for a stable and impressive final structure.
Step 2: Design and Cut Your Castle/Dollhouse Features Upcycled Kids Toys Ideas
Next, sketch out your design directly onto the box. Think about where you want doors, windows, turrets for a castle, or rooms for a dollhouse. Use a ruler to draw straight lines for a neater finish.
Carefully cut out the features using scissors for thinner cardboard or a box cutter for thicker material (adults only for the cutter!). Remember to cut on a protected surface. This is where your structure starts to take shape! Don’t worry about perfection; whimsical and quirky designs are often the most charming for “Eco-friendly DIY toys”.
A common pitfall here is over-cutting, which can weaken the structure. It’s better to cut smaller openings initially and enlarge them if needed. Also, consider leaving flaps for doors and windows that can open and close.
Step 3: Assemble and Decorate Your Creation Upcycled Kids Toys Ideas
If you’re using multiple boxes, now is the time to assemble them using strong tape or hot glue (adult supervision). Reinforce any weak joints. For a castle, you can create turrets from cardboard tubes or smaller boxes attached to the corners.
Then, let the decorating begin! This is where your child’s creativity can truly shine. Use non-toxic paints to give the castle stone walls or paint the dollhouse in bright, cheerful colors. Add details with markers, glue on fabric scraps for rugs or curtains, and use bottle caps for doorknobs. Explore various “Creative upcycled kids toys ideas” for decoration.
Encourage your child to take the lead in the decoration process. This not only fosters their creativity but also gives them a sense of ownership over their new toy. Consider adding textures like glued-on sand for a castle wall or fabric swatches for wallpaper.
Project 2: Plastic Bottle Bowling Pins Upcycled Kids Toys Ideas
Turn those empty plastic bottles into a fun indoor bowling game! This is a fantastic example of “Eco-friendly DIY toys” that provides hours of active play.
Step 1: Collect and Prepare Your Bottles Upcycled Kids Toys Ideas

Alt text: Step 1 for upcycled kids toys ideas – preparing plastic bottles for a bowling game.
Gather 6 to 10 empty plastic bottles of similar size. Water bottles or soda bottles work well. Ensure they are thoroughly cleaned and dried. You’ll also need some sand, rice, or small pebbles to weigh them down, and a funnel can be helpful for this.
It’s important that the bottles are completely dry inside before adding the weighting material to prevent any mold growth. If you don’t have sand or rice, dried beans or lentils also work well.
The weight is crucial to make the pins stable enough to stand but light enough for kids to knock over easily. Experiment with the amount of filler to get the right balance.
Step 2: Weigh Down and Seal the Pins Upcycled Kids Toys Ideas
Using a funnel, carefully pour a small amount of sand, rice, or pebbles into each bottle – about 1/4 to 1/3 full should do the trick. The goal is to give them some stability so they don’t topple over too easily.
Once filled, securely screw the caps back on. You might want to add a dab of strong glue or a piece of tape around the cap to ensure it stays sealed, especially with younger children who might try to open them. This is a key step in learning “How to make upcycled kids toys” safely.
Making sure the caps are super secure prevents accidental spills and keeps small parts away from very young children. If the original caps are lost, a sturdy piece of tape over the opening can also work.
Step 3: Decorate Your Bowling Pins Upcycled Kids Toys Ideas
Now for the fun part! Let your kids decorate the bottles to look like bowling pins or any characters they like. You can use acrylic paints, permanent markers, or even wrap them in colored paper or fabric.
Consider painting them all white and adding red stripes like traditional bowling pins, or let each pin be a unique creature or design. This stage allows for great creativity. For an extra touch, you can number the pins. Find inspiration from various “Creative upcycled kids toys ideas” online or in craft books.
Use non-toxic, child-safe paints and markers. If using paint, allow it to dry completely before playing. For a ball, a soft playground ball or even a rolled-up pair of socks works perfectly.
Project 3: Tin Can Drum Kit Upcycled Kids Toys Ideas
Unleash your child’s inner rockstar with a DIY drum kit made from tin cans. This upcycled kids toys idea is not only fun but also a great way to explore rhythm and sound.
Step 1: Prepare Your Tin Cans Safely

Alt text: Step 1 for upcycled kids toys ideas – safely preparing tin cans for a DIY drum kit.
Collect several tin cans of different sizes – coffee cans, vegetable cans, fruit cans. It’s crucial that an adult prepares these cans by ensuring there are no sharp edges. Use a can opener that leaves a smooth edge, or carefully file down any rough spots. Wash and dry the cans thoroughly.
Safety is paramount with this project. If you don’t have a smooth-edge can opener, consider covering the top rim with thick tape (like duct tape) folded over the edge. This is vital for any “Eco-friendly DIY toys” involving metal.
The different sizes of cans will produce different tones, making the drum kit more interesting. Larger cans will generally produce deeper sounds.
Step 2: Create the Drum Skin (Optional) Upcycled Kids Toys Ideas
For a more traditional drum sound, you can create a drum skin. Stretch a piece of thick balloon, rubber sheeting, or even sturdy fabric tightly over the open end of the can and secure it with a strong rubber band or by tightly wrapping duct tape around the sides.
If you skip this step, kids can still have fun tapping on the bottom or sides of the cans. However, a drum skin can amplify the sound and provide a more resonant surface. Experiment with different materials for the drum skin; for example, a piece of an old yoga mat could work.
Be careful not to stretch the balloon too thin, as it might break easily. Securing it very tightly is key to a good sound. This step adds an extra layer to “How to make upcycled kids toys” with a musical theme.
Step 3: Decorate and Assemble Your Drum Kit Upcycled Kids Toys Ideas
Let your child decorate the cans using paints, colored paper, stickers, or fabric. They can create vibrant patterns or make each drum a different color.
Once decorated, arrange the cans to form a drum kit. You can simply place them on the floor or get a bit more elaborate by attaching them to a piece of cardboard or a low wooden frame. For drumsticks, chopsticks, wooden spoons, or even unsharpened pencils work great. You can wrap the ends with fabric or yarn for a softer sound.
Encourage exploration of different sounds by tapping various parts of the cans or using different “drumsticks.” This project is excellent for developing rhythm and coordination. For more father-son bonding projects, explore these upcycled kids toys ideas.
Project 4: Sock Puppets Extravaganza
Old, lonely socks get a new lease on life as characterful puppets! This is a timeless classic among upcycled kids toys ideas that fuels storytelling and imaginative play.
Step 1: Raid the Sock Drawer

Alt text: Step 1 for upcycled kids toys ideas – gathering socks and craft supplies for puppet making.
Gather all those mismatched or holey socks. Any size, color, or pattern can work, often leading to more unique characters. You’ll also need craft supplies like buttons for eyes, yarn for hair, felt scraps for mouths or ears, and fabric glue or a needle and thread.
Clean socks are a must, even if they are old. This is a great opportunity to teach kids about repurposing items that might otherwise be discarded. Longer socks work well as they can cover more of the arm.
Consider the texture and color of the socks when brainstorming character ideas. A fluffy sock could be a sheep, while a striped one might be a zebra or a quirky monster. This taps into “Creative upcycled kids toys ideas” by using existing features.
Step 2: Design Your Puppet Characters
Lay out your socks and start envisioning the characters. Will it be an animal, a person, or a fantastical creature? Sketch out some ideas or just start experimenting by placing buttons for eyes and yarn for hair.
For the mouth, you can either use the heel of the sock as a natural mouth shape or cut a slit and line it with felt. This is where you can really let your imagination run wild.
To create a more defined mouth, you can cut a piece of cardboard into an oval shape, fold it in half, and glue it inside the sock where the mouth will be. This gives more structure for “talking.”
Step 3: Bring Your Puppets to Life
Now, attach the features. Glue or sew on buttons for eyes, yarn for hair, and felt pieces for ears, tongues, noses, or clothing details. Encourage your child to do as much of the gluing or designing as they can (with supervision for sewing).
Once the puppets are complete, why not create a simple puppet theater from a large cardboard box or by draping a blanket over a doorway? This extends the play value immensely. Learning “Eco-friendly DIY toys, How to make upcycled kids toys, Creative upcycled kids toys ideas” like sock puppets is a joy.
Remember that imperfections add character! Don’t aim for store-bought perfection. The charm of these puppets lies in their homemade, unique appeal.
Project 5: Egg Carton Critters and Organizers
Empty egg cartons are surprisingly versatile and can be transformed into cute critters, treasure boxes, or handy organizers for small toys or craft supplies. This is a super simple yet effective upcycled kids toys idea.
Step 1: Collect and Clean Egg Cartons

Alt text: Step 1 for upcycled kids toys ideas – preparing egg cartons for crafting critters.
Start collecting cardboard egg cartons (not styrofoam, as paint doesn’t adhere well). Make sure they are clean and free from any egg residue. You’ll also need paint, markers, scissors, glue, and embellishments like googly eyes, pipe cleaners, and pom-poms.
Cardboard egg cartons are preferable as they are easier to cut, paint, and glue. If you only have styrofoam, you might need special paint and glue.
Think about what you want to make. A single egg cup can be a bug’s body, while a row of cups can be a caterpillar. The whole carton can become a jewelry box or a paint palette.
Step 2: Cut and Shape Your Creations
Carefully cut the egg carton into desired shapes using scissors. For example, individual cups can become little bugs or flower petals. A strip of cups can transform into a caterpillar or a train.
This step might require adult assistance, as cutting through the molded cardboard can be tricky for little hands. Think about the structure of your desired creation – will it need legs, antennae, or wings? This is where items like pipe cleaners come in handy.
Don’t discard the flat lid part of the egg carton; it can be used for wings, bases, or other features.
Step 3: Paint, Decorate, and Play!
Once cut, it’s time to paint and decorate. Let your child paint the egg carton pieces in vibrant colors. After the paint dries, add googly eyes, pipe cleaner antennae or legs, pom-pom noses, or felt wings.
If making an organizer, they can decorate the outside and then use the individual cups to sort small items like beads, buttons, or tiny toy figures. This is a great way to combine “Creative upcycled kids toys ideas” with practical organization.
These little critters can be used in small world play, or an egg carton caterpillar can become a fun pull-toy if you attach a string. The possibilities are nearly endless with this humble material.
Project 6: Cardboard Tube Binoculars & Telescopes
Transform simple cardboard tubes (from toilet paper or paper towels) into tools for imaginary adventures! Budding explorers will love these upcycled kids toys ideas.
Step 1: Gather Your Explorer Gear

Alt text: Step 1 for upcycled kids toys ideas – collecting cardboard tubes for DIY binoculars.
Collect two toilet paper tubes for binoculars or one paper towel tube for a telescope. You’ll also need paint or colored paper to decorate, glue or staples, string or yarn for a neck strap (for binoculars), and perhaps some clear plastic wrap or colored cellophane for “lenses” (optional).
Ensure the tubes are clean and free of any remaining paper. If using paper towel tubes for binoculars, you can cut one in half.
This project is quick, easy, and perfect for younger children with shorter attention spans.
Step 2: Construct Your Viewing Device
For binoculars, place the two toilet paper tubes side-by-side and secure them together with glue or staples. An adult should handle the stapler. For a telescope, you’re mostly ready to decorate, but you could add a slightly larger cardboard ring at one end to mimic a real telescope’s eyepiece.
If adding “lenses,” cut circles of clear plastic wrap or colored cellophane slightly larger than the tube openings. Secure them over one end of each tube (or one end of the telescope) with a rubber band or by gluing them carefully around the rim. This adds a fun touch to these “Eco-friendly DIY toys”.
For a more robust connection between the two tubes of the binoculars, you can wrap a strip of cardstock around the middle section where they join and glue it securely.
Step 3: Decorate and Explore!
Now, let your child decorate their new binoculars or telescope. They can paint them, cover them with colored paper or washi tape, or draw designs with markers. Add stickers or glitter for extra flair.
If making binoculars, punch a hole on the outer side of each tube near the top and tie a piece of string or yarn through the holes to create a neck strap. This makes them easier for little explorers to carry. Now they’re ready for bird watching in the backyard or searching for pirates! For parents looking for engaging activities, knowing “How to make upcycled kids toys” like these is a great skill.
Encourage imaginative play by setting up an “expedition” in the house or garden. What can they spot through their new upcycled toy?
Project 7: Fabric Scrap Capes and Costumes
Don’t throw away old t-shirts, bedsheets, or fabric remnants! They can be easily transformed into superhero capes, princess skirts, or pirate sashes – perfect for dress-up and igniting “Creative upcycled kids toys ideas”.
Step 1: Source Your Super Fabrics

Alt text: Step 1 for upcycled kids toys ideas – gathering fabric scraps for DIY capes and costumes.
Look through your old clothes, linens, or craft stash for suitable fabrics. Old t-shirts are great for no-sew capes. Larger pieces like old pillowcases or sheets can become skirts or tunics. You’ll need fabric scissors, and depending on your skill and fabric, either a needle and thread, fabric glue, or safety pins.
Consider the color and texture of the fabric. Shiny or brightly colored materials often appeal to kids for dress-up. Even old towels can be repurposed for certain costume elements.
No-sew options are fantastic for quick results and for involving kids more directly in the “making” process.
Step 2: Design and Cut Your Costume Pieces
For a simple no-sew cape from a t-shirt: lay the t-shirt flat, cut off the sleeves, and then cut up the sides, leaving the neckband intact. The back panel of the t-shirt becomes the cape, using the existing neck opening.
For skirts, a simple rectangle of fabric can be gathered onto a piece of elastic for a waistband. For sashes, just cut long strips. Let your child help with the design ideas. What kind of character do they want to be?
Always supervise Achild when using fabric scissors. If you’re feeling more ambitious, you can find simple patterns online for basic costume shapes.
Step 3: Assemble and Embellish
For no-sew items, you might be done after cutting! For items needing assembly, use fabric glue for simple bonds (good for felt decorations) or a basic running stitch if sewing. Safety pins can be a temporary solution for fitting or attaching pieces.
Encourage kids to decorate their costumes with fabric markers, glued-on felt shapes, glitter glue (use sparingly!), or even by attaching lightweight items like bottle caps as “medals.” This is a pinnacle of “Eco-friendly DIY toys, How to make upcycled kids toys, Creative upcycled kids toys ideas“, turning waste into wondrous wearables.
These simple costume pieces can provide endless hours of imaginative play. Combine them with other upcycled accessories like cardboard tube swords or wands.
The Amazing Final Results of Your Upcycled Creations!
Voilà! After some creative fun, you and your little ones have transformed everyday “junk” into a delightful collection of unique, eco-friendly toys. Imagine the pride on their faces as they play with something they helped create!
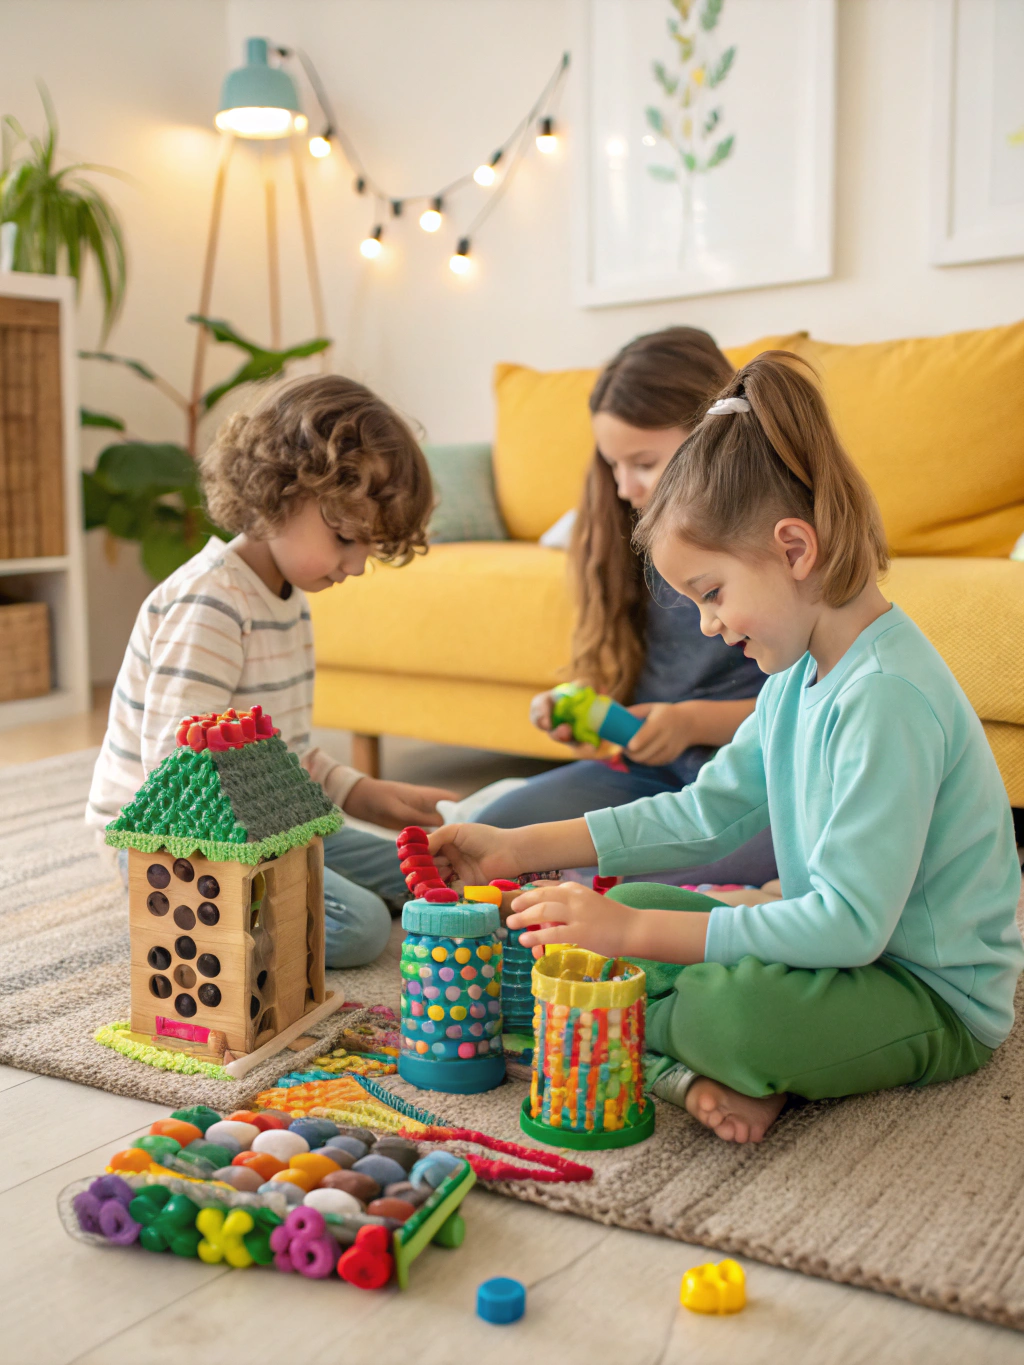
Caption: Your amazing collection of homemade upcycled kids toys – ready for hours of imaginative play!
From a majestic cardboard castle ready for royal adventures to a set of quirky sock puppets eager to tell stories, these upcycled kids toys ideas are more than just playthings. They represent creativity, resourcefulness, and a step towards a more sustainable lifestyle. Each toy carries a story, not just of its past life as a household item, but of the fun and learning that went into its transformation.
We’d absolutely love to see what masterpieces you and your family have crafted! Share photos of your upcycled toys in the comments below, or tell us your favorite tips and tricks for making “Eco-friendly DIY toys”. What other “Creative upcycled kids toys ideas” have you come up with?
Pro Tips for Upcycling Success & FAQs
Embarking on your upcycled kids toys ideas journey is exciting! Here are a few extra tips to make the process smoother and even more rewarding, along with answers to some common questions.
H3: Pro Tips for Awesome Upcycled Toys
- Safety First, Always: Before handing over any upcycled toy, double-check for sharp edges, small parts that could be choking hazards (especially for younger children), and ensure any paints or glues used are non-toxic and fully dried. Adult supervision is key during the making process, especially with tools like scissors, craft knives, or hot glue guns.
- Involve the Kids (Age-Appropriately): The more involved children are in the creation process, the more they will cherish and play with the final toy. Assign tasks suitable for their age and skill level – younger kids can paint, stick, and decorate, while older kids might help with cutting (under supervision) or more complex assembly.
- Don’t Aim for Perfection: The charm of homemade, upcycled toys often lies in their imperfections. Embrace the quirks! It’s about the process, creativity, and fun, not about producing a store-bought replica.
- Build a “Future Treasures” Box: Keep a dedicated box or bin where you can toss items that have upcycling potential – cardboard tubes, interesting plastic containers, fabric scraps, bottle caps, etc. This way, you’ll always have materials on hand when inspiration for “Eco-friendly DIY toys” strikes.
- Think About Durability (and Repairability): While some upcycled toys might be more ephemeral, consider how to make them last a bit longer. Reinforce cardboard joins with extra tape, use strong glue, or choose sturdier base materials. The good news is, if an upcycled toy breaks, you can often repair it or even upcycle it into something new!
H3: Frequently Asked Questions (FAQs)
Q1: What are the best materials for beginners wanting to try upcycled kids toys ideas?
Cardboard is your best friend! Boxes of all sizes, cardboard tubes (toilet paper, paper towel rolls), and egg cartons are incredibly versatile, easy to work with, and readily available. They require minimal specialized tools – usually just scissors, glue, and paint. Plastic bottles are also great starters. These materials lend themselves well to a wide range of “Creative upcycled kids toys ideas” without a steep learning curve.
Q2: How can I ensure the upcycled toys I make are safe for my toddler?
For toddlers, safety is paramount. Avoid small parts that can be detached (like buttons, small beads, or insecurely glued googly eyes) as they are choking hazards. Ensure all edges are smooth (especially on wood or metal items – though metal is generally best avoided for toddler toys unless expertly prepared by an adult). Use only non-toxic, child-safe paints, glues, and markers. Always supervise play with homemade toys, especially new ones. Focus on larger, simpler constructions for this age group. When learning “How to make upcycled kids toys” for toddlers, simplify designs and prioritize robust construction.
Q3: My child loses interest in toys quickly. How can upcycled toys help?
The beauty of **[upcycled kids toys ideas](https://www.fixdiy.site/fathers-day-crafts-for-toddlers-diy/)** is twofold here. Firstly, because kids are often involved in making them, they develop a stronger connection and sense of ownership, which can lead to prolonged interest. Secondly, upcycled toys are often open-ended, meaning they can be used in many different ways, sparking more imaginative play than some single-purpose commercial toys. If they do lose interest, it’s less of a financial loss, and you can even involve them in upcycling that toy into something new!
Q4: Where can I find more inspiration for “Eco-friendly DIY toys”?
Besides wonderful blogs like this one, Pinterest is a visual treasure trove for upcycled crafts and DIY toy ideas. A quick search for “upcycled kids toys,” “DIY cardboard toys,” or “recycled material crafts for kids” will yield thousands of inspiring images and tutorials. Don’t forget to check out resources like [Good Housekeeping’s upcycling ideas](https://www.goodhousekeeping.com/home/craft-ideas/how-to/g139/genius-upcycling-ideas/) for broader “[Eco-friendly DIY toys, How to make upcycled kids toys, Creative upcycled kids toys ideas](https://www.goodhousekeeping.com/home/craft-ideas/how-to/g139/genius-upcycling-ideas/)” inspiration. Often, the best ideas come from simply looking at an item destined for the recycling bin and asking, “What could this become?”
Q5: How do I store all these amazing upcycled kids toys?
Storage can indeed be a fun challenge! Consider using upcycled solutions for storage too – a large decorated cardboard box can become a “toy chest” for other upcycled creations. Utilize vertical space with hanging fabric bags (also potentially upcycled!). For smaller items like egg carton critters or sock puppets, clear bins or baskets help keep things organized and visible. Rotate toys to keep things fresh; not everything needs to be out all the time.
Get Creative and Share Your Upcycled Masterpieces!
We hope these 7 upcycled kids toys ideas have sparked your imagination and shown you just how easy and rewarding it can be to create fun, engaging, and “Eco-friendly DIY toys” for your children. The possibilities are truly endless when you start looking at “trash” as “treasure.”
Now it’s your turn! Which project are you most excited to try first? Do you have any other brilliant upcycled toy ideas or tips to share with our community of DIY enthusiasts?
Leave a comment below with your thoughts, questions, or photos of your own upcycled creations. We love seeing how you bring these ideas to life!
Don’t forget to share this post with other crafty parents, grandparents, and educators who might be looking for “Creative upcycled kids toys ideas.”
And if you haven’t already, sign up for our newsletter to get more DIY projects, home improvement tips, and creative inspiration delivered straight to your inbox. Happy upcycling!

