Introduction
Ever stare at that growing collection of wine corks, feeling a pang of guilt about just tossing them? You’re not alone! Many a home-improvement enthusiast wonders how to transform these little tokens of good times into something both beautiful and practical. Well, wonder no more, because today we’re diving into an incredibly satisfying wine cork trivet DIY project. This isn’t just about decluttering; it’s about creating a charming, rustic, and surprisingly durable piece for your kitchen or dining table.
Imagine the satisfaction of placing a hot dish on a trivet you made yourself – pretty cool, right? This wine cork trivet DIY is the perfect weekend craft, requiring minimal tools and offering maximum bragging rights. Let’s turn those saved corks into a crafty home upgrade!
This project is a fantastic entry point into the world of upcycling. Not only is it environmentally friendly, but it also allows you to create unique, personalized items that can’t be bought in stores. The natural texture and varied designs of wine corks lend themselves beautifully to creating a piece that’s both functional and a conversation starter. Think of the stories each cork could tell! Whether you’re a seasoned DIY pro or just starting out, this wine cork trivet DIY is accessible and rewarding. We’ll guide you through every step, ensuring your finished product is something you’ll be proud to display and use. Get ready to uncork your creativity!
Wine Cork Trivet DIY
Wine Cork Trivet DIY
What You’ll Need for Your Wine Cork Trivet DIY
Before we get our craft on, let’s gather our supplies. Having everything ready to go makes the whole wine cork trivet DIY process smoother and more enjoyable. Most of these items you might already have around the house, especially if you’re a fellow DIY lover!
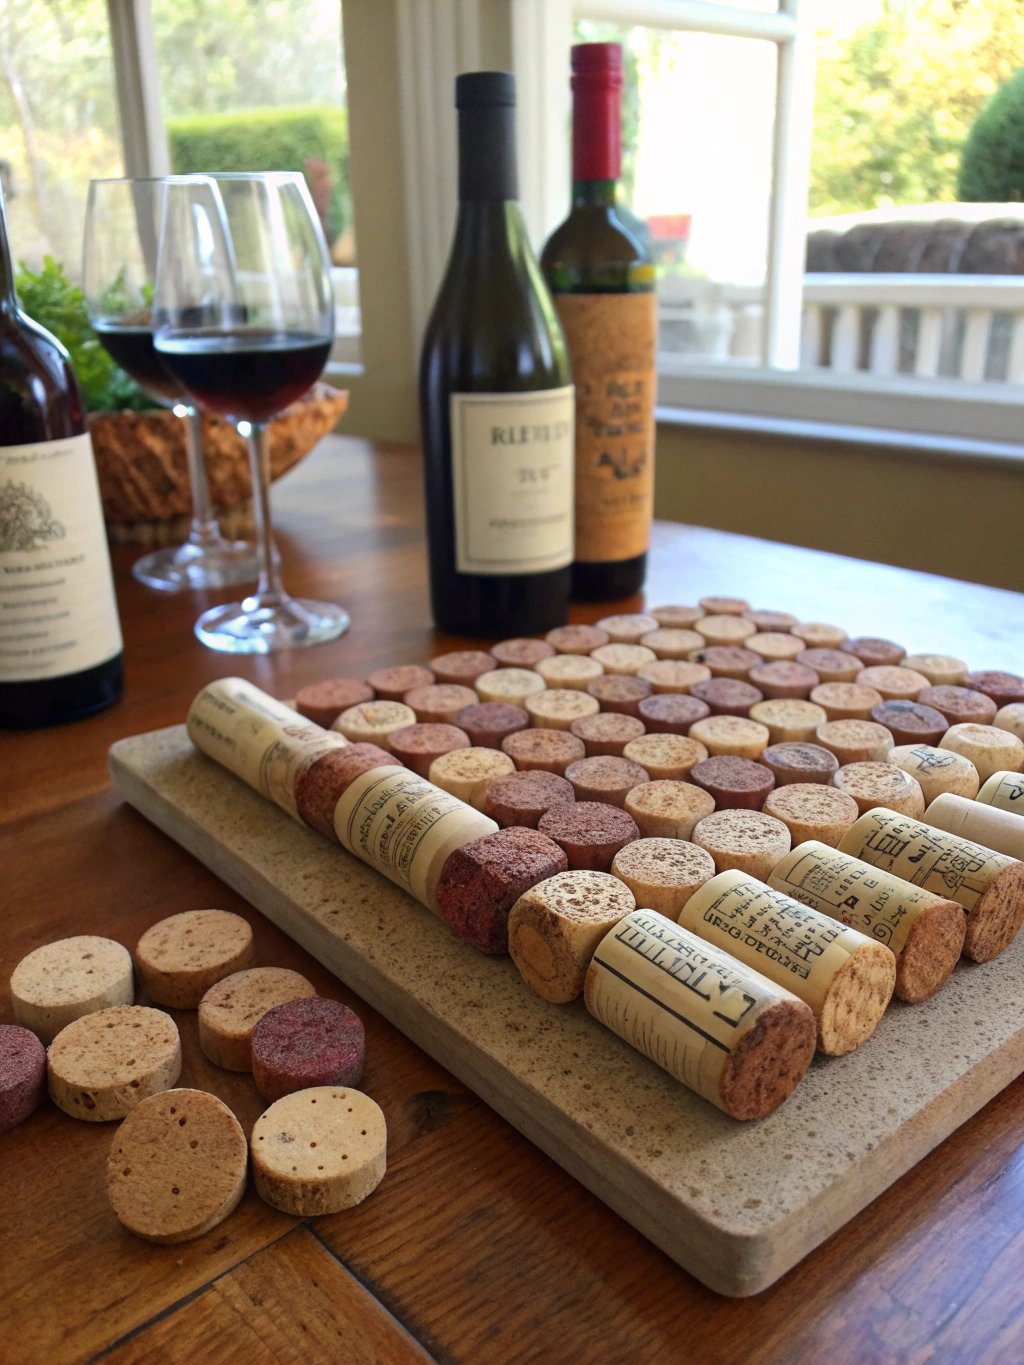
*Caption: Gather these simple materials and tools before starting your wine cork trivet DIY adventure!*
Here’s your checklist:
- Wine Corks: The stars of the show! You’ll need approximately 30-50, depending on the desired size of your trivet. Try to use corks of similar height for an even surface, though slight variations can add character. Both natural and synthetic corks work, but natural corks are often easier to cut if needed.
- Strong Adhesive: A hot glue gun with glue sticks is highly recommended for its quick bonding and ease of use. Alternatively, a strong craft glue like E6000 or a clear silicone adhesive can work, but they will have longer drying times.
- Cutting Tool (Optional but Recommended): A sharp utility knife or craft knife (X-Acto knife). This is for trimming any uneven corks or cutting them in half if you want a flatter, wider base for some designs. Always use a cutting mat and exercise caution.
- Cutting Mat (If using a knife): Protects your work surface and provides a stable base for cutting.
- Ruler or Measuring Tape: To help plan your trivet size and ensure your corks are aligned.
- Sandpaper (Optional): Fine-grit sandpaper can be used to smooth any rough edges of corks after cutting.
- Base Material (Optional): For a more structured trivet, you can glue your corks onto a thin piece of corkboard sheet, felt, or even a sturdy piece of cardboard cut to your desired shape. This adds stability, especially for larger trivets.
- Clamps or Heavy Books (Optional): Useful if you’re using slower-drying glue or want to ensure a tight bond while the glue sets for a base material.
- Protective Gloves (Recommended): Especially when using a hot glue gun or sharp cutting tools. Safety first!
- Pencil or Marker: For marking cutting lines or outlining your design on the base material.
- Decorative Ribbon or Twine (Optional): To wrap around the finished trivet for an extra decorative touch.
Having these items at hand will make your wine cork trivet DIY project a breeze. Remember, the beauty of DIY is its flexibility. If you don’t have one exact item, think about what you do have that could serve a similar purpose. For instance, if you lack a dedicated cutting mat, a thick piece of old cardboard can work in a pinch for protection. The key is to be resourceful and safe! Many Wine cork projects, DIY trivet ideas, How to make a wine cork trivet, Wine cork trivet DIY instructions, Crafty home upgrades, Creative wine cork crafts highlight the versatility of materials, and this one is no different.
Step-by-Step Guide to Your Perfect Wine Cork Trivet DIY
Alright, DIY dynamos, it’s time to get down to business! We’ve broken down the wine cork trivet DIY process into 7 easy-to-follow steps. Take your time with each one, and remember, crafting is supposed to be fun!
Step 1: Prepare Your Corks
This initial step is crucial for a polished final product. Don’t skimp on the prep!
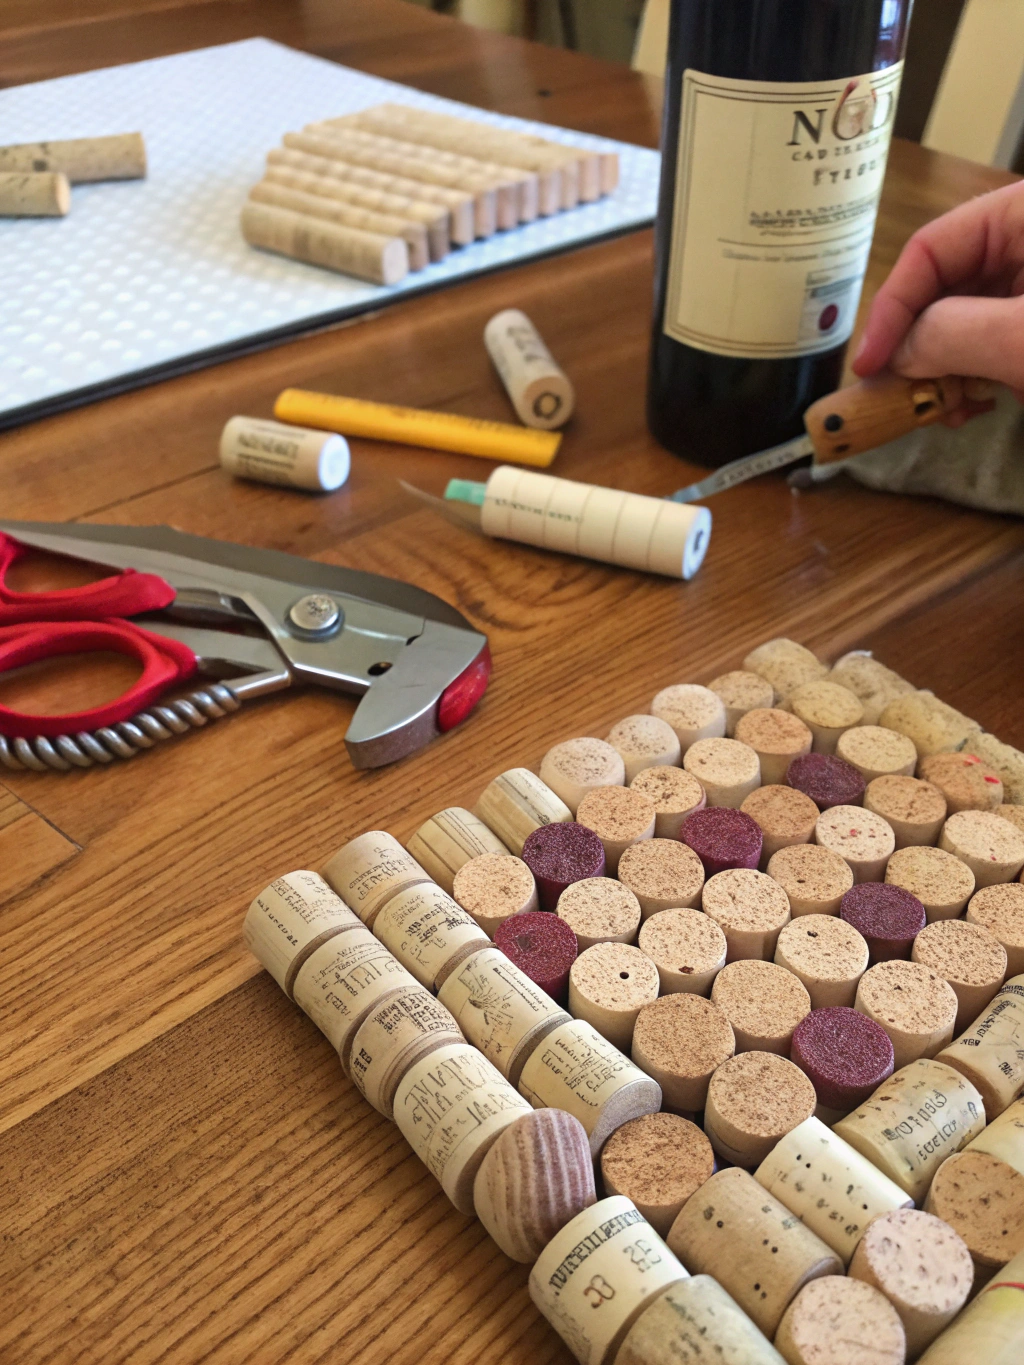
*Caption: Step 1: Cleaning and sorting your wine corks is key for a great wine cork trivet DIY.*
First, give your corks a good clean. Some might have wine stains, which can actually add to the rustic charm, but you’ll want to remove any dust, debris, or sticky residue. A gentle wipe with a damp cloth is usually sufficient. If they’re a bit grimy, a very mild soap solution can be used, but ensure they are completely dry before you proceed. Wet corks won’t glue well and can even develop mold.
Next, sort your corks. Look for corks that are roughly the same height. If you have a significant variation, your trivet surface won’t be level, which isn’t ideal for balancing hot pots and pans. If you love the look of varied corks but need that even surface, this is where your utility knife comes in. Carefully, and using a cutting mat, trim the taller corks down to match the shorter ones. It’s often easiest to trim from the less-interesting end of the cork (the one that was inside the bottle).
If you’re aiming for absolute precision, you can stand them on a flat surface and use a ruler to mark a consistent height before cutting. Some people even choose to cut all their corks in half lengthwise to create a flatter, wider surface area for gluing, especially if making a larger trivet or using a base. This also effectively doubles your cork supply! If you do cut them, a quick pass with fine-grit sandpaper can smooth any jagged edges.
This preparation phase in your wine cork trivet DIY might seem a bit tedious, but trust me, it pays off. A clean, uniform set of corks will make the assembly process much smoother and result in a far more professional-looking trivet. Consider this your foundation for a fantastic crafty home upgrade.
Step 2: Plan Your Trivet Design and Layout
Before you even think about reaching for that glue gun, let’s talk design! This is where your creativity really gets to shine in your wine cork trivet DIY.

*Caption: Step 2: Experimenting with different layouts is a fun part of the wine cork trivet DIY process.*
What shape do you want your trivet to be? Common choices are square, rectangle, or hexagon, as these are relatively easy to achieve with cylindrical corks. Circles are also popular but can be a bit trickier to get perfectly round without a form. Lay your prepared corks out on your work surface and start playing around with arrangements. Try a simple grid pattern for a square or rectangle. For a hexagon, start with one cork in the center and arrange six around it, then build outwards.
Consider the size too. A smaller trivet might be perfect for a teapot, while a larger one could accommodate a casserole dish. Use your ruler to get an idea of the final dimensions. It’s a good idea to arrange all your corks into your desired shape before any gluing begins. This allows you to see how they fit, make adjustments, and ensure you have enough corks of the right size.
You might find that some corks fit better in certain spots due to slight variations in their diameter or texture. This dry run is also a great time to decide if you want to incorporate any patterns, like alternating wine-stained ends with clean ends, or mixing corks from different wineries for visual interest.
If you’ve opted to use a base material (like a corkboard sheet or felt), now is the time to cut it to your desired shape and size if you haven’t already. You can then arrange your corks on top of this base to finalize your layout. Some people even lightly trace the outline of their cork arrangement onto the base with a pencil as a guide for gluing. Taking a few extra minutes for this planning stage of your wine cork trivet DIY can prevent a lot of frustration later.
This is a key aspect of many Wine cork projects, DIY trivet ideas, How to make a wine cork trivet, Wine cork trivet DIY instructions, Crafty home upgrades, Creative wine cork crafts.
Step 3: Gluing the First Row (or Center)
With your design finalized, it’s time to bring out the hot glue gun! This is where your wine cork trivet DIY starts to take physical form.

*Caption: Step 3: Carefully gluing the first row sets the foundation for your wine cork trivet DIY.*
Plug in your hot glue gun and let it heat up fully. Ensure you have extra glue sticks handy. If you’re working with a base, you’ll apply glue to the bottom of each cork and press it onto the base. If you’re making a baseless trivet (where corks are glued directly to each other), you’ll apply glue to the sides of the corks.
Let’s assume a simple square or rectangular design for now. Start with one row of corks. Take your first cork, apply a line of hot glue along one side (if baseless) or to the bottom (if using a base). Quickly press it into place according to your planned layout. For the next cork in the row, apply glue to the side that will attach to the first cork, and also to its bottom if using a base. Press it firmly against the first cork and down onto the base, if applicable.
Hold for a few seconds to allow the glue to set. Hot glue sets fast, which is great, but it also means you need to work efficiently and accurately.
A common pitfall here is using too little or too much glue. Too little, and your trivet won’t be sturdy. Too much, and it will ooze out and look messy. Aim for a consistent bead of glue. If glue does ooze, try to wipe it away quickly before it fully hardens (be careful, it’s hot!). Sometimes, it’s easier to let small oozes harden and then carefully trim them away later with a craft knife. Ensure your corks are standing straight and are flush with each other on top. A level surface is key!
For a hexagonal design, you’d typically start with the center cork and then glue the surrounding six corks to it and to each other. The principle is the same: apply glue, press firmly, hold, and ensure alignment. This first row (or central cluster) is foundational for your wine cork trivet DIY, so take your time to get it right.
Step 4: Building Out Your Trivet
Now that you have your initial row or central cluster securely glued, it’s time to build outwards and complete the main body of your wine cork trivet DIY.

*Caption: Step 4: Patiently build out your wine cork trivet DIY, ensuring each cork is securely attached.*
Continue adding corks one by one, or row by row, following your planned design. For each new cork, identify which surfaces will be touching already-glued corks (and the base, if you’re using one). Apply hot glue to these contact surfaces. For example, if a cork is being added to a grid and will touch two existing corks, apply glue to the two sides of the new cork that will make contact.
Press each cork firmly into place, ensuring it’s aligned with its neighbors both vertically (so the top surface remains level) and horizontally. Hold it for a few seconds until the glue grabs. Work methodically. It can be tempting to rush, but this can lead to a wobbly or misshapen trivet. If you’re making a larger trivet, you might find it helpful to work in sections, allowing one section to set completely before adding to it. This helps maintain structural integrity.
A common issue at this stage is misalignment. Keep checking that your rows are straight and your overall shape is maintained. If a cork goes on a bit crooked, and the glue hasn’t fully set, you might be able to gently wiggle it into position. If it’s already solid, trying to force it can break other glue bonds. In such a case, it might be better to carefully cut that cork out and re-glue it, or accept the minor imperfection as part of its handmade charm!
Throughout this wine cork trivet DIY process, frequently step back and look at your work from different angles to catch any misalignments early. Many creative wine cork crafts benefit from this careful, piece-by-piece assembly.
Step 5: Reinforce and Check for Stability (Optional but Recommended)
Once all your corks are glued into your desired shape, take a moment to admire your handiwork! But before you call it completely done, let’s ensure your wine cork trivet DIY is strong and stable.

*Caption: Step 5: Checking for wobbly corks and adding extra glue ensures a durable wine cork trivet DIY.*
Gently handle your trivet. Try to wiggle individual corks. Are there any loose spots? Does it feel sturdy overall? If you’re not using a solid base material, this step is particularly important. The constant heating and cooling from hot dishes, plus general handling, can put stress on the glue joints over time.
If you find any wobbly corks or weak points, now is the time to reinforce them. You can carefully apply a bit more hot glue into the gaps between corks where the bond seems weak. Use the tip of the glue gun to get into tight spaces. Be mindful not to create unsightly globs of glue on the visible surfaces. If you applied glue to the bottoms onto a base, flip the trivet over (if the base allows) and check if any corks seem to be lifting from the base. Add more glue underneath if necessary.
Another technique for baseless trivets is to run a thin bead of glue along the outside perimeter seams where the corks meet, or even along some of the internal seams if they look like they need it. This can add significant rigidity. If you used a slower-drying craft glue instead of hot glue, ensure it has completely cured according to the manufacturer’s instructions before doing this stress test.
Rushing this can compromise the bonds. This reinforcing step elevates your wine cork trivet DIY from a simple craft to a durable kitchen accessory. This focus on durability is common in many Wine cork projects, DIY trivet ideas, How to make a wine cork trivet, Wine cork trivet DIY instructions, Crafty home upgrades, Creative wine cork crafts.
Step 6: Trimming and Finishing Touches
Your wine cork trivet DIY structure is complete and sturdy! Now for those little details that make a big difference to the final look.

*Caption: Step 6: Clean up any excess glue and consider adding decorative touches to your wine cork trivet DIY.*
Carefully inspect your trivet for any excess hot glue “strings” or “blobs.” Those pesky spiderweb-like strands are a hallmark of hot glue projects! Most can be easily pulled off once cool. For more stubborn blobs, especially those on visible surfaces, you can try to carefully trim them away with a sharp craft knife. Be very cautious not to cut into the corks themselves or your fingers. Sometimes, a little bit of rubbing alcohol on a cotton swab can help loosen small, cured glue spots, but test this on an inconspicuous area first as it could affect some cork finishes or inks.
If you opted to cut your corks and the edges are a bit rough, now’s the time for that fine-grit sandpaper. Gently sand any uneven or sharp edges for a smoother feel and appearance. Wipe away any sanding dust with a dry cloth.
This is also the stage where you can add optional decorative elements. A popular choice is to wrap a piece of ribbon or rustic twine around the perimeter of the trivet. This can hide the side seams of the corks and add a pop of color or texture. Simply apply a thin line of hot glue along the edge of the trivet, section by section, and press the ribbon or twine into place.
Secure the ends neatly, perhaps with a small bow or by tucking them under. Some people even paint or stain the exposed ends of the corks for a different look, though the natural cork is often part of the charm for a wine cork trivet DIY. These finishing touches really personalize your creation and elevate it to a “crafty home upgrade.”
Step 7: Curing and Your First Use!
The final step in your wine cork trivet DIY journey! Patience here is key before you put your new creation to the test.

*Caption: Step 7: Let your wine cork trivet DIY fully cure, then enjoy its rustic charm in your kitchen!*
Even though hot glue sets quickly, it’s a good idea to let your finished trivet sit undisturbed for at least a few hours, or ideally 24 hours, to allow all the glue bonds to fully cure and reach maximum strength. This is especially important if you’ve done a lot of reinforcing or used a significant amount of glue. If you used a different type of adhesive, like E6000 or silicone, adhere strictly to the manufacturer’s recommended full cure time, which could be 24-72 hours. Trying to use the trivet too soon could cause it to fall apart, undoing all your hard work.
Once fully cured, your wine cork trivet is ready for action! Place it on your dining table or kitchen counter. The natural cork material is an excellent insulator, protecting your surfaces from hot pots, pans, and serving dishes. Its slightly uneven, textured surface (a natural feature of corks) also provides a bit of grip. The first time you use it, especially with a particularly hot dish, you might notice a very faint, warming cork smell, which is perfectly normal and usually dissipates.
Clean your trivet by wiping it with a damp cloth. Avoid submerging it in water or putting it in the dishwasher, as this can weaken the glue and damage the corks over time. With proper care, your wine cork trivet DIY will serve you well for years to come, a charming reminder of your crafting prowess and a testament to turning simple materials into something wonderful.
Your Stunning Wine Cork Trivet DIY: The Final Result!
And there you have it! After following these 7 steps, you’ve transformed a humble pile of wine corks into a beautiful, functional, and eco-friendly wine cork trivet DIY. Give yourself a pat on the back – you’ve earned it!
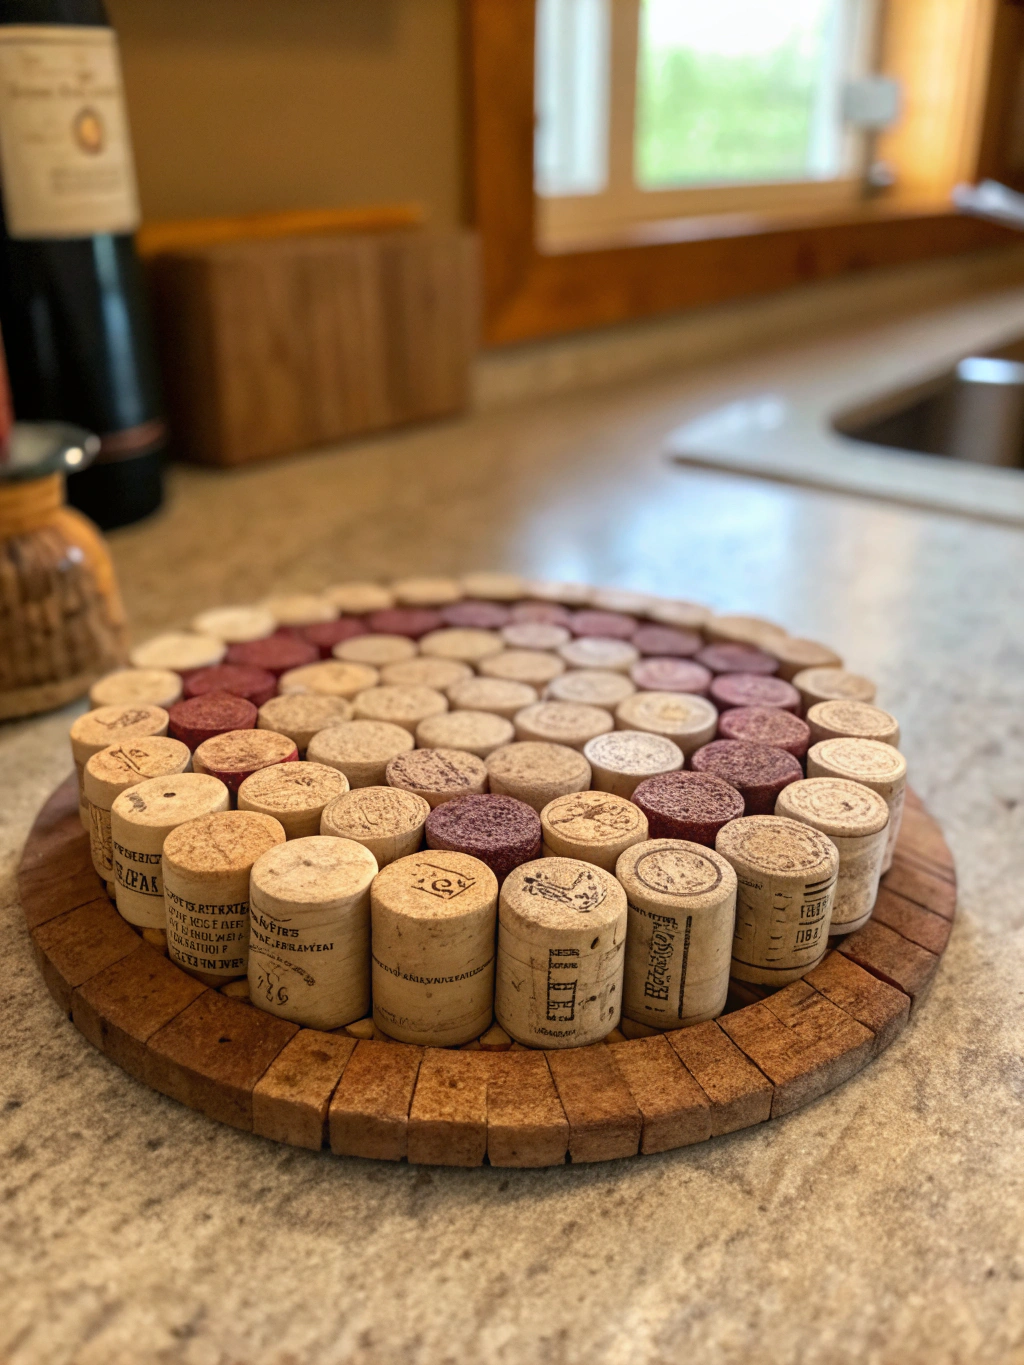
*Caption: Behold your finished masterpiece! A stylish and practical wine cork trivet DIY, ready to grace your table.*
Isn’t it amazing how something so simple can look so chic and rustic? This project is a perfect example of how upcycling can bring unique character to your home. Your new trivet is not just a practical kitchen accessory; it’s a conversation starter, a piece of your personality, and a testament to your creativity. Imagine the compliments you’ll receive when guests see it!
This wine cork trivet DIY is more than just a craft; it’s a small step towards a more sustainable lifestyle. You’ve given new life to materials that might have otherwise ended up in a landfill. Plus, the skills you’ve practiced – careful cutting, precise gluing, design planning – are transferable to so many other DIY projects. For more inspiration on upcycling, including other Wine cork projects, DIY trivet ideas, How to make a wine cork trivet, Wine cork trivet DIY instructions, Crafty home upgrades, Creative wine cork crafts, there are tons of resources available.
We’d absolutely LOVE to see your creations! Did you go for a square, hexagonal, or a completely unique design? Did you add any special touches like ribbon or paint? Share a photo of your finished wine cork trivet DIY in the comments below, or tag us on social media! Your ingenuity could inspire other DIY enthusiasts. Also, if you have any tips or tricks you discovered along the way, please share those too – we’re all about learning from each other in the DIY community.
Pro Tips & FAQs for Your Wine Cork Trivet DIY
You’ve got the basics down, but here are a few extra nuggets of wisdom and answers to common questions to make your wine cork trivet DIY even better and address any lingering queries.
(Click to Expand Sections)
Q1: How many wine corks do I really need for a standard trivet?
A: This is one of the most common questions for any wine cork trivet DIY instructions. For a typical square trivet of about 6×6 inches or 7×7 inches, you’ll usually need between 30 to 50 corks, assuming they are standard wine cork size (around 0.8 inches in diameter and 1.75 inches tall) and you’re standing them upright.
If you cut the corks in half lengthwise to create a flatter profile (making them about 0.8 inches wide but only half as thick for gluing to a base), you might need more individual pieces for the same surface area, but you’d use fewer whole corks. The best way to know for sure is to lay out your desired pattern before you start gluing. Always collect a few more than you think you’ll need – it’s better to have extras than to run short mid-project!
Q2: Can I use synthetic corks for this wine cork trivet DIY?
A: Yes, you absolutely can use synthetic corks! They glue just as well as natural corks with hot glue or strong craft adhesives. The main difference is aesthetic and sometimes textural. Synthetic corks often have a more uniform look and might be brighter in color. Some people prefer the natural, varied look of real cork, while others like the consistency of synthetic ones.
Functionally, both will protect your surfaces from heat. If you’re planning to cut your corks, natural cork is generally easier to slice cleanly than some denser synthetic varieties. This is a great example of how versatile DIY trivet ideas can be with different materials.
Q3: What’s the best way to clean my finished wine cork trivet?
A: Keeping your crafty home upgrades looking their best is important! For your wine cork trivet, cleaning is simple. Most spills or marks can be wiped off with a damp cloth. If you have a more stubborn food stain, you can use a very mild
soap solution on the cloth, but try to avoid soaking the corks. Never submerge your trivet in water or put it in the dishwasher. Excessive moisture can weaken the glue bonds over time and cause the corks to swell or degrade. Let it air dry completely after wiping. Because cork is naturally antimicrobial and mold-resistant, simple wipe-downs are usually sufficient.
Q4: My trivet is a bit wobbly. How can I fix it after it’s all glued?
A: Don’t worry, this can happen, especially with your first wine cork trivet DIY attempt! If it’s a slight wobble due to one or two corks being slightly shorter, you might be able to fix it by gluing small, thin pieces of felt or extra cork slices to the underside of the shorter corks to level it out. If the wobble is due to a weak glue joint, try to carefully inject a bit more hot glue into the problematic seam.
For a more significant wobble, or if the whole structure feels unstable, you might consider gluing the entire trivet onto a thin, sturdy base like a corkboard sheet or a piece of Masonite cut to size. This provides overall stability. Learning how to make a wine cork trivet often involves a bit of troubleshooting!
Q5: Are there other creative wine cork crafts I can try with my leftover corks?
A: Absolutely! Your [wine cork trivet DIY](https://www.fixdiy.site/upcycling-crafts/) project is just the beginning. Wine corks are incredibly versatile. You can make coasters (like mini trivets!), keychains, place card holders, bulletin boards, bath mats (use a non-slip backing!), and even small sculptures or ornaments.
Many creative wine cork crafts involve similar techniques of gluing and arranging. Search online for “wine cork projects” and you’ll find a treasure trove of ideas. It’s a fantastic way to continue your upcycling journey and add more handmade charm to your home. This very website where you found this guide, FixDIY.site, is dedicated to [wine cork trivet DIY](https://www.fixdiy.site/upcycling-crafts/) and other upcycling adventures!
We hope these tips and FAQs help you on your wine cork trivet DIY adventure! Crafting should be enjoyable, and a little extra knowledge can make the process smoother and the results even more impressive.
Now, go forth and create! We can’t wait to see what you make. Don’t forget to share your experiences and photos in the comments below. If you found this guide helpful, please consider sharing it with your fellow DIY-loving friends or subscribing to our newsletter for more crafty projects, home improvement tips, and upcycling inspiration. Happy crafting!

